
etch
Eine vereinfachte, deklarative Möglichkeit, CustomPaint in Flutter zu verwenden
- Sterne
- 58
- Forks
- 0
- Letzter Push (UTC)
- 23.04.2022
- Projektstatus
- Aktiv
Original-README
Englischer Projektschnappschuss. Aktuelle Inhalte auf GitHub.
✍️ Etch
A Simplified, Declarative Implementation Of CustomPaint For Flutter
Features
- Create your CustomPaint widget declaratively.
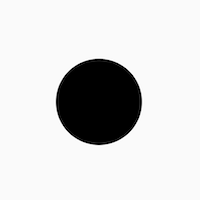
    EtchCanvas(
        etchElements: [
            EtchCircle.alignment(
                centerAlignment: Offset.zero,
                radius: 50.0,
            ),
        ],
        child: SizedBox(
          width: 100.0,
          height: 100.0,
        ),
    ),
- Use either points or alignments to define points everywhere
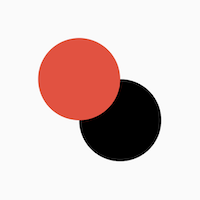
    EtchCanvas(
        etchElements: [
            EtchCircle(
              center: Offset(100, 100),
              radius: 50.0,
            ),
            EtchCircle.alignment(
               centerAlignment: Offset.zero,
               radius: 50.0,
               etchStyle: EtchStyle(
                   color: Colors.red,
               ),
           ),
        ],
        child: SizedBox(
          width: 100.0,
          height: 100.0,
        ),
    ),
- Easy support for Paths
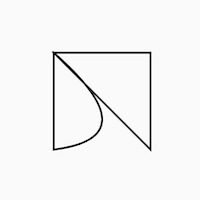
    EtchCanvas(
      etchElements: [
        EtchPath(
          etchPathElements: [
            EtchPathMoveTo(point: Offset(0, 0)),
            EtchPathAddPolygon.alignment(
              pointAlignments: [
                Offset(-1, -1),
                Offset(1, -1),
                Offset(1, 1),
              ],
            ),
            EtchPathQuadraticBezierTo.alignment(
              controlPointAlignment: Offset(1, 0.75),
              endPointAlignment: Offset(-1, 1),
            ),
            EtchPathClose(),
          ],
        ),
      ],
      child: SizedBox(
        width: 100.0,
        height: 100.0,
      ),
    ),
- Work with canvas layers easily
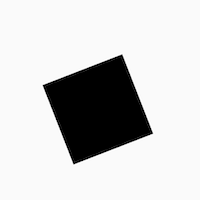
    EtchCanvas(
      etchElements: [
        EtchLayer.rotate(
          rotateZ: 1.2,
          etchElements: [
            EtchRect.alignment(
              topLeftAlignment: Offset(-1, -1),
              bottomRightAlignment: Offset(1, 1),
            ),
          ],
        ),
      ],
      child: SizedBox(
        width: 100.0,
        height: 100.0,
      ),
    ),
- Easy animations with
TweenAnimationBuilder
Add animations easily using TweenAnimationBuilder or using normal animation controllers without
having to pass down progress or other logic.
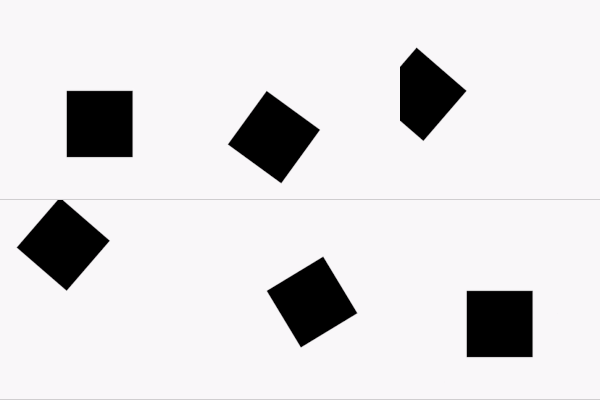
    TweenAnimationBuilder<double>(
      duration: const Duration(seconds: 1),
      tween: Tween(begin: 0, end: 2 * pi),
      builder: (context, val, _) {
        return EtchCanvas(
          etchElements: [
            EtchLayer.rotate(
              rotateZ: val,
              etchElements: [
                EtchRect.alignment(
                  topLeftAlignment: Offset(-1, -1),
                  bottomRightAlignment: Offset(1, 1),
                ),
              ],
            ),
          ],
          child: const SizedBox(
            width: 100.0,
            height: 100.0,
          ),
        );
      }
    ),
Getting started
- To get started, add an
EtchCanvasto your app:
    EtchCanvas(
        etchElements: [],
    ),
Any elements which have the format 'Etch----' can fit into these (EtchParagraph, EtchPath, EtchCircle, etc).
The default constructor arguments usually take in points while the .alignment constructor takes in
alignments. For alignments (-1, -1) is the top left while (1, 1) is the bottom right.
    EtchCanvas(
        etchElements: [
            EtchRect.alignment(
              topLeftAlignment: Offset.zero,
              bottomRightAlignment: Offset(1, 1),
            ),
            EtchOval.alignment(
              topLeftAlignment: Offset(-1, -1),
              bottomRightAlignment: Offset(0, 0),
            ),
            EtchArc.alignment(
              topLeftAlignment: Offset(-1, -1),
              bottomRightAlignment: Offset(1, 1),
              startAngle: 0,
              sweepAngle: 2,
            ),
        ],
    ),
- Use
EtchStyleto modify paint properties.
    EtchPath(
      etchPathElements: [
        //...
      ],
      etchStyle: EtchStyle(
        style: PaintingStyle.stroke,
      ),
    ),
You can also supply your own Paint object using EtchStyle.raw().
    EtchPath(
      etchPathElements: [
        //...
      ],
      etchStyle: EtchStyle.raw(
        Paint()..color = Colors.black..// add your props,
      ),
    ),
- To add a path to the elements, use
EtchPath. Etch path elements have the naming formatEtchPath---(EtchPathAddPolygon,EtchPathAddArc,EtchPathCubicTo, etc)
    EtchCanvas(
        etchElements: [
             EtchPath(
                 etchPathElements: [
                     EtchPathMoveTo(point: Offset(0, 0)),
                     EtchPathLine(point: Offset(110, 0)),
                     EtchPathLine(point: Offset(110, 110)),
                     EtchPathClose(),
                 ],
                 etchStyle: EtchStyle(
                     style: PaintingStyle.stroke,
                 ),
             ),
        ],
    ),
- To add a layer, use the
EtchLayerelement. This can have numerous EtchElements inside just like the normalEtchCanvas. Layers can have individual transformations without affecting the rest of the canvas - so you can rotate or scale one layer without affecting the others.EtchLayer, like theTransformwidget, has multiple inbuilt transformations - but you can pass in your ownMatrix4using the default constructor.
    EtchCanvas(
        etchElements: [
            EtchLayer.rotate(
              rotateX: 1.2,
              etchElements: [
                EtchRect.alignment(
                  topLeftAlignment: Offset(-1, -1),
                  bottomRightAlignment: Offset(1, 1),
                ),
              ],
            ),
            EtchLayer.scale(
              scale: Offset(1, 2),
              etchElements: [
                EtchRect.alignment(
                  topLeftAlignment: Offset(-1, -1),
                  bottomRightAlignment: Offset(1, 1),
                ),
              ],
            ),
            EtchLayer(
              transform: Matrix4.identity(),
              etchElements: [
                EtchRect.alignment(
                  topLeftAlignment: Offset(-1, -1),
                  bottomRightAlignment: Offset(1, 1),
                ),
              ],
            ),
        ],
    ),
Additional information
Note: This package is currently in an experimental stage and full metrics are not yet ascertained. Please feel free to launch issues or PRs if you face something unexpected while using it.

Deven Joshi ↗
Kategorien
Verwendete Abhängigkeiten
Abhängigkeiten 3 Einträge
- flutter
{"sdk":"flutter"} - flutter_testEntwicklung
{"sdk":"flutter"} - flutter_lintsEntwicklung
^1.0.4
Wie wähle ich ein passendes Repository?
Nach Anwendungsfall filtern, Aktivität vergleichen und vor der Nutzung das Originalprojekt prüfen.
- Nach Name, Autor oder Beschreibung suchen und nach Thema eingrenzen.
- Sterne, Forks und letzte Pushes vergleichen. Sterne zeigen Interesse, garantieren aber keine Qualität.
- Vor der Nutzung README, Lizenz und Issues auf GitHub prüfen.
Quellen und Pflege
“A repository is the most basic element of GitHub.”
GitHub Docs — About repositories ↗
- d3xvn/etch · GitHub ↗
- GitHub Docs — Saving repositories with stars ↗
- Verzeichnis gepflegt von Ducafecat ↗