
 v0.0.5
shaky_animated_listview
列出动画以跟踪屏幕上的滚动变化,或在列表首次出现时对列表项进行动画处理,使用不同的过渡规则。
73喜欢 51近 30 天下载140Pub 分数
AndroidiOSWebmacOSWindowsLinux
列出动画以跟踪屏幕上的滚动变化,或在列表首次出现时对列表项进行动画处理,使用不同的过渡规则。

{"sdk":"flutter"}{"sdk":"flutter"}^1.0.4以下为英文项目原文快照,最新内容请访问 GitHub。
Shaky_animated_list can be used for three main things:
All these animations track your scroll changes on screen or your list first attachment to animated your list items with different transition rules.
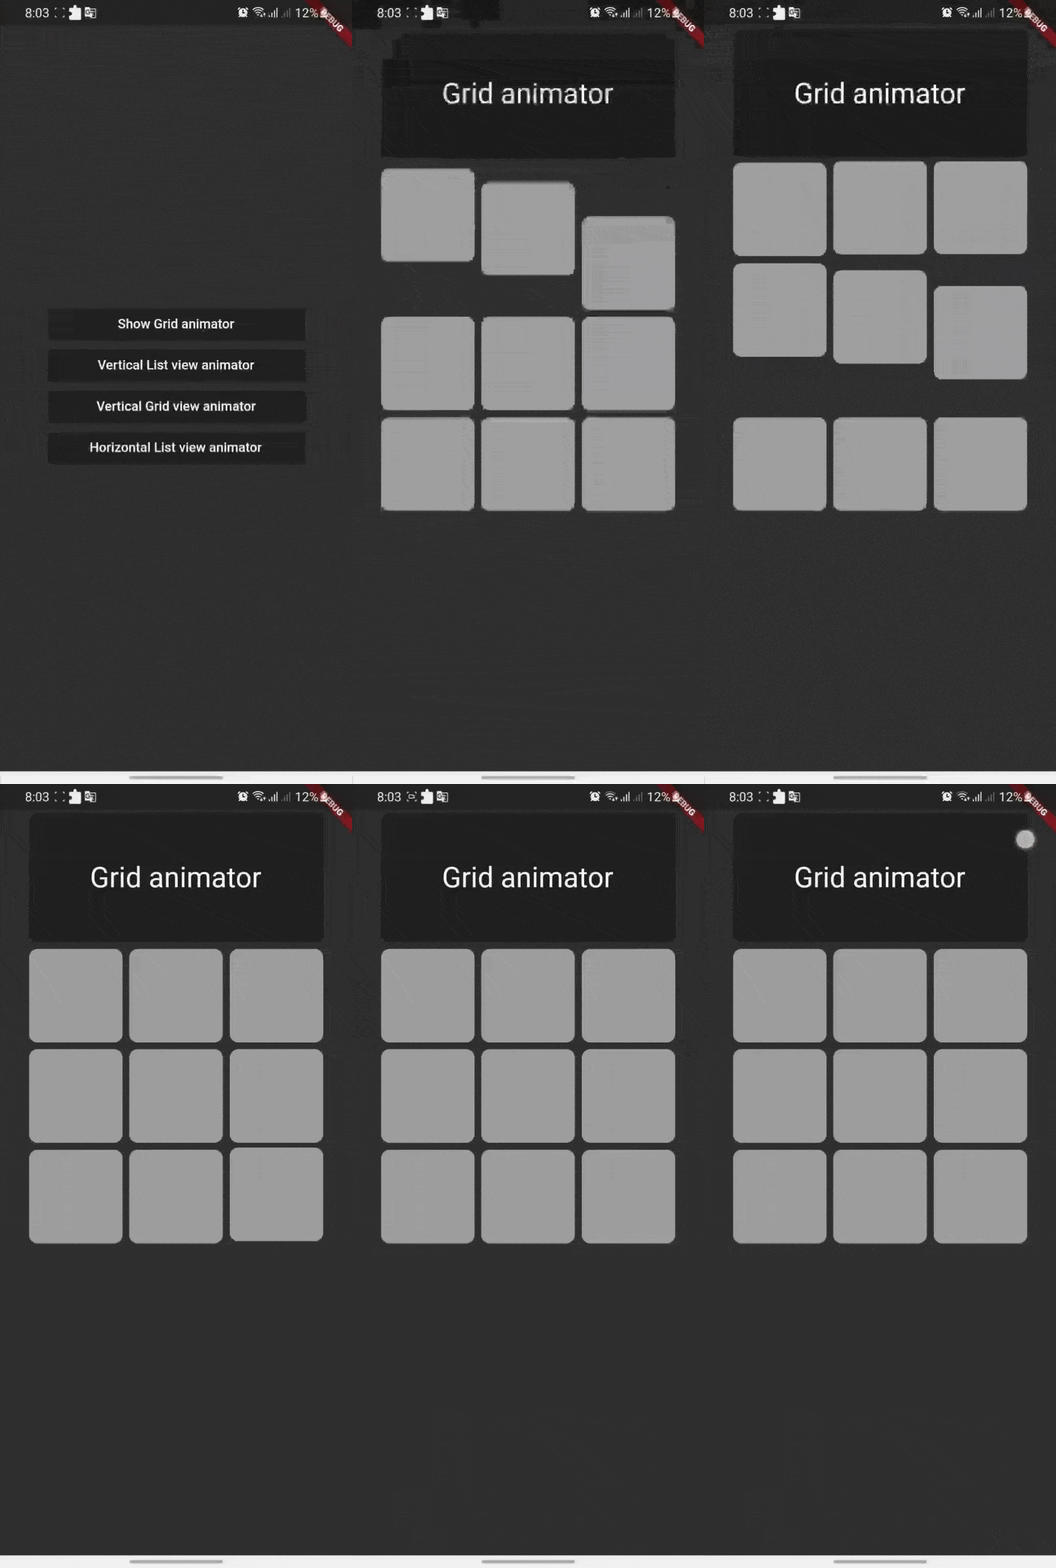
| Shaking Grid | Scroll list | Scroll Grid |
|---|---|---|
| shaking_grid | scroll_list | scroll_grid |
You can define these animation directions Axis by channing your list ScrollDirection.
Shaking grid can be simply implemented by wrapping your grid child by GridAnimatorWidget and that's it we will take it from here ^^
for example you can simply do this to show shaking grey color cards
    GridView.count(
    crossAxisCount: 3,
    // shrinkWrap: true,
    children: List.generate(9, (i) => GridAnimatorWidget(
        child: Padding(
        padding: const EdgeInsets.all(4),
            child: ClipRRect(
            borderRadius: const BorderRadius.all(Radius.circular(10)),
                child: Container(
                color: Colors.grey,
                ),
        ),
    ),
    ),).toList()
    )
shaking_grid
ListView Scroll animations will enable your to implement the scroll animations with full control on animations space and duration please don't add vertical margins to your elements, you can use the spaceBetween to give a space between elements and extendedSpaceBetween to control the scroll animations space.
Also you can use duration to control the reverse animations duration based on your needs
for example you can simply do this to show ListView vertical Scroll animations
    AnimatedListView(
    duration: 100,
    extendedSpaceBetween: 30,
    spaceBetween:10,
    children: List.generate(
    21,
    (index) => Card(
    elevation: 50,
    margin: const EdgeInsets.symmetric(horizontal: 20),
    shadowColor: Colors.black,
    color: Colors.grey,
        child: SizedBox(
        height: 300,
            child: Padding(
            padding: const EdgeInsets.all(20.0),
            child: Column(
                children: [
                    CircleAvatar(
                    backgroundColor: Colors.blue[500],
                    radius: 60,
                    child: const CircleAvatar(
                        backgroundImage: NetworkImage(
                        "https://avatars.githubusercontent.com/u/30810111?v=4"),
                        //NetworkImage
                        radius: 50,
                        ),
                    ),
                    const SizedBox(
                    height: 10,
                    ),
                    Text(
                    'Scroll to start',
                        style: TextStyle(
                        fontSize: 30,
                        color: Colors.blue[900],
                        fontWeight: FontWeight.w500,
                        ),
                    ),
                    const SizedBox(
                    height: 10,
                    ),
                    const Text(
                    'Animated list demo',
                        style: TextStyle(
                        fontSize: 15,
                        color: Colors.white,
                        ),
                    ),
                    const SizedBox(
                    height: 10,
                    ),
                ],
            ),
            ),
        ),
    )
))
scroll_list
Grid Scroll animations will enable your to implement the scroll animations on a grid view, one little change here is that we will implement the delegate, this is a design issue that we run into so you will have to
to specify your crossAxisCount, crossAxisSpacing, mainAxisSpacing, and duration and we will take it from here,you can use any other default supported parameters in GridView.
for example you can simply do this to show Grid vertical Scroll animations
    AnimatedGridView(
          duration: 100,
          crossAxisCount: 2,
          mainAxisExtent: 256,
          crossAxisSpacing: 8,
          mainAxisSpacing: 8,
          children: List.generate(
              21,
              (index) => Card(
                    elevation: 50,
                    shadowColor: Colors.black,
                    color: Colors.grey[700],
                    child: SizedBox(
                      width: double.infinity,
                      child: Padding(
                        padding: const EdgeInsets.all(20.0),
                        child: Column(
                          children: const [
                            CircleAvatar(
                              backgroundColor: Colors.black,
                              radius: 60,
                              child: CircleAvatar(
                                backgroundImage: NetworkImage(
                                    "https://avatars.githubusercontent.com/u/30810111?v=4"),
                                //NetworkImage
                                radius: 50,
                              ),
                            ),
                          ],
                        ),
                      ),
                    ),
                  )
             )
       ),
scroll_grid
if you want to add a horizontal animations, all what you have to do is to add a scroll direction to the widget and that's it for example you can simply do this to show ListView horizontal Scroll animations
  AnimatedListView(
        duration: 100,
        scrollDirection: Axis.horizontal,
        children: List.generate(
        21,
            (index) => const Card(
            elevation: 50,
            margin: EdgeInsets.symmetric(horizontal: 10),
            shadowColor: Colors.black,
            color: Colors.grey,
                child: SizedBox(
                height: 300,
                width: 200,
                ),
            ),
        ),
  ),
horz_list
Let's develop with collaborations. We would love to have contributions by raising issues and opening PRs. Filing an issue before PR is must.
Project is published under the Apache 2.0 license. Feel free to clone and modify repo as you want, but don't forget to add reference to authors :)