
flutter_overlay_manager
nghinguyengr/flutter_overlay_manager open-source repository details.

- 星标
- 2
- 复刻
- 1
- 最近推送(UTC)
- 2024年12月16日
- 项目状态
- 未归档
原始 README
以下为英文项目原文快照,最新内容请访问 GitHub。
A Flutter package for managing overlays. It separates your main UI and the overlays by moving the main UI, including navigation, to another layer. We can add any other layers without affecting the main UI.
It also solves some problems encountered when using Navigator.
Using showDialog<T> in Flutter introduces several challenges:
-
Route Management and Lifecycle Events:
- Showing a dialog with
showDialog<T>creates a new route, causing the current page route to go to the background. This can interfere with lifecycle event handling, especially when the app relies onModalRoute.of(context).isCurrentto determine the active route.
- Showing a dialog with
-
Asynchronous Nature and Synchronization:
showDialog<T>is asynchronous, making it difficult to detect when a dialog is actually displayed. This complicates synchronization, particularly when multiple dialogs need to be managed rapidly in succession.
-
Navigator Confusion:
- Dialogs and app pages share the same navigator and cannot be individually named. Using
Navigator.of(context).pop()to close a dialog or a page can lead to confusion, as the behavior depends on the current navigator context.
- Dialogs and app pages share the same navigator and cannot be individually named. Using
Feature
-
Built-in the loading overlay entry, see Show a Loading Indicator
-
Sort entries by z-index.
-
Only overlay entry is shown if there're same ID.
Installation
Add the following to your pubspec.yaml file:
dependencies:
  flutter_overlay_manager: ^<latest_version>
Initialization
To use the overlay manager, initialize it as a singleton:
FlutterOverlayManager overlayManager = FlutterOverlayManager.I;
Alternatively, you can create a new instance:
FlutterOverlayManager overlayManager = FlutterOverlayManager.asNewInstance();
When integrating this in a Flutter app, you would typically call this method in the MaterialApp builder:
MaterialApp(
  builder: (context, child) {
        return FlutterOverlayManager.I.builder((context) => child!);
  },  // Wraps the app to manage overlays
  home: YourHomePage(),
);
Display a Custom Overlay
You can display any widget as an overlay:
overlayManager.show(
  (context) => YourCustomWidget(),
  id:'your_overlay_entry_id',
  zindex: 1, // Where your overlay entry should be.
  backgroundColor: Colors.black54,
  dismissible: true,
);
Show a Loading Indicator
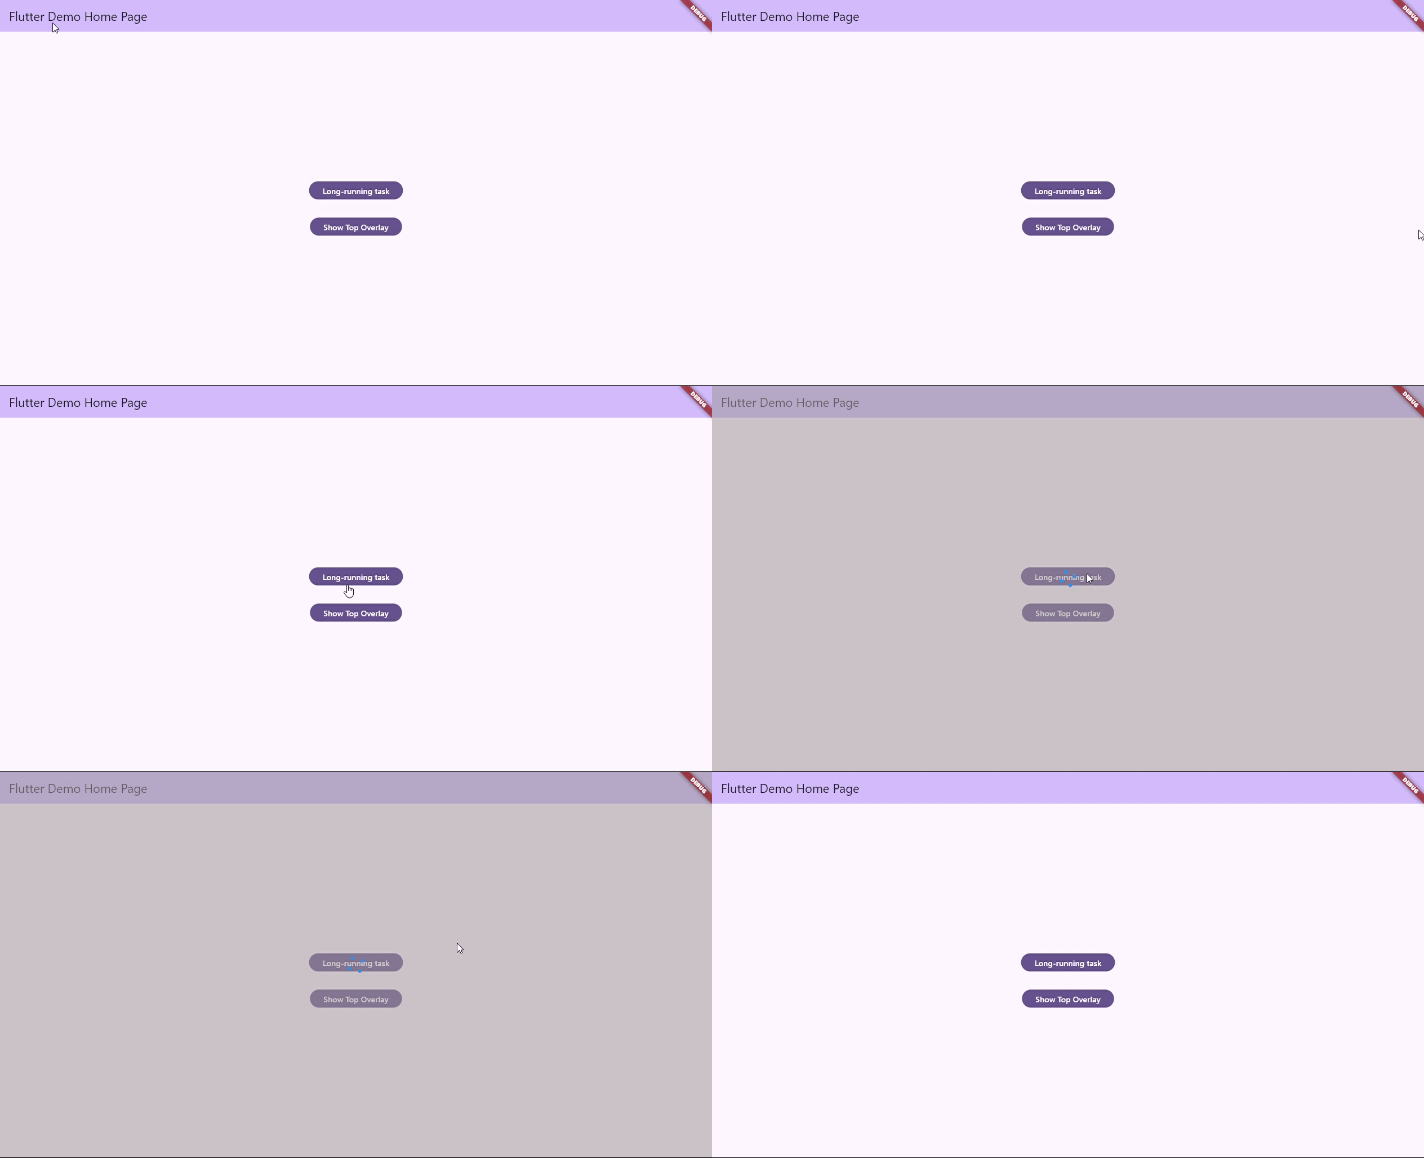
There is a built-in loading overlay, you can use it to prevent the user from interacting with UI when calling API or long-running async task.
The manager ensures that only one loading overlay is dislayed when you call showLoading() anywhere and anytime:
OverlayEntryControl control = await overlayManager.showLoading();
You can also customize your loading:
final control = await FlutterOverlayManager.I
      .showLoading(builder: (context) => CircularProgressIndicator());
To hide the loading, call:
control.dismiss();
Or if you don't have a control reference, use:
overlayManager.hide(loadingId);
Set position for the Overlay
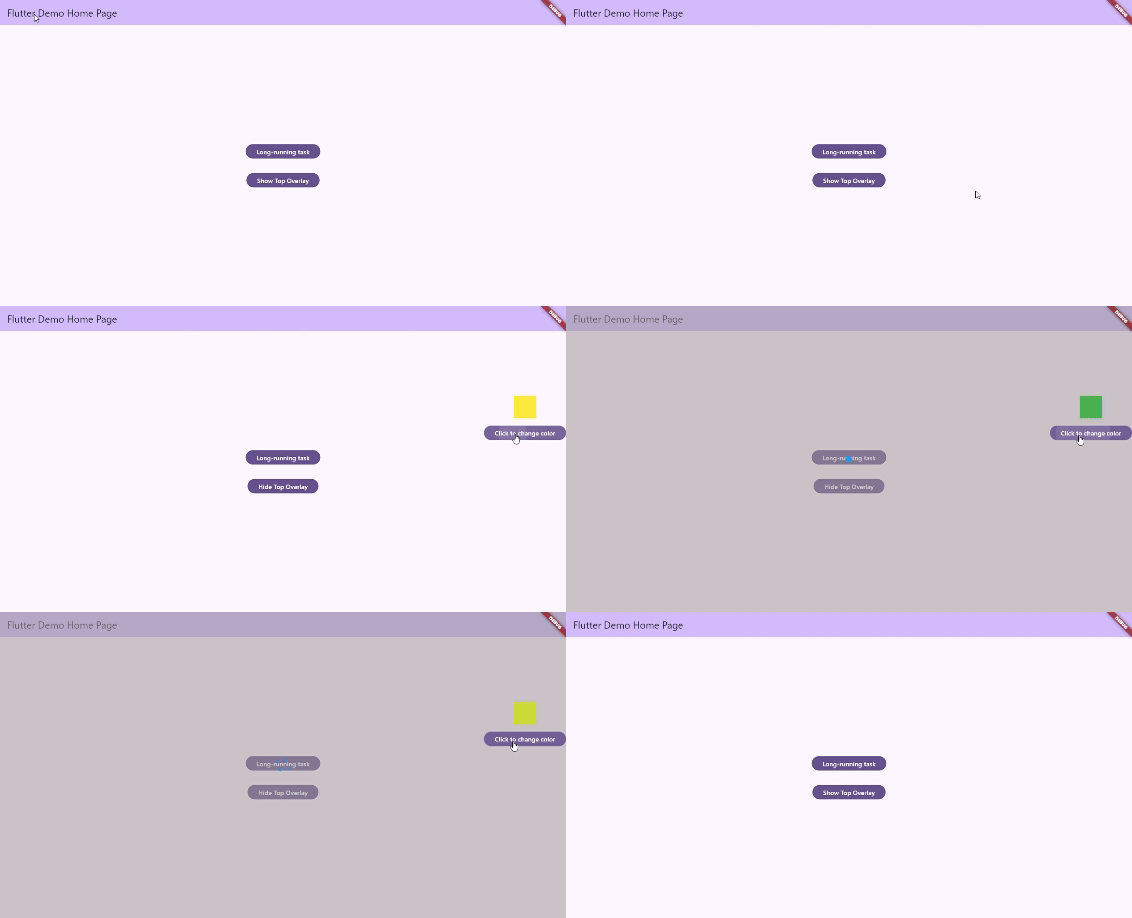
The sorting is based on the z-index of each entry. That index is obtained when calling show() function.
Here is an example for another overlay above the loading overlay:
- The
z-indexof the loading is 0. - The
z-indexof the customized overlay is 1.
Hiding an Overlay
To hide a specific overlay by its ID:
overlayManager.hide('your_overlay_id');
Or if you have a control reference, use:
control.dismiss();
Example
import 'dart:math';

import 'package:flutter/material.dart';
import 'package:flutter_overlay_manager/flutter_overlay_manager.dart';


void main() {
  FlutterOverlayManager.I.setLoadingZIndex(0);
  runApp(const MyApp());
}

class MyApp extends StatelessWidget {
  const MyApp({super.key});

  // This widget is the root of your application.
  @override
  Widget build(BuildContext context) {
    return MaterialApp(
      title: 'Flutter Demo',
      builder: (context, child) {
        return FlutterOverlayManager.I.builder((context) => child!);
      },
      theme: ThemeData(
        colorScheme: ColorScheme.fromSeed(seedColor: Colors.deepPurple),
        useMaterial3: true,
      ),
      home: const MyHomePage(title: 'Flutter Demo Home Page'),
    );
  }
}

class MyHomePage extends StatefulWidget {
  const MyHomePage({super.key, required this.title});

  final String title;

  @override
  State<MyHomePage> createState() => _MyHomePageState();
}

class _MyHomePageState extends State<MyHomePage> {
  @override
  Widget build(BuildContext context) {
    return Scaffold(
      appBar: AppBar(
        backgroundColor: Theme.of(context).colorScheme.inversePrimary,
        title: Text(widget.title),
      ),
      body: Center(
        child: Column(
          mainAxisAlignment: MainAxisAlignment.center,
          children: <Widget>[
            FilledButton(
              onPressed: () async {
                final loader = await FlutterOverlayManager.I.showLoading();
                await Future.delayed(Duration(seconds: 5));
                await loader.dismiss();
              },
              child: Text("Long-running task"),
            ),
            const SizedBox(height: 32),
            FilledButton(
              onPressed: () {
                if (FlutterOverlayManager.I
                    .isOverlayShowing("_TOP_OVERLAY_ID")) {
                  FlutterOverlayManager.I.hide("_TOP_OVERLAY_ID");
                } else {
                  FlutterOverlayManager.I.show(
                    (context) => const Positioned(
                      top: 200,
                      right: 0,
                      child: TopOverlayView(),
                    ),
                    zindex: 1, // The overlay loading will be below the overlay
                    id: "_TOP_OVERLAY_ID",
                  );
                }
                setState(() {});
              },
              child: Text(
                  FlutterOverlayManager.I.isOverlayShowing("_TOP_OVERLAY_ID")
                      ? "Hide Top Overlay"
                      : "Show Top Overlay"),
            ),
          ],
        ),
      ),
    );
  }
}

class TopOverlayView extends StatefulWidget {
  const TopOverlayView({super.key});

  @override
  State<TopOverlayView> createState() => _TopOverlayViewState();
}

class _TopOverlayViewState extends State<TopOverlayView> {
  var _color = Colors.yellow;
  void _randomColor() {
    final random = Random();
    _color = Colors.primaries[random.nextInt(Colors.primaries.length)];

    setState(() {});
  }

  @override
  Widget build(BuildContext context) {
    return Column(
      mainAxisSize: MainAxisSize.min,
      children: [
        Container(
          color: _color,
          width: 50,
          height: 50,
        ),
        const SizedBox(height: 16),
        FilledButton(
          onPressed: () {
            _randomColor();
          },
          child: Text("Click to change color"),
        ),
      ],
    );
  }
}
Contributions
Pull requests are welcome!
Check out CONTRIBUTING.md, which contains a guide for those who want to contribute to the Flutter Overlay Manager.
Reporting bugs and issues are contribution too, yes it is.

nghinguyen.gr ↗
使用的依赖
依赖清单 5 项
- collection
^1.17.2 - flutter
{"sdk":"flutter"} - uuid
^4.0.0 - flutter_test开发依赖
{"sdk":"flutter"} - flutter_lints开发依赖
^3.0.0
如何选择适合项目的代码仓?
先按使用场景筛选,再比较项目活跃情况,最后到原始仓库核对使用要求。
- 通过仓库名、作者或描述搜索,再按技术分类缩小范围。
- 结合星标、复刻与最近推送比较项目;星标反映社区关注,不代表质量保证。
- 使用前在 GitHub 核对 README、许可证与 Issues。
来源与维护
“A repository is the most basic element of GitHub.”
GitHub Docs — About repositories ↗