
活力檢測
一個單一函數套件,用於檢測攝影機中可見的臉部是活體臉部還是非活體臉部。
- 星標
- 10
- 分支
- 24
- 最近推送(UTC)
- 2026年7月16日
- 專案狀態
- 未封存
原始 README
以下為英文專案原文快照,最新內容請造訪 GitHub。
livelyness_detection










Index
What is the Livelyness Detection?
Liveness detection for face recognition in biometrics is a technique where an algorithm detects if the person in front of the camera is alive and real. The algorithm is able to recognize a live person from presentation attacks - where a bad actor, or fraud perpetrator, uses someone else's physical characteristics or biometric data (known as "spoofs") for impersonation.
Spoofing attempts using printed photos, recordings, deep fake pictures, and 3D masks poses a serious threat. Facial Liveness Detection incorporates specialized features to identify biometric spoofing attacks, which could be an imitation emulating a person’s unique biometrics scanned through the biometric detector to deceive or bypass the identification and authentication steps provided by the system. Even though face recognition can reliably answer the question, “Is this the right person?” but not the question, “Is this a live person?” This is where liveness detection technology plays a significant role in fraud detection and mitigation. Face biometric matching must be able to detect spoofs in order to be trusted, and to maintain the integrity of biometric data.
Platform Support
| iOS | Android | MacOS | Web | Linux | Windows |
|---|---|---|---|---|---|
| ✔️ | ✔️ |
Installation
First, we have to install the package on flutter.
Flutter Setup
Add livelyness_detection to your pubspec.yaml dependencies.
Using command-line
flutter pub add livelyness_detection
Native Setup
Next comes the native setup on both android and iOS
iOS
iOS Setup
- Open the project in Xcode and set the deployment
- Open the
ios/Runner/Info.plistfile asSource Code. - Add the below-mentioned code inside the
<dict>tag.
  <key>NSCameraUsageDescription</key>
  <string>Camera Access for Scanning</string>
  <key>NSMicrophoneUsageDescription</key>
  <string>Microphone for playing instructions audio.</string>
- Open the
ios/Runner/Podfileand uncomment the second line.
platform :ios, '14.0' # <---------- Uncomment this line
- Set the deployment target in the Xcode project
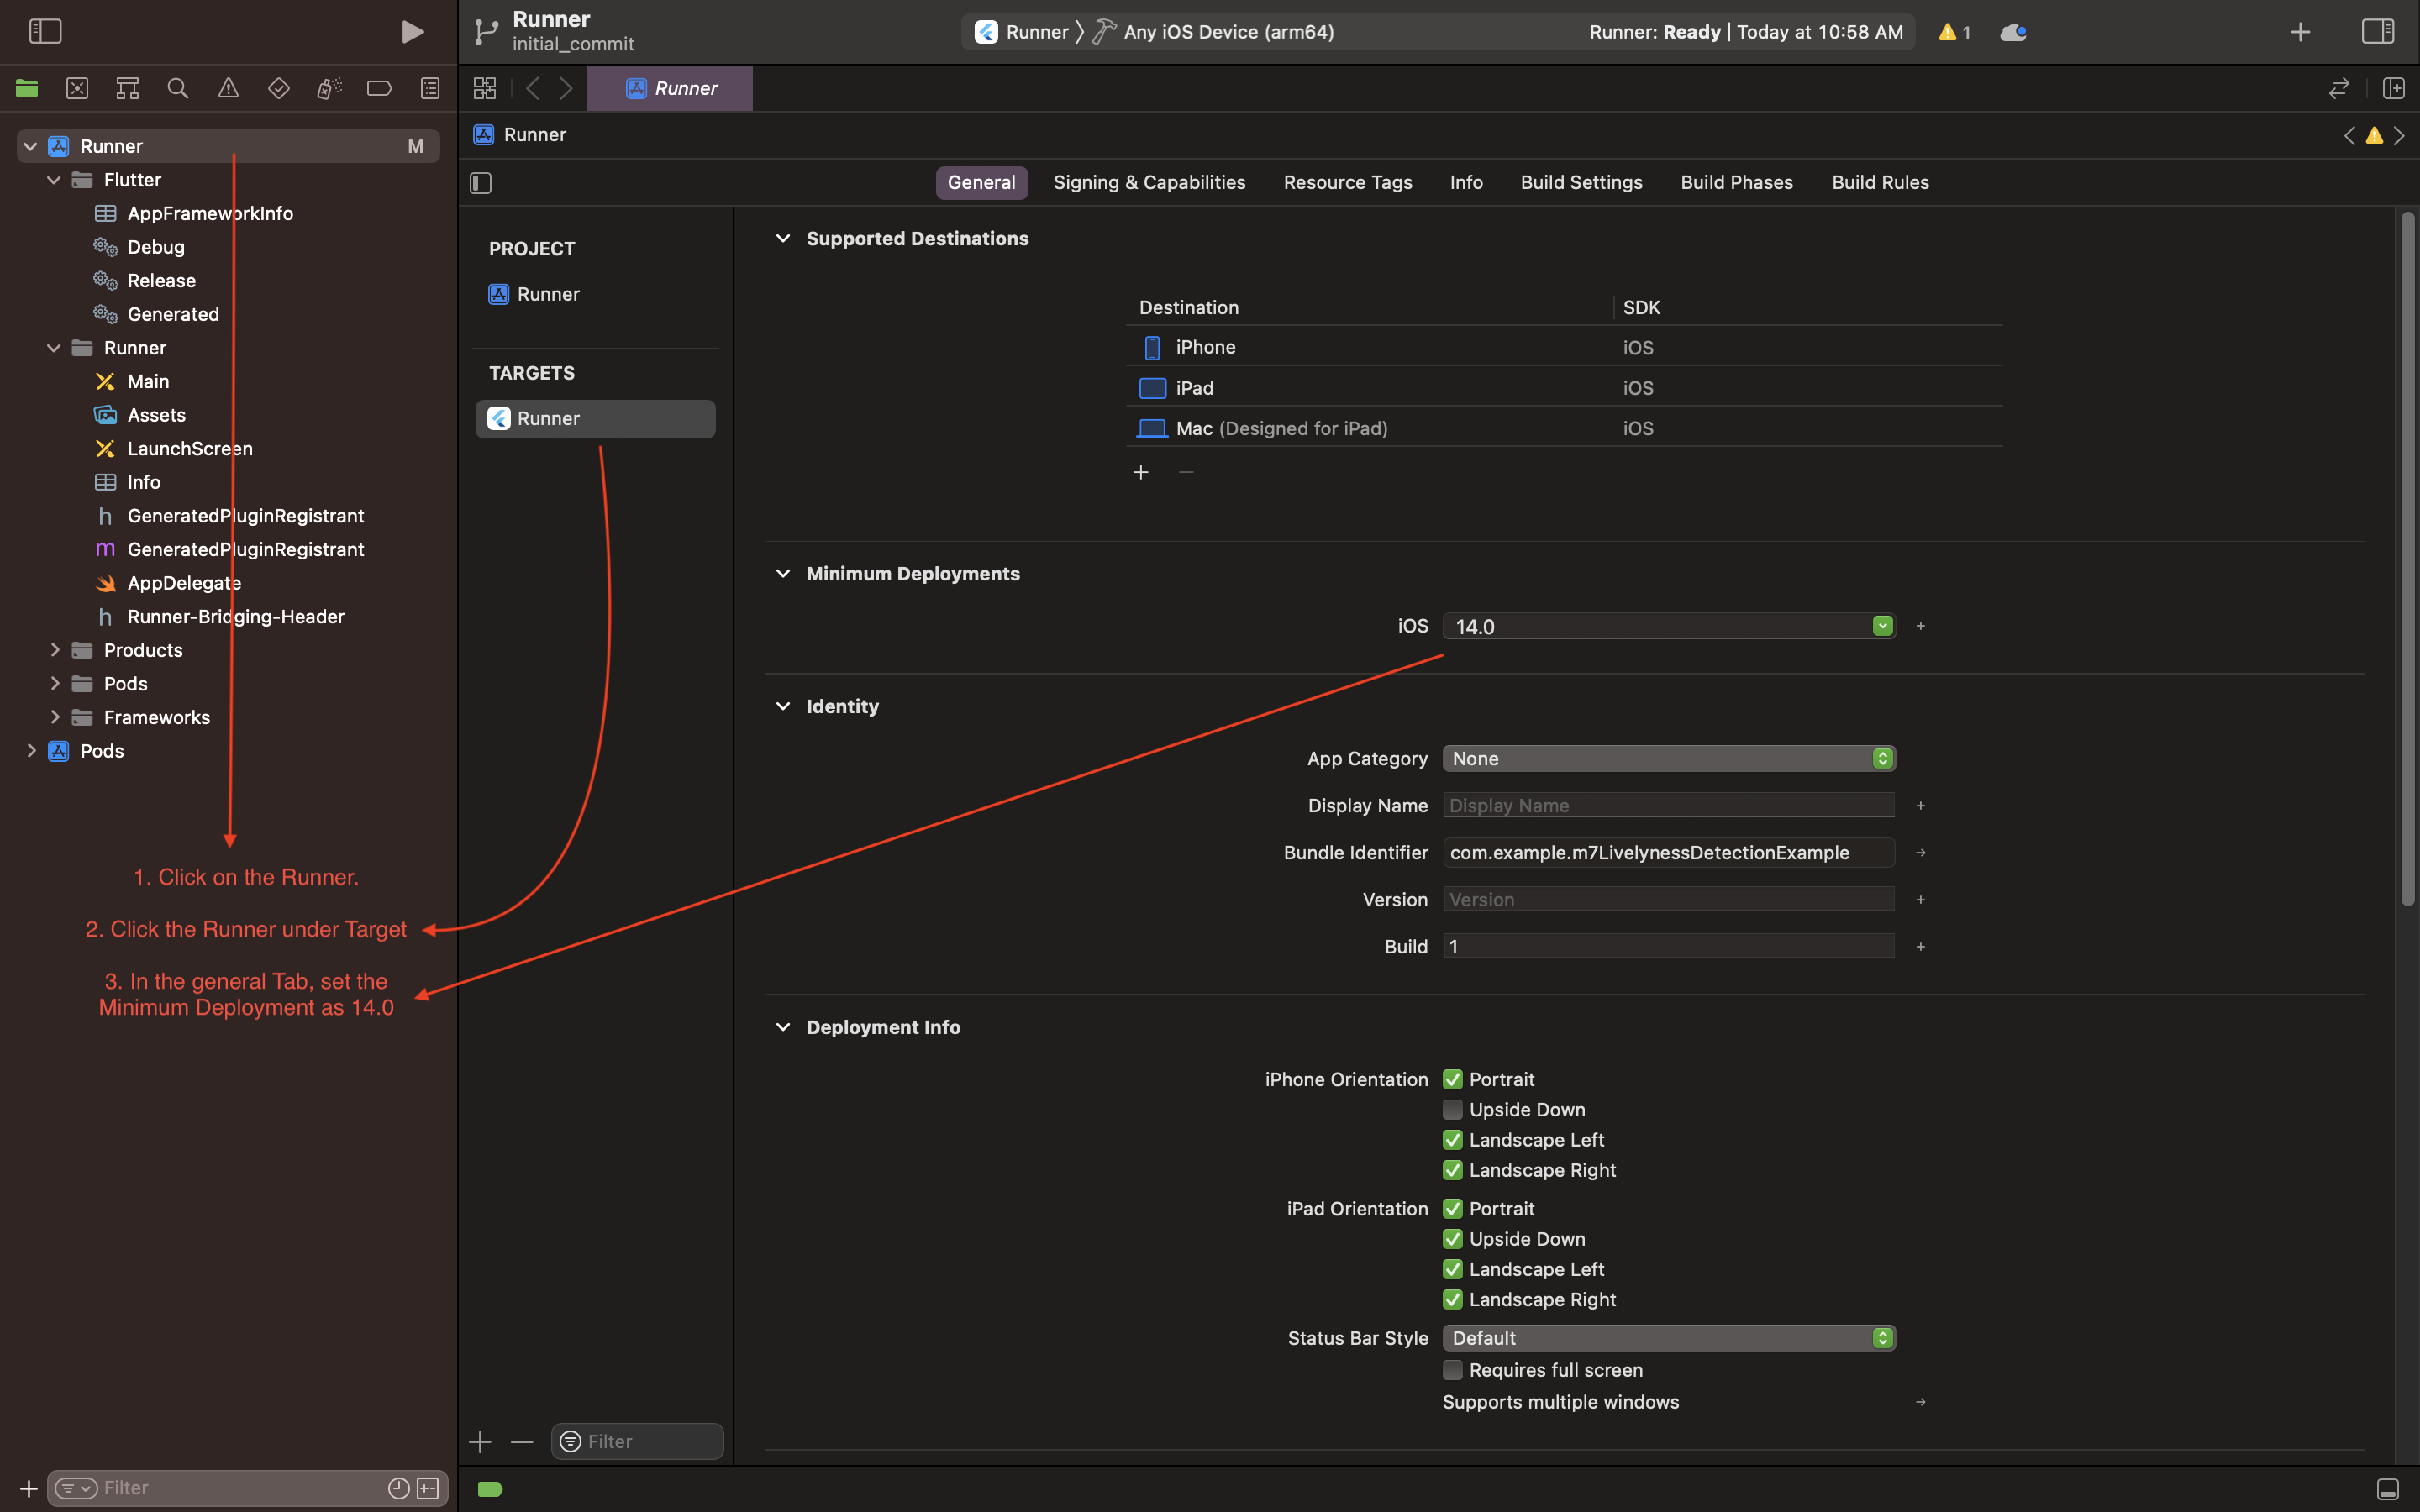
Android
Android Setup
- Open the
example/android/app/build.gradlefile and set theminSdkVersionas21.
Example
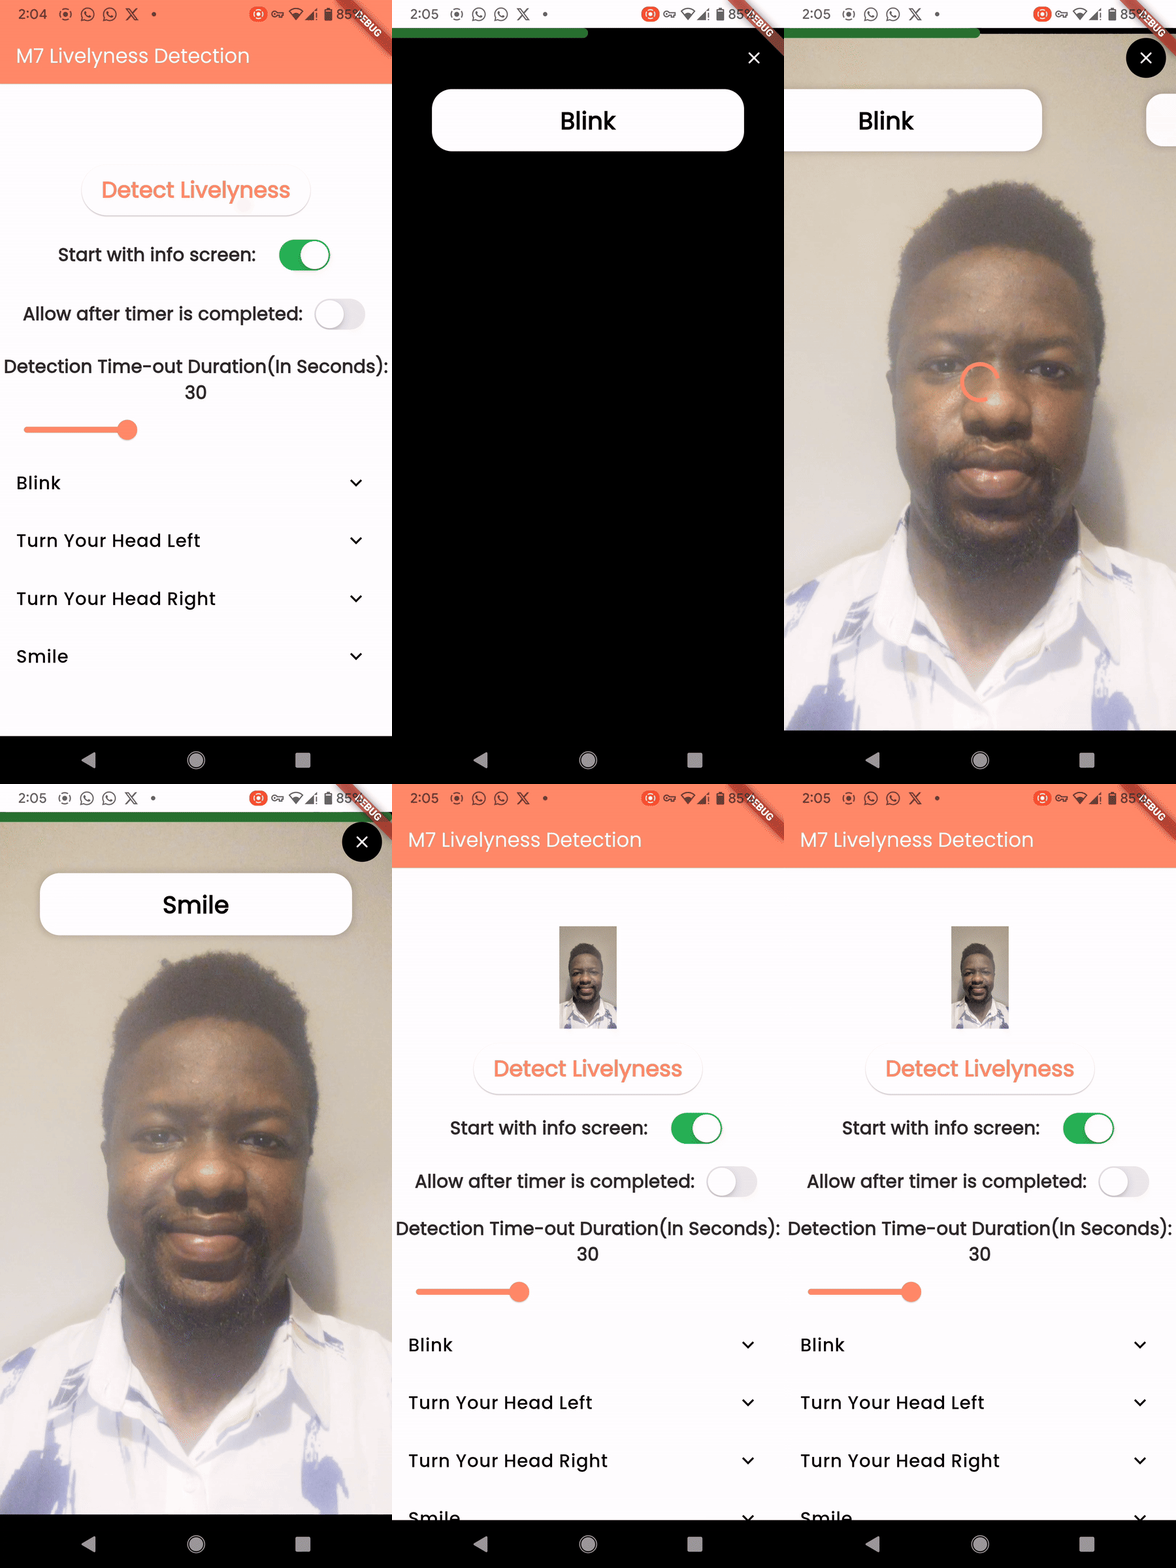
A call to a single line function will return a temporary path to the captured image.
Code
    final String? response =
        await LivelynessDetection.instance.detectLivelyness(
      context,
      config: DetectionConfig(
        steps: [
          LivelynessStepItem(
            step: LivelynessStep.blink,
            title: "Blink",
            isCompleted: false,
          ),
          LivelynessStepItem(
            step: LivelynessStep.smile,
            title: "Smile",
            isCompleted: false,
          ),
        ],
        startWithInfoScreen: true,
      ),
    );
Example Video-Andriod , iOS
Contributors

Kryonex Labs ↗
使用的依賴
依賴清單 15 項
- animate_do
^3.3.4 - camera
^0.11.0+1 - camerawesome
^2.1.0 - collection
^1.17.0 - equatable
^2.0.5 - flutter
{"sdk":"flutter"} - google_mlkit_face_detection
^0.11.0 - image
^4.0.15 - lottie
^3.1.2 - path_provider
^2.0.14 - plugin_platform_interface
^2.1.3 - rxdart
^0.28.0 - uuid
^4.4.2 - flutter_lints開發依賴
^4.0.0 - flutter_test開發依賴
{"sdk":"flutter"}
如何選擇適合專案的儲存庫?
先依使用情境篩選,再比較專案活躍情況,最後到原始儲存庫確認使用要求。
- 透過儲存庫名稱、作者或描述搜尋,再依技術分類縮小範圍。
- 綜合星標、分支與最近推送比較專案;星標反映社群關注,不保證品質。
- 使用前在 GitHub 確認 README、授權條款與 Issues。
來源與維護
“A repository is the most basic element of GitHub.”
GitHub Docs — About repositories ↗