
Lebendigkeitserkennung
Ein einzelnes Funktionspaket zur Erkennung, ob das im Kamerafeld sichtbare Gesicht ein echtes Gesicht ist oder nicht.
- Sterne
- 10
- Forks
- 24
- Letzter Push (UTC)
- 16.07.2026
- Projektstatus
- Aktiv
Original-README
Englischer Projektschnappschuss. Aktuelle Inhalte auf GitHub.
livelyness_detection










Index
What is the Livelyness Detection?
Liveness detection for face recognition in biometrics is a technique where an algorithm detects if the person in front of the camera is alive and real. The algorithm is able to recognize a live person from presentation attacks - where a bad actor, or fraud perpetrator, uses someone else's physical characteristics or biometric data (known as "spoofs") for impersonation.
Spoofing attempts using printed photos, recordings, deep fake pictures, and 3D masks poses a serious threat. Facial Liveness Detection incorporates specialized features to identify biometric spoofing attacks, which could be an imitation emulating a person’s unique biometrics scanned through the biometric detector to deceive or bypass the identification and authentication steps provided by the system. Even though face recognition can reliably answer the question, “Is this the right person?” but not the question, “Is this a live person?” This is where liveness detection technology plays a significant role in fraud detection and mitigation. Face biometric matching must be able to detect spoofs in order to be trusted, and to maintain the integrity of biometric data.
Platform Support
| iOS | Android | MacOS | Web | Linux | Windows |
|---|---|---|---|---|---|
| ✔️ | ✔️ |
Installation
First, we have to install the package on flutter.
Flutter Setup
Add livelyness_detection to your pubspec.yaml dependencies.
Using command-line
flutter pub add livelyness_detection
Native Setup
Next comes the native setup on both android and iOS
iOS
iOS Setup
- Open the project in Xcode and set the deployment
- Open the
ios/Runner/Info.plistfile asSource Code. - Add the below-mentioned code inside the
<dict>tag.
  <key>NSCameraUsageDescription</key>
  <string>Camera Access for Scanning</string>
  <key>NSMicrophoneUsageDescription</key>
  <string>Microphone for playing instructions audio.</string>
- Open the
ios/Runner/Podfileand uncomment the second line.
platform :ios, '14.0' # <---------- Uncomment this line
- Set the deployment target in the Xcode project
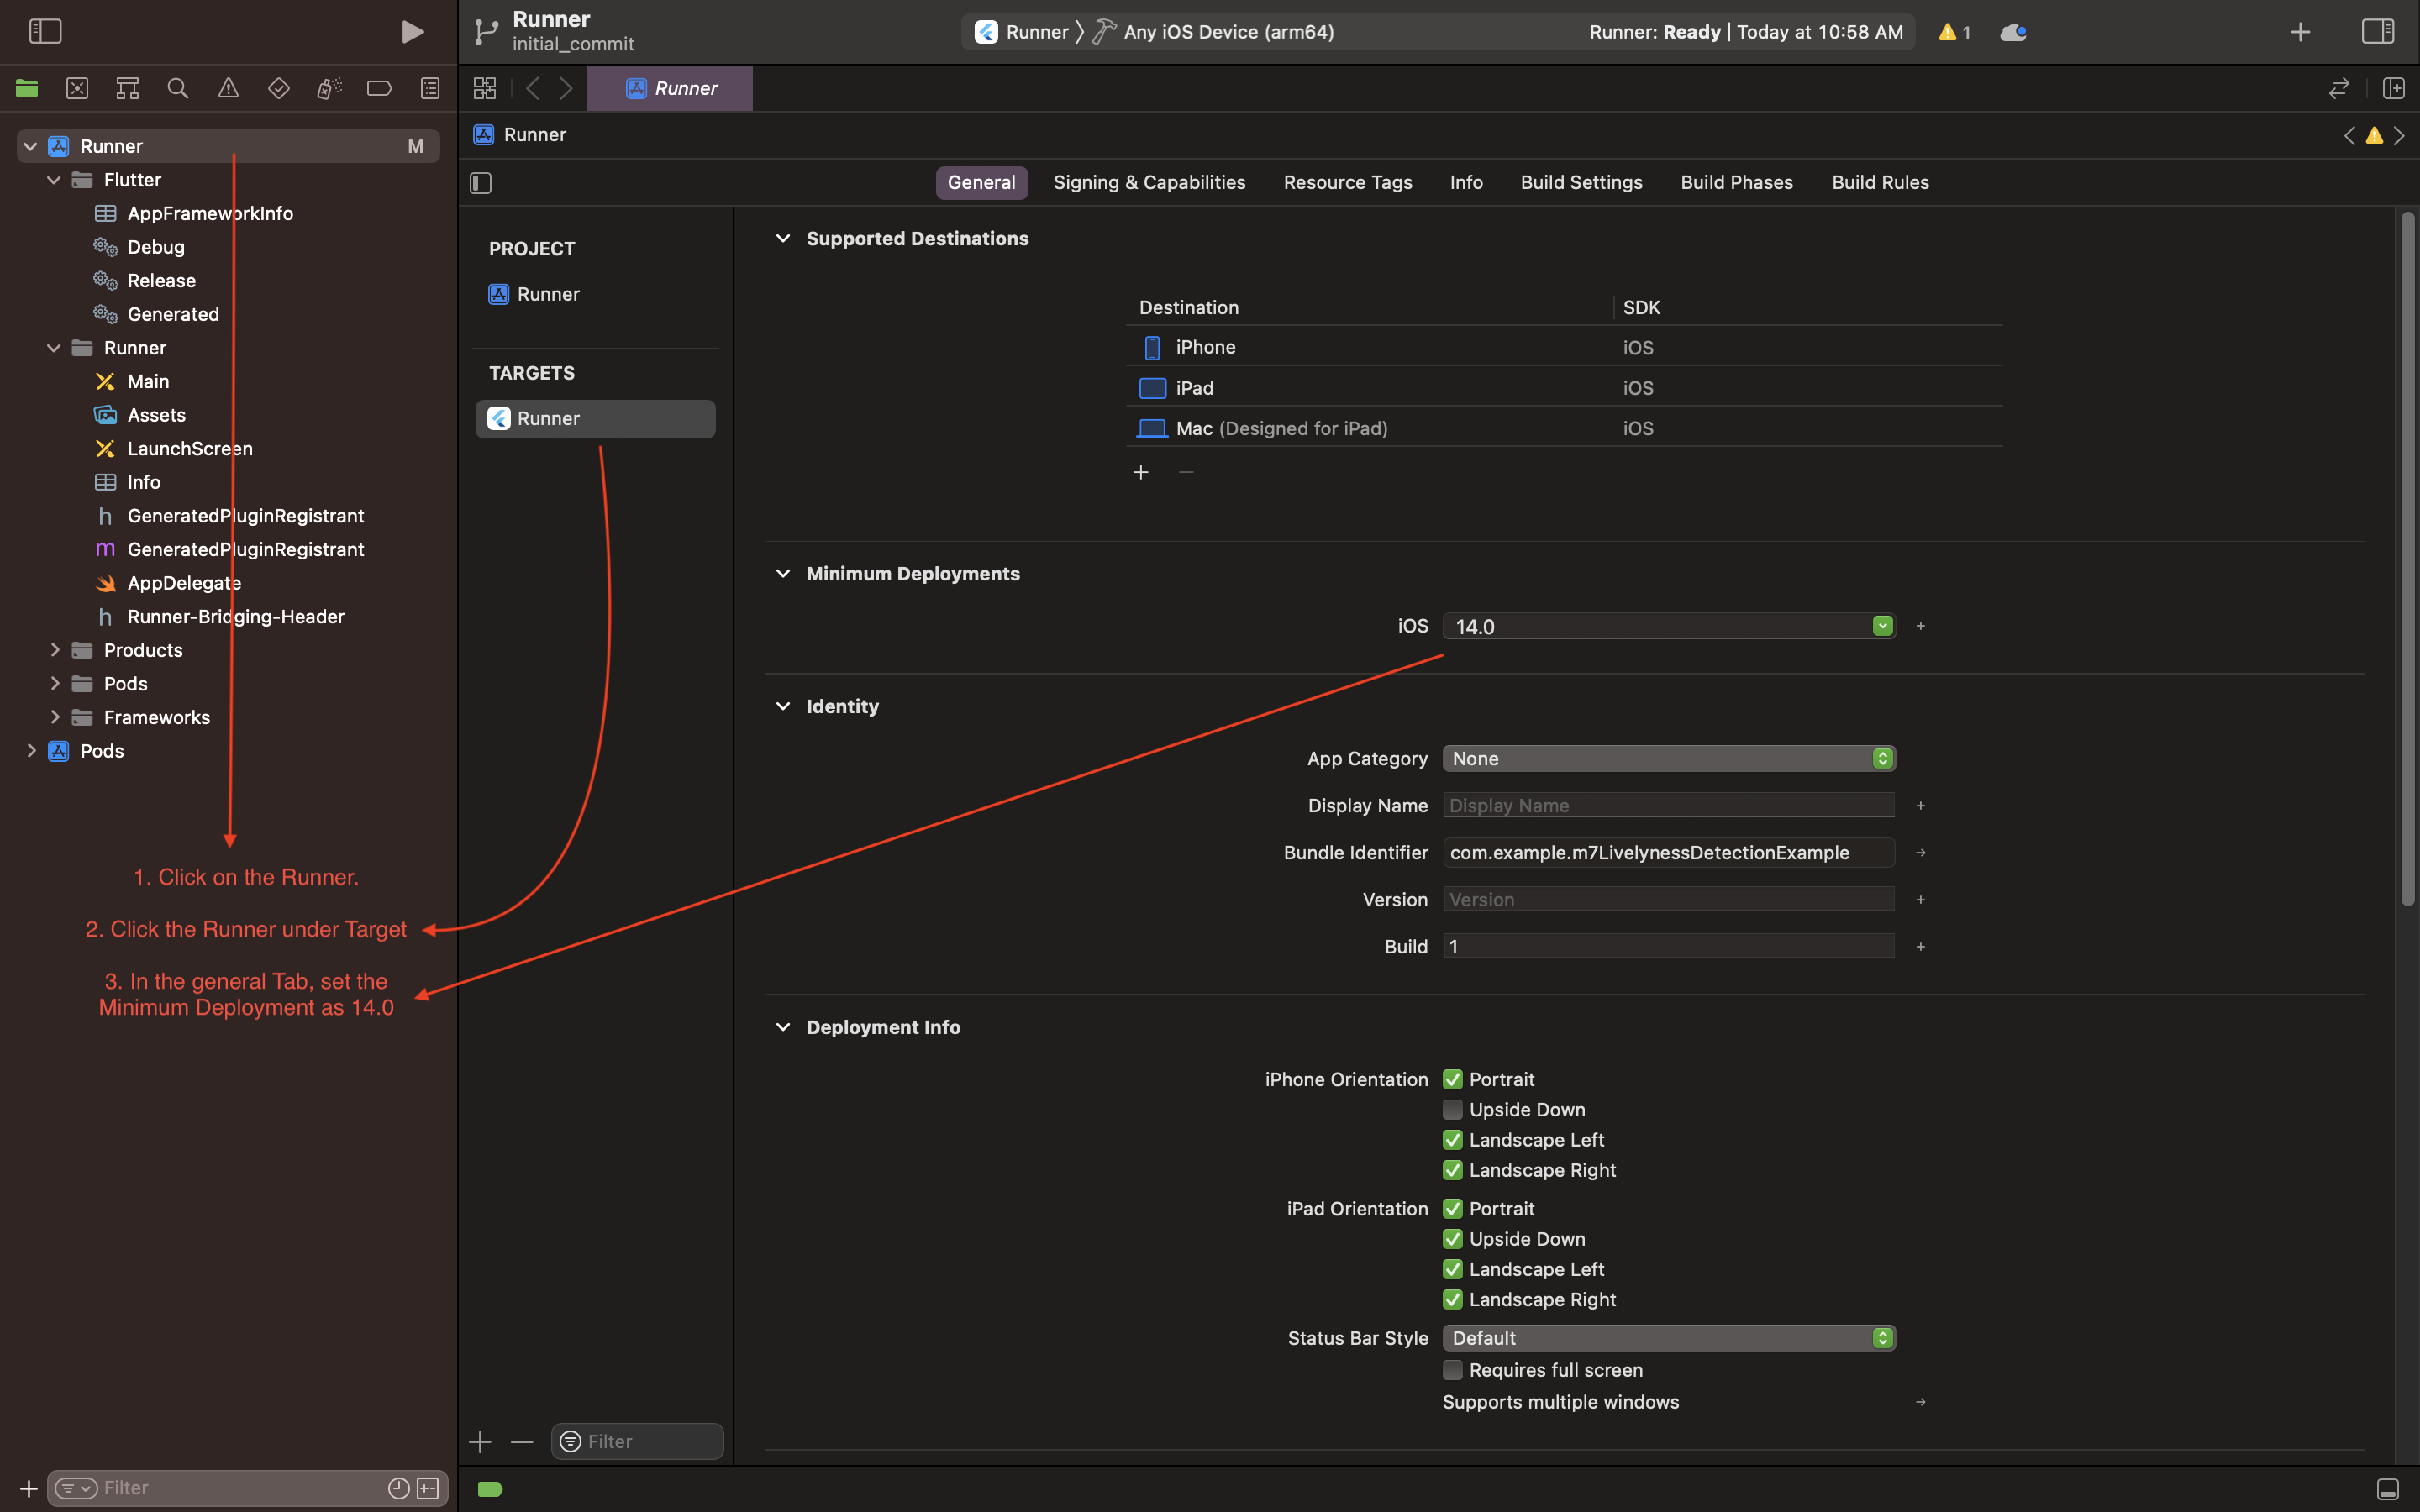
Android
Android Setup
- Open the
example/android/app/build.gradlefile and set theminSdkVersionas21.
Example
A call to a single line function will return a temporary path to the captured image.
Code
    final String? response =
        await LivelynessDetection.instance.detectLivelyness(
      context,
      config: DetectionConfig(
        steps: [
          LivelynessStepItem(
            step: LivelynessStep.blink,
            title: "Blink",
            isCompleted: false,
          ),
          LivelynessStepItem(
            step: LivelynessStep.smile,
            title: "Smile",
            isCompleted: false,
          ),
        ],
        startWithInfoScreen: true,
      ),
    );
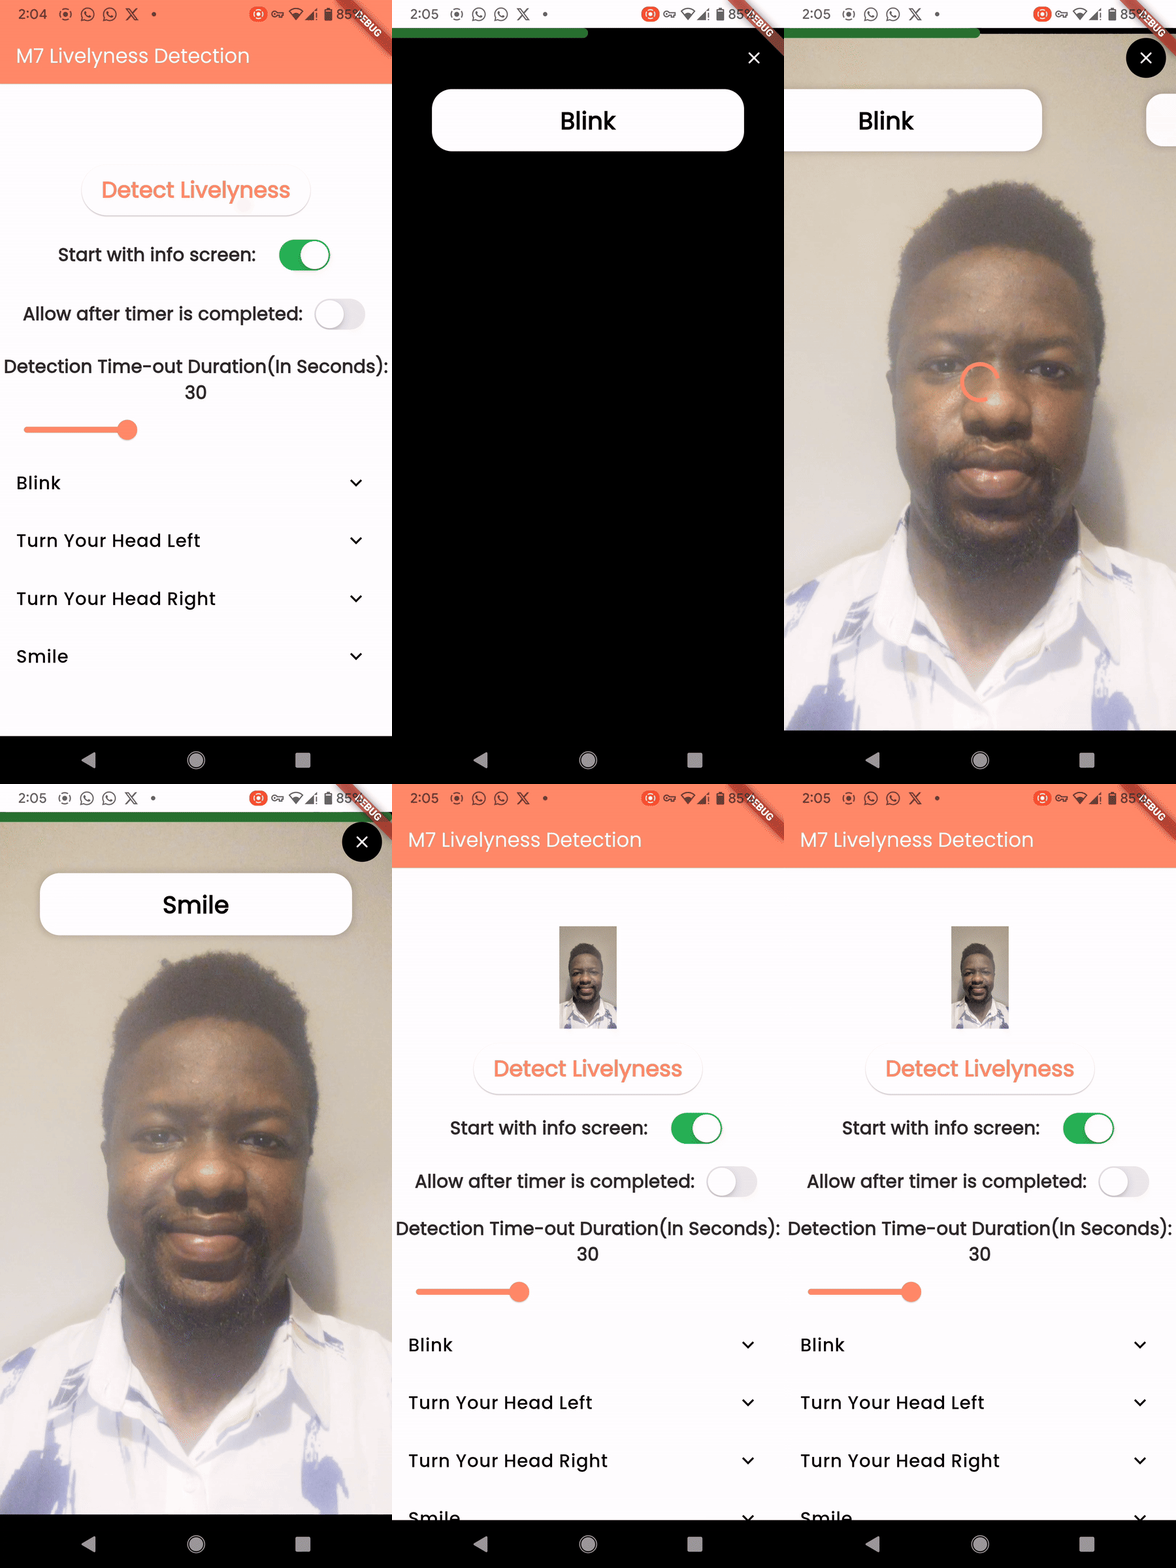
Example Video-Andriod , iOS
Contributors

Kryonex Labs ↗
Verwendete Abhängigkeiten
Abhängigkeiten 15 Einträge
- animate_do
^3.3.4 - camera
^0.11.0+1 - camerawesome
^2.1.0 - collection
^1.17.0 - equatable
^2.0.5 - flutter
{"sdk":"flutter"} - google_mlkit_face_detection
^0.11.0 - image
^4.0.15 - lottie
^3.1.2 - path_provider
^2.0.14 - plugin_platform_interface
^2.1.3 - rxdart
^0.28.0 - uuid
^4.4.2 - flutter_lintsEntwicklung
^4.0.0 - flutter_testEntwicklung
{"sdk":"flutter"}
Wie wähle ich ein passendes Repository?
Nach Anwendungsfall filtern, Aktivität vergleichen und vor der Nutzung das Originalprojekt prüfen.
- Nach Name, Autor oder Beschreibung suchen und nach Thema eingrenzen.
- Sterne, Forks und letzte Pushes vergleichen. Sterne zeigen Interesse, garantieren aber keine Qualität.
- Vor der Nutzung README, Lizenz und Issues auf GitHub prüfen.
Quellen und Pflege
“A repository is the most basic element of GitHub.”
GitHub Docs — About repositories ↗