
 v3.1.4
flutter_flavor
We can create different flavors, and thus have different instances of our apps before publishing it on the App Store and Google Play.
478Likes 30K30-day downloads160Pub points
AndroidiOSWebmacOSWindowsLinux
Easy and fast configuration of flavors in your Flutter App.

{"sdk":"flutter"}^5.0.0English project snapshot. Visit GitHub for the latest content.
pub package Star on Github License: MIT
Flavors helps us to create builds for different instances of our app. For example, we can create a flavor for development, a flavor for production and another flavor for a demo of the app. In this way we can create different flavors, and thus have different instances of our apps before publishing it on the App Store and Google Play.
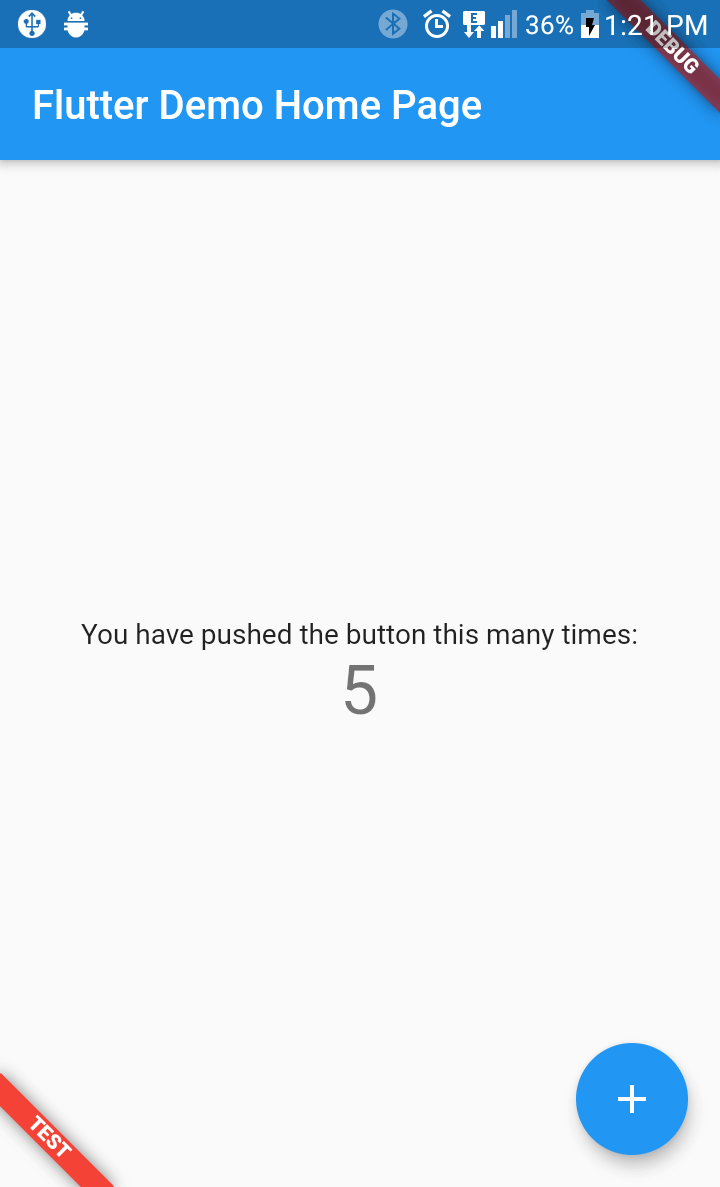
flutter_favor allows you to quickly configure and define dynamic variables for each flavor in your project. The flavors, as well as their names; they are dynamically defined by the developer or development team. In the configuration of a flavor you can set the name of each flavor, as well as the color and location of its banner. When attribute name is undefined or empty, the banner is hidden.
You can also configure the banners independently. The aforementioned attributes are globally configured in FlavorConfig, but can be changed in the FlavorBanner.
| PROD | DEV | TEST |
|---|---|---|
| Screenshot Prod | Screenshot Dev | Screenshot Test |
Note By default the banner is shown in BannerLocation.topStart and is visibility only when the attribute name of configuration is defined and not empty.
flutter_flavor: ^3.1.4
import 'package:flutter_flavor/flutter_flavor.dart';
FlavorConfig(
    name: "DEVELOP",
    color: Colors.red,
    location: BannerLocation.bottomStart,
    variables: {
        "counter": 0,
        "baseUrl": "https://www.example.com",
    }
);
int _counter = FlavorConfig.instance.variables["counter"];
import 'package:flutter/material.dart';
import 'package:flutter_flavor/flutter_flavor.dart';

import 'app.dart';

void main() {
  FlavorConfig(
    name: "DEVELOP",
    color: Colors.red,
    location: BannerLocation.topStart,
    variables: {
      "counter": 5,
      "baseUrl": "https://www.example2.com",
    },
  );

  runApp(const MyApp());
}
import 'package:flutter/material.dart';
import 'package:flutter_flavor/flutter_flavor.dart';

class MyApp extends StatelessWidget {
  const MyApp({super.key});

  @override
  Widget build(BuildContext context) {
    return FlavorBanner(
      child: MaterialApp(
        title: 'Flutter Demo',
        theme: ThemeData(
          colorScheme: ColorScheme.fromSeed(seedColor: Colors.deepPurple),
          useMaterial3: true,
        ),
        home: const MyHomePage(title: 'Flutter Demo Home Page'),
      ),
    );
  }
}

class MyHomePage extends StatefulWidget {
  const MyHomePage({super.key, required this.title});
  final String title;

  @override
  State<MyHomePage> createState() => _MyHomePageState();
}

class _MyHomePageState extends State<MyHomePage> {
  int _counter = 0;

  void _incrementCounter() {
    setState(() {
      _counter++;
    });
  }

  @override
  Widget build(BuildContext context) {
    return Scaffold(
      appBar: AppBar(
        backgroundColor: Theme.of(context).colorScheme.inversePrimary,
        title: Text(widget.title),
      ),
      body: Center(
        child: Column(
          mainAxisAlignment: MainAxisAlignment.center,
          children: <Widget>[
            const Text(
              'You have pushed the button this many times:',
            ),
            Text(
              '$_counter',
              style: Theme.of(context).textTheme.headlineMedium,
            ),
          ],
        ),
      ),
      floatingActionButton: FloatingActionButton(
        onPressed: _incrementCounter,
        tooltip: 'Increment',
        child: const Icon(Icons.add),
      ),
    );
  }
}
The .vscode folder is created in the workspace, if it does not exist it can be created by hand. Inside that folder a launch.json file is created and the configuration is established inside the file. For more information, visit: https://code.visualstudio.com/docs/editor/debugging and https://go.microsoft.com/fwlink/?linkid=830387
{
  "version": "0.2.0",
  "configurations": [
    {
      "name": "PROD-Flavor",
      "program": "[project-folder]/lib/main_prod.dart",
      "request": "launch",
      "type": "dart"
    },
    {
      "name": "DEV-Flavor",
      "program": "[project-folder]/lib/main_dev.dart",
      "request": "launch",
      "type": "dart"
    }
  ]
}
MIT License