
 v5.0.1
align_positioned
极大地简化了使用 Columns 和 Rows 难以实现的布局,通过让您声明性地定位和调整控件相对于彼此的位置和大小。
270喜欢 1.4万近 30 天下载150Pub 分数
AndroidiOSWebmacOSWindowsLinux
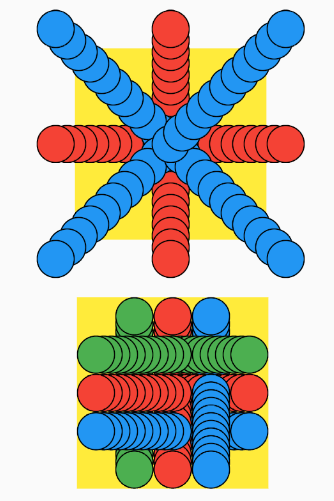
Flutter 包:当您期望的布局或动画过于复杂,无法用 Column 和 Row 实现时,此控件可让您以复杂方式定位、调整大小、旋转或变换其子项。

^4.0.1{"sdk":"flutter"}{"sdk":"flutter"}以下为英文项目原文快照,最新内容请访问 GitHub。
https://raw.githubusercontent.com/marcglasberg/align_positioned/HEAD/example/SponsoredByMyTextAi.png
Widgets in this package:
AlignPositionedAnimatedAlignPositionedAnimChainWhy are these widgets an indispensable tool?
When your desired layout feels too complex for Columns and Rows, AlignPositioned is a real
lifesaver. Flutter is very composable, which is good, but sometimes it's unnecessarily complex to
translate some layout requirement into a composition of simpler widgets.
The AlignPositioned aligns, positions, sizes, rotates and transforms its child in relation to both
the container and the child itself. In other words, it lets you easily and directly define where
and how a widget should appear in relation to another.
For example, you can tell it to position the top-left of its child at 15 pixels to the left of the
top-left corner of the container, plus move it two thirds of the child's height to the bottom plus
10 pixels, and then rotate 15 degrees.
Do you even know how to start doing this by composing basic Flutter widgets? Maybe, but
with AlignPositioned it's much easier, and it takes a single widget.
Besides layout, AlignPositioned is specially helpful for explicit animations
(those that use a controller), since you can just calculate the final position, size and rotation
you want for each frame. Without it, you may find yourself having to animate a composition of
widgets.
Meanwhile, AnimatedAlignPositioned and AnimChain widgets are helpful for
implicit animations, which are very easy to create. If you change their parameters they animate
automatically, interpolating between the old and new parameter values.
Add align_positioned
as a dependency
in your pubspec.yaml file, then import it:
import 'package:align_positioned/align_positioned.dart';
Pass a child to the AlignPositioned or the AnimatedAlignPositioned, and then one or more of
the following parameters:
AlignPositioned(
   child: child,
   alignment: ...,
   dx: ...,
   dy: ...,
   moveByChildWidth: ...,
   moveByChildHeight: ...,
   moveByContainerWidth: ...,
   moveByContainerHeight: ...,
   moveVerticallyByChildWidth: ...,
   moveHorizontallyByChildHeight: ...,
   moveVerticallyByContainerWidth: ...,
   moveHorizontallyByContainerHeight: ...,
   childWidth: ...,
   childHeight: ...,
   minChildWidth: ...,
   minChildHeight: ...,
   maxChildWidth: ...,
   maxChildHeight: ...,
   childWidthRatio: ...,
   childHeightRatio: ...,
   minChildWidthRatio: ...,
   minChildHeightRatio: ...,
   maxChildWidthRatio: ...,
   maxChildHeightRatio: ...,
   rotateDegrees: ...,
   matrix4Transform: ...,
   wins: ...,
   touch: ...,
   );
Let's study each parameter in detail:
The alignment parameter works as expected. For example,
Alignment.bottomRight represents the bottom right of the container, and Alignment(0.0, 0.0)
represents the center of the container. The distance from -1.0 to +1.0 is the distance from one side
of the rectangle to the other side of the rectangle.
If touch is Touch.inside, then alignment works just like the alignment for the Align widget,
aligning the child inside the container.
However, if touch is Touch.outside, then the alignment happens outside the container; and if
it's Touch.middle, the center of the child will be aligned to the container edge.
As another example, if touch is Touch.inside, then Alignment(1.0, 0.0) makes the child's right
side touch the right side of the container (it touches the container from the inside).
But if touch is Touch.outside, then Alignment(1.0, 0.0) makes the child's left side touch the
right side of the container (it touches the container from the outside).
But if touch is Touch.middle, then Alignment(1.0, 0.0) makes the child's center touch the
right side of the container (it touches the container from the middle).
Parameters dx and dy can be positive or negative, and move the child horizontally and
vertically, in pixels.
Parameters moveByChildWidth and moveByChildHeight can be positive or negative, and move the
child horizontally and vertically, but the unit here is not pixels, but child widths and heights.
Parameters moveByContainerWidth and moveByContainerHeight can be positive or negative, and move
the child horizontally and vertically, but the unit here is not pixels, but container widths and
heights.
Parameters moveVerticallyByChildWidth, moveHorizontallyByChildHeight,
moveVerticallyByContainerWidth and moveHorizontallyByContainerHeight allow you to move in some
direction according to the size (width or height) of the orthogonal direction. For example,
while moveByChildWidth: 0.2 would move horizontally by 20% of the child's width,
moveVerticallyByChildWidth would move vertically by 20% of the child's width.
The below image shows the center of the child positioned 15 pixels to the right of the top-left corner of the container:
https://raw.githubusercontent.com/marcglasberg/align_positioned/HEAD/example/lib/alignPos1.png
AlignPositioned(
   child: child,
   alignment: Alignment.topLeft,
   touch: Touch.inside,
   dx: 15.0, // Move 4 pixels to the right.
   moveByChildWidth: -0.5, // Move half child width to the left.
   moveByChildHeight: -0.5); // Move half child height to the top.
Then, to move the child one container width to the right, and one container height to the bottom:
https://raw.githubusercontent.com/marcglasberg/align_positioned/HEAD/example/lib/alignPos2.png
AlignPositioned(
   child: child,
   alignment: Alignment.topLeft,
   touch: Touch.inside,
   dx: 15.0, // Move 4 pixels to the right.
   moveByChildWidth: -0.5, // Move half child width to the left.
   moveByChildHeight: -0.5, // Move half child height to the top.
   moveByContainerWidth: 1.0, // Move one container width to the right.
   moveByContainerHeight: 1.0); // Move one container height to the bottom.
Please try the example that showcases the effects seen below:
https://raw.githubusercontent.com/marcglasberg/align_positioned/HEAD/example/lib/alignPos3.png
Optionally, you can also define the child size:
childWidth is the child width, in pixels.
childHeight is the child height, in pixels.
minChildWidth is the minimum width, in pixels. It has precedence over childWidth.
minChildHeight is the minimum height, in pixels. It has precedence over childHeight.
maxChildWidth is the maximum width, in pixels. It has precedence over childWidth.
maxChildHeight is the maximum height, in pixels. It has precedence over childHeight.
childWidthRatio is the child width, as a fraction of the container width. If between 0.0 and
1.0, the child will be smaller than its container. If more than 1.0, the child will be larger than
its container. If you define both childWidthRatio and childWidth they will be added.
childHeightRatio is the child height, as a fraction of the container height. If between 0.0 and
1.0, the child will be smaller than its container. If more than 1.0, the child will be larger than
its container. If you define both childHeightRatio and childHeight they will be added.
minChildWidthRatio is the minimum child width, as a fraction of the container width. It has
precedence over childWidth. If both minChildWidth and minChildWidthRatio
are defined, both will be applied (the minimum will be the larger one).
minChildHeightRatio. is the minimum child height, as a fraction of the container height. It has
precedence over childHeight. If both minChildHeight and minChildHeightRatio
are defined, both will be applied (the minimum will be the larger one).
maxChildWidthRatio is the maximum child width, as a fraction of the container width. It has
precedence over childWidth. If both maxChildWidth and maxChildWidthRatio
are defined, both will be applied (the maximum will be the smaller one).
maxChildHeightRatio is the maximum child height, as a fraction of the container height. It has
precedence over childHeight. If both maxChildHeight and maxChildHeightRatio
are defined, both will be applied (the maximum will be the smaller one).
wins decides what happens if the minimum size is larger than the maximum size. If wins
is Wins.min, the default, the minimum size will be used. If wins is Wins.max, the maximum
size will be used.
Optionally, you can also define rotation and transformation:
rotateDegrees is the rotation, in degrees (1 turn is 360 degrees). The position of the axis of
the rotation (the "origin") depends on the
alignment parameter and the parent. So, for example, Alignment.center
means the axis of rotation is at the center of the parent.
matrix4Transform lets you apply any transformation to the child. This
uses Matrix4Transform instead of Matrix4,
since it's easier to use. However, you can still use Matrix4 directly with the
constructor Matrix4Transform.from(matrix4).
https://raw.githubusercontent.com/marcglasberg/align_positioned/HEAD/example/lib/alignPos4.png
https://raw.githubusercontent.com/marcglasberg/align_positioned/HEAD/example/lib/animated_align_positioned.gif
Use the AlignPositioned.relative() factory if you have a main widget, and you want to
position/size/rotate/translate another widget relative to the main one, but the second is not a
child of the first.
Example, to center the main container widget, and then put a relative child widget vertically below it (in the Y-axis):
Center(
   child: AlignPositioned.relative(
       container: widgetA(),
       child: widgetB(),
       moveByContainerHeight: 0.5,
       moveByChildHeight: 0.5));
The invert parameter controls which widget overlaps the other. If invert is false (the
default), the container widget is below the child widget in the Z-axis (will be painted before).
If invert is true, the container widget to be on top of the child widget, in the Z-axis (will
be painted after).
A Stack positions its children relative to the edges of its box. The Stack documentation
contains this text:
In particular, when using a Stack you can't position children relative to their size or the stack's own size.
However, by using AlignPositioned you can do precisely that:
position (and size, rotate and transform) children relative to their size or the Stack's own size,
and consequently in relation to the other widgets inside the Stack.
If you recall how a Stack works, each of its child widgets is either positioned or non-positioned.
The stack sizes itself to contain all the non-positioned children, which are positioned according to
the stacks' alignment parameter. Next, the positioned children are laid out.
If you use the AlignPositioned default constructor and put it inside a Stack, it will be a **
non-positioned** child.
To create a positioned widget, use the AlignPositioned.expand() factory. The AlignPositioned
will then expand and fix itself to the corners of the Stack. In other words, the Stack will size
itself to their other non-positioned widgets, and then you can use the AlignPositioned to lay out
its child in relation to the Stack.
Example:
Stack(
  children: [
    Container(...),
    Positioner(child: Container(...)),
    AlignPositioned(...),
    AlignPositioned.expand(...),
    ...
    ]);
If you change the AnimatedAlignPositioned parameters it will animate automatically:
return AnimatedAlignPositioned(
    duration: Duration(seconds: 3)
    alignment: Alignment.bottomCenter,
    rotateDegrees: isOk ? 0 : 180,
    child: AnimatedContainer(
        color: isOk ? Colors.yellow : Colors.red,
        duration: Duration(seconds: 2)
        ),
    );
The AnimChain widget lets you define a sequence of widgets, where each one will be displayed after
the previous after some wait time.
You can chain widgets which are totally different from one another. For example:
AnimChain(repeat: true, initialDelay: Duration(milliseconds: 150))

      // Yellow box for 700 milliseconds
      .next(
        wait: Duration(milliseconds: 700),
        widget: Container(color: Colors.yellow, width: 95, height: 95, margin: const EdgeInsets.all(2.5)))

      // Red text for 1000 milliseconds
      .next(
        wait: Duration(milliseconds: 1000),
        widget: Container(child: Text("Hello world!", style: TextStyle(color: Colors.red, fontSize: 25)), width: 100, height: 100))

      // Blue icon for 1200 milliseconds
      .next(
        wait: Duration(milliseconds: 1200),
        widget: Icon(Icons.accessibility, color: Colors.blue, size: 100));
Try running the example.
However, if you define implicitly animated widgets
(like AnimatedAlignPositioned, AnimatedContainer, AnimatedOpacity, AnimatedPadding etc.)
then you can easily create a smooth animation.
For example:
return AnimChain(repeat: true, initialDelay: Duration(milliseconds: 150))
   // Show the yellow box and wait 5 seconds.
   .next(
      wait: Duration(seconds: 5),
      widget: AnimatedAlignPositioned(
         alignment: Alignment.bottomCenter,
         rotateDegrees: 0,
         child: Container(color: Colors.yellow),
         ),
      )
   // Rotate to the red box in 3 seconds.
   .next(
      wait: Duration(seconds: 3),
      widget: AnimatedAlignPositioned(
         duration: Duration(seconds: 3),
         rotateDegrees: 180,
         child: Container(color: Colors.red),
         ),
      )
   // Finally, translate the blue in the vertical axis.
   .next(
      widget: AnimatedAlignPositioned(
         duration: Duration(seconds: 15),
         alignment: Alignment.bottomCenter,
         dy: 150,
         rotateDegrees: 180,
         child: Container(color: Colors.blue),
         ),
      ),
    );
Try running the example.
By Marcelo Glasberg
glasberg.dev
github.com/marcglasberg
linkedin.com/in/marcglasberg/
twitter.com/glasbergmarcelo
stackoverflow.com/users/3411681/marcg
medium.com/@marcglasberg
My article in the official Flutter documentation:
The Flutter packages I've authored:
My Medium Articles: