
 v3.0.0
overlay_tutorial
एक फ्लटर पैकेज जो विजेट पर एक छेद काटकर ओवरले ट्यूटोरियल दिखाता है। इसमें छेद के पास संकेत भी जोड़ने की अनुमति है।
69लाइक 54230-दिन डाउनलोड140Pub अंक
AndroidiOSWebmacOSWindowsLinux
ओवरले ट्यूटोरियल दिखाने के लिए एक Flutter पैकेज।

{"sdk":"flutter"}^1.15.0^2.5.0^2.0.3^1.11.1{"git":{"url":"https://github.com/TabooSun/dart_taboosun_lints.git","ref":"v1.0.1"}}{"sdk":"flutter"}यह अंग्रेज़ी मूल स्नैपशॉट है। नवीनतम सामग्री GitHub पर देखें।
A Flutter package for displaying overlay tutorial.
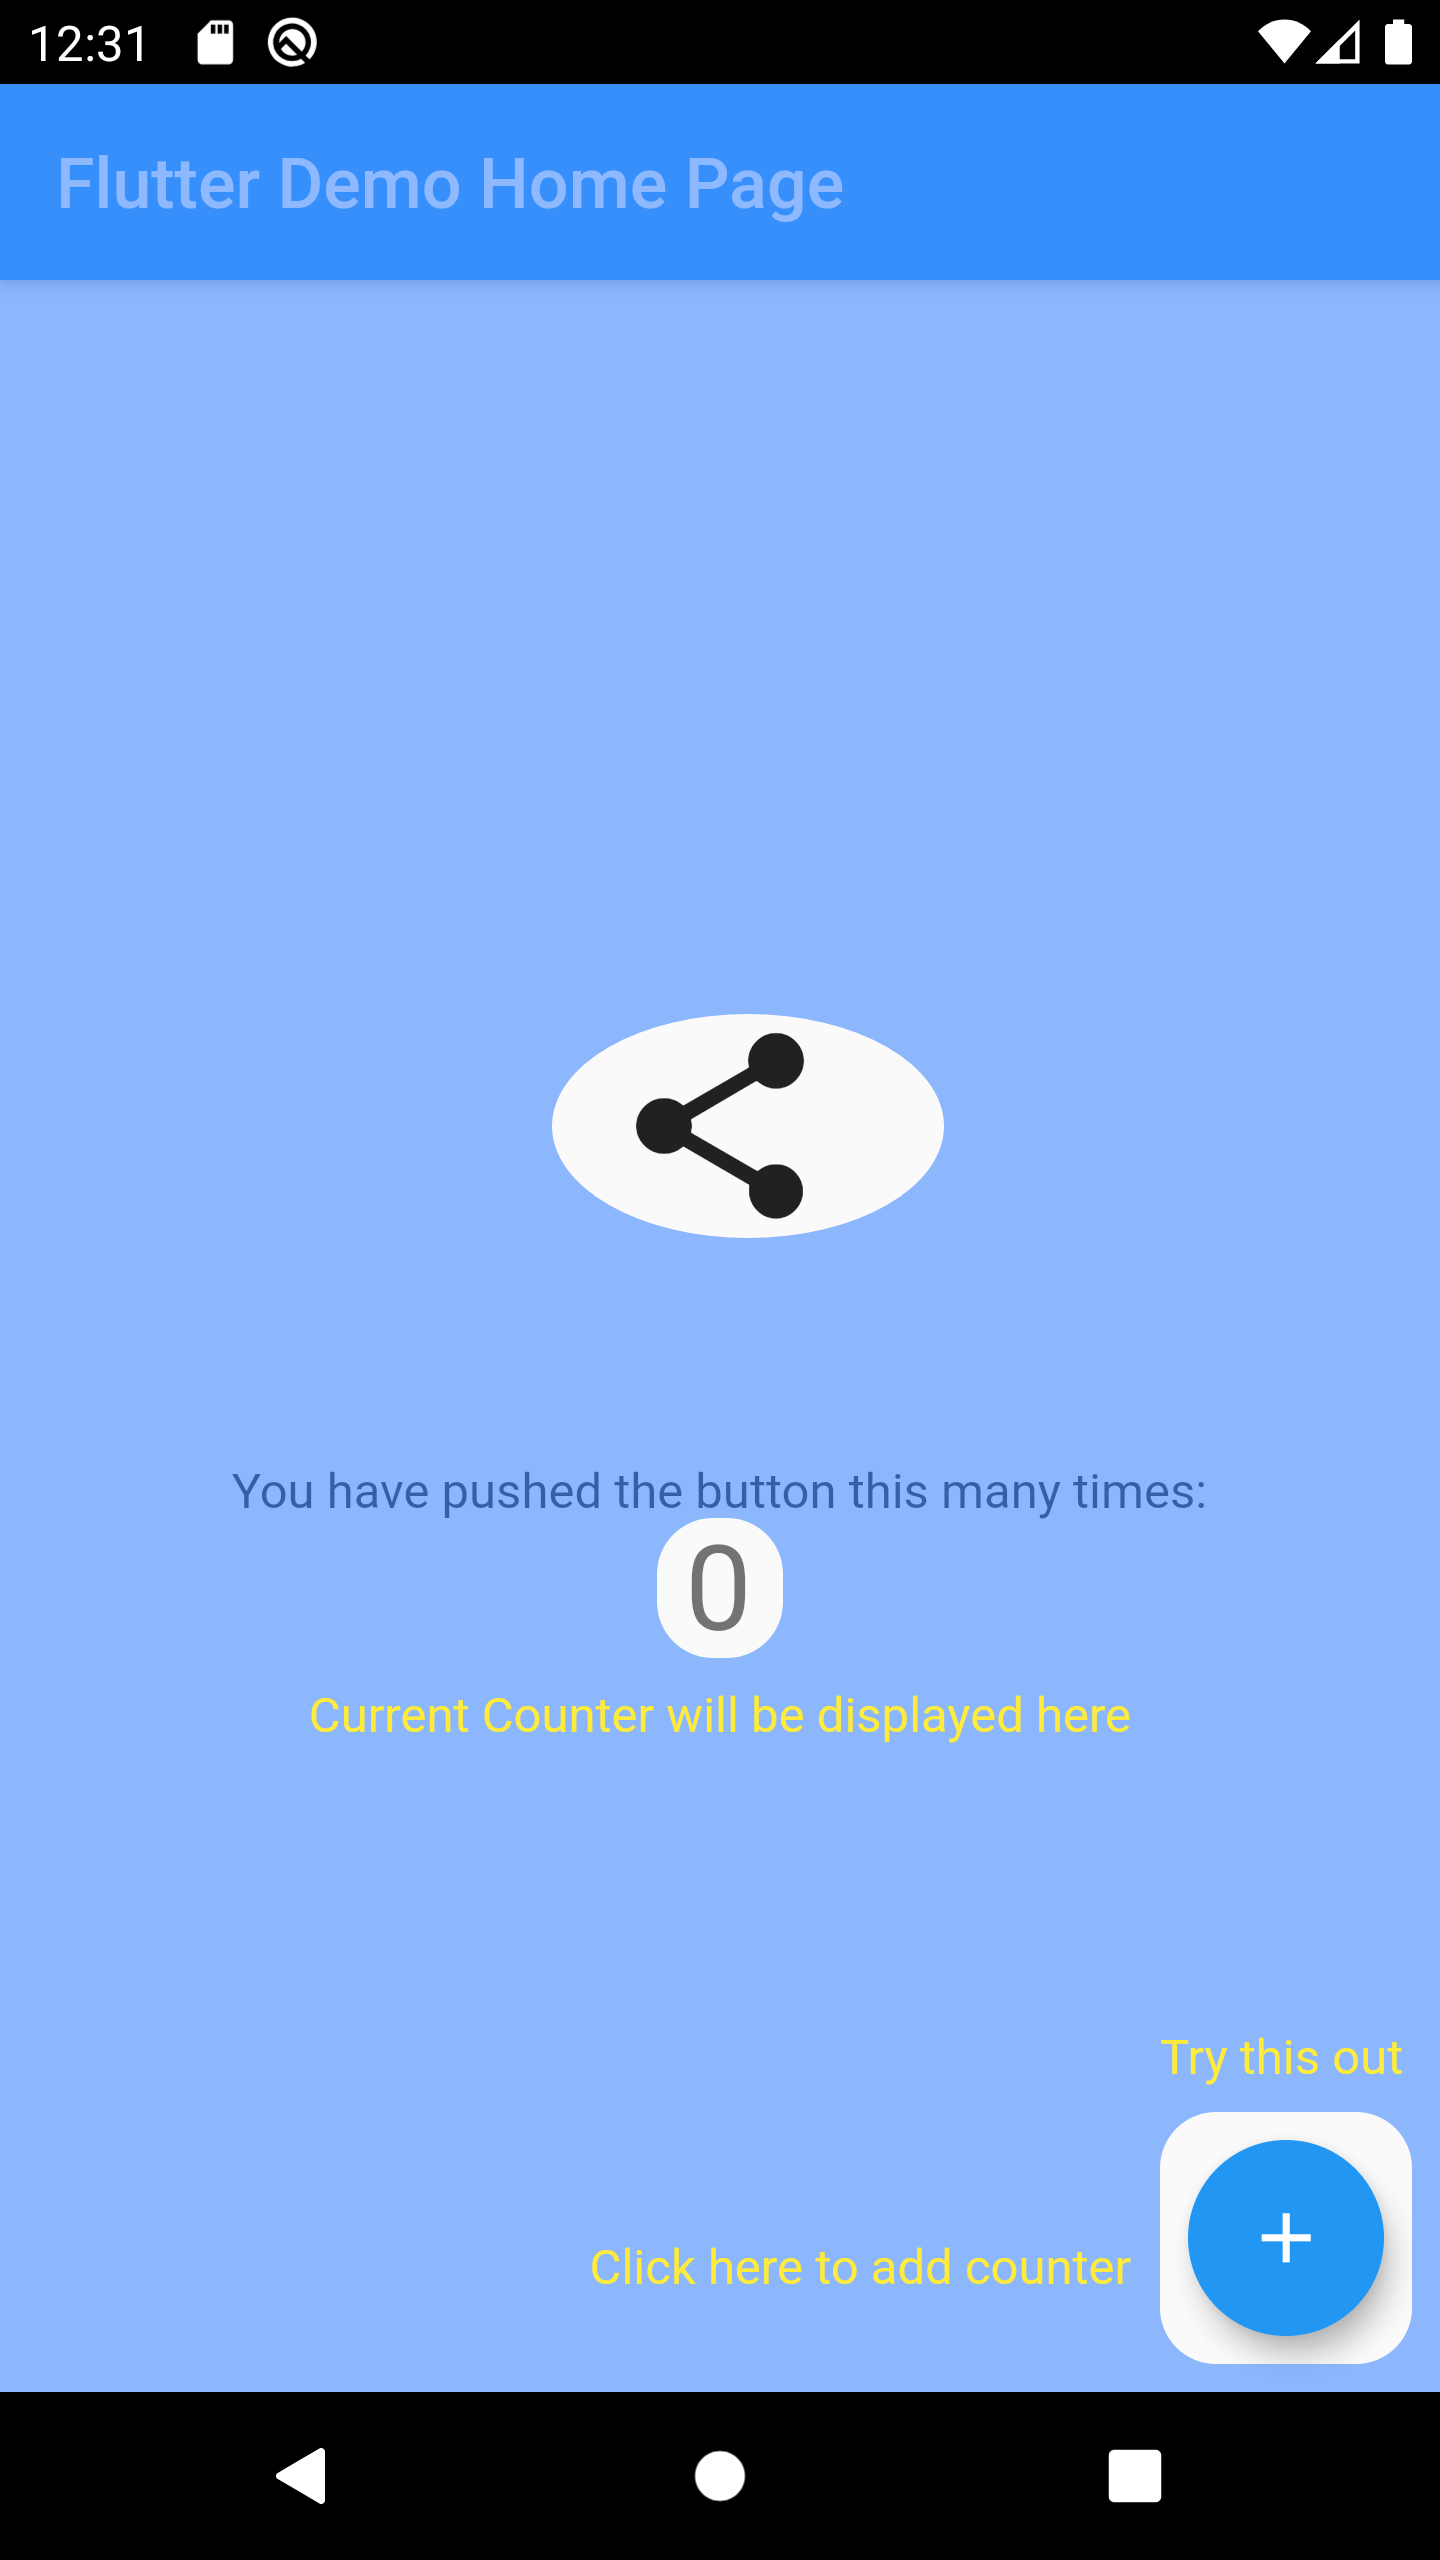
Wrap the widget that you want to create a hole using OverlayTutorialHole. Ensure you have OverlayTutorialScope as a parent of these holes.
OverlayTutorialScope.enabled property to control the visibility of the overlay tutorial. If this is false, the entire overlay tutorial will be hidden.OverlayTutorialHole.enabled property to control the visibility of the holes.
Widget build(BuildContext context) {
  final textTheme = Theme.of(context).textTheme;
  const tutorialColor = Colors.yellow;
  return SafeArea(
    child: Stack(
      children: [
        OverlayTutorialScope(
          enabled: _isTutorialEnabled,
          overlayColor: Colors.blueAccent.withOpacity(.6),
          // Disable all the widgets. All the widgets are now non-interactive.
          child: AbsorbPointer(
            absorbing: _isTutorialEnabled,
            child: Scaffold(
              appBar: AppBar(
                title: Text(widget.title),
              ),
              body: Center(
                child: Column(
                  mainAxisAlignment: MainAxisAlignment.center,
                  children: <Widget>[
                    AnimatedBuilder(
                      animation: _tweenAnimation,
                      builder: (context, child) {
                        return SlideTransition(
                          position: _tweenAnimation,
                          child: child,
                        );
                      },
                      child: OverlayTutorialHole(
                        enabled: true,
                        overlayTutorialEntry: OverlayTutorialCustomShapeEntry(
                          shapeBuilder: (rect, path) {
                            path = Path.combine(
                              PathOperation.difference,
                              path,
                              Path()
                                ..addOval(Rect.fromLTWH(
                                  rect.left - 16,
                                  rect.top,
                                  112,
                                  64,
                                )),
                            );
                            return path;
                          },
                        ),
                        child: const Icon(
                          Icons.share,
                          size: 64,
                        ),
                      ),
                    ),
                    const SizedBox(height: 64),
                    const Text(
                      'You have pushed the button this many times:',
                    ),
                    OverlayTutorialHole(
                      enabled: true,
                      overlayTutorialEntry: OverlayTutorialRectEntry(
                        padding: const EdgeInsets.symmetric(horizontal: 8.0),
                        radius: const Radius.circular(16.0),
                        overlayTutorialHints: <OverlayTutorialWidgetHint>[
                          OverlayTutorialWidgetHint(
                            position: (rect) => Offset(0, rect.bottom),
                            builder: (context, entryRect) {
                              return SizedBox(
                                width: MediaQuery.of(context).size.width,
                                child: Center(
                                  child: Padding(
                                    padding: const EdgeInsets.all(8.0),
                                    child: Text(
                                      'Current Counter will be displayed here',
                                      style: textTheme.bodyText2!
                                          .copyWith(color: tutorialColor),
                                    ),
                                  ),
                                ),
                              );
                            },
                          ),
                        ],
                      ),
                      child: Text(
                        '$_counter',
                        style: Theme.of(context).textTheme.headline4,
                      ),
                    ),
                  ],
                ),
              ),
              floatingActionButton: OverlayTutorialHole(
                enabled: true,
                overlayTutorialEntry: OverlayTutorialRectEntry(
                  padding: const EdgeInsets.all(8.0),
                  radius: const Radius.circular(16.0),
                  overlayTutorialHints: [
                    OverlayTutorialWidgetHint(
                      builder: (context, entryRect) {
                        return Positioned(
                          top: entryRect.rRect!.top - 24.0,
                          left: entryRect.rRect!.left,
                          child: Text(
                            'Try this out',
                            style: textTheme.bodyText2!
                                .copyWith(color: tutorialColor),
                          ),
                        );
                      },
                    ),
                    OverlayTutorialWidgetHint(
                      position: (rect) => Offset(0, rect.center.dy),
                      builder: (context, entryRect) {
                        return SizedBox(
                          width: entryRect.rRect!.left,
                          child: Padding(
                            padding: const EdgeInsets.only(right: 8.0),
                            child: Row(
                              mainAxisAlignment: MainAxisAlignment.end,
                              children: [
                                Flexible(
                                  child: Text(
                                    'Click here to add counter',
                                    style: textTheme.bodyText2!
                                        .copyWith(color: tutorialColor),
                                  ),
                                ),
                              ],
                            ),
                          ),
                        );
                      },
                    ),
                  ],
                ),
                child: FloatingActionButton(
                  onPressed: _incrementCounter,
                  tooltip: 'Increment',
                  child: const Icon(Icons.add),
                ),
              ),
            ),
          ),
        ),
        if (_isTutorialEnabled)
          Align(
            alignment: Alignment.topRight,
            child: GestureDetector(
              onTap: () {
                _isTutorialEnabled = false;
                setState(() {});
              },
              child: Padding(
                padding: const EdgeInsets.all(8.0),
                child: Container(
                  padding: const EdgeInsets.all(16),
                  decoration: const BoxDecoration(
                    shape: BoxShape.circle,
                    color: Colors.black,
                  ),
                  child: const Icon(
                    Icons.close,
                    color: Colors.red,
                  ),
                ),
              ),
            ),
          ),
      ],
    ),
  );
}
OverlayTutorialRectEntry draws a Rectangle shapeOverlayTutorialCircleEntry draws a Circle shapeOverlayTutorialCustomShapeEntry allows to draw a customized shapeDisabling widget is not provided by this package out of the box. You can achieve this using one of the Flutter widget: AbsorbPointer or IgnorePointer. Make sure you do not wrap the OverlayTutorialScope with these widgets as this will disable the widget in OverlayTutorialWidgetHint.
https://github.com/TabooSun/overlay_tutorial/blob/main/example/images/example_gif.gif?raw=true
Check Dart Documentation