

 v1.0.4
floating_view
YouTubeの折りたたみウィンドウ動作を実現するプラグイン。
18いいね 6330日間ダウンロード160Pub ポイント
AndroidiOSWebmacOSWindowsLinux
YouTubeの折りたたみウィンドウ動作を実現するプラグイン。

以下は英語原文のスナップショットです。最新版は GitHub をご覧ください。
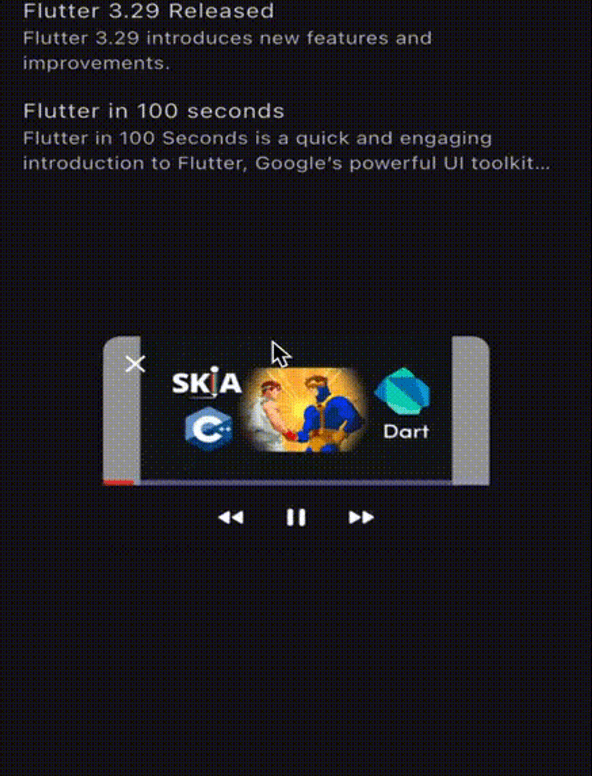
The FloatingView package enables you to create a floating window similar to YouTube's floating video feature. This allows the window to float on the screen and be draggable while scrolling.

To integrate the package into your Flutter application, follow these steps:
Wrap the Screen:
Wrap the screen where you want to display the FloatingView:
late final FloatingController _controller = FloatingController(
    context,
    initialPosition: FloatingPosition.bottomLeft,
);

@override
void dispose() {
    super.dispose();
    _controller.dispose();
}

@override
Widget build(BuildContext context) {
    return FloatingView(
        controller: _controller,
        childBuilder: () => Scaffold(
            body: ItemBuilder(list: dummyList, controller: _controller),
        ),
    );
}
Note: FloatingView will disappear when changing routes. To display it across routes, wrap your desired route screen with the FloatingView and use the same controller. The controller can be passed down in the widget tree or stored in state management solutions such as BLoC, Provider, etc. The FloatingView will be passed down across the screen using the Hero widget, which is currently the only option available.
Navigator.push(
    context,
    MaterialPageRoute(
        builder: (context) => FloatingView(
            controller: _controller,
            childBuilder: () => NavigationTestScreen(),
        ),
    ),
);
Initialize the FloatingView:
Initialize the controller and store the widget you want to display, such as a video, screen, or text. Here is an example of using FloatingView with a Video Player or a simple screen:
void onTap(dynamic data) {
    switch (data) {
        case Video _:
            VideoPlayerController? videoController;
            videoController = VideoPlayerController.asset(data.url)
                ..initialize().then((_) {
                    videoController?.play();
                });

            widget.controller.initialize(
                maxChild: MaximizedVideo(
                    videoController: videoController,
                    floatingController: widget.controller,
                    video: data,
                ),
                minChild: MinimizedVideo(
                    videoController: videoController,
                    floatingController: widget.controller,
                    video: data,
                ),
                onDispose: () {
                    videoController?.dispose();
                },
            );
            break;

        case News _:
            widget.controller.initialize(
                maxChild: MaximizedNewsScreen(
                    news: data,
                    controller: widget.controller,
                ),
                minChild: MinimizedNewsScreen(
                    news: data,
                    controller: widget.controller,
                ),
                onDispose: () {},
            );
            break;

        default:
            break;
    }
}
Note: controller.initialize() will run the previous onDispose() method to clear the previous controller data if you initialize another FloatingView while having an active one.
Using the APIs:
You can use the passed-down controller to control the FloatingView state like this:
Padding(
    padding: const EdgeInsets.fromLTRB(15, 15, 15, 0),
    child: Row(
        children: [
            GestureDetector(
                onTap: () {
                    widget.controller.close();
                },
                child: Icon(Icons.close, size: 24),
            ),
            const SizedBox(width: 20),
            GestureDetector(
                onTap: () {
                    widget.controller.toggleSize();
                },
                child: Icon(Icons.aspect_ratio, size: 24),
            ),
        ],
    ),
);
FloatingControllerInitialize the Floating View:
controller.initialize({
    required Widget maxChild,
    required Widget minChild,
    required VoidCallback onDispose,
})
Close an Active Floating View:
controller.close()
Toggle the Floating View Size:
controller.toggleSize()
#Dispose the controller:
controller.dispose()
Contributions are welcome! Please open an issue or submit a pull request if you have any improvements or bug fixes.
This project is licensed under the MIT License. See the LICENSE file for details.
If you find this package helpful and want to support its development, consider making a donation. Thank you for your support!

依存関係一覧 3 件
{"sdk":"flutter"}{"sdk":"flutter"}^5.0.0用途で絞り込み、開発状況を比較し、採用前に元のリポジトリで要件を確認しましょう。
“A repository is the most basic element of GitHub.”
GitHub Docs — About repositories ↗