
 v2.0.0
apptex_chat
이 패키지는 채팅 시스템을 더 간단하고 사용자 친화적으로 만들며, 한 번의 클릭으로 채팅 기능을 제어할 수 있도록 해줍니다.
15좋아요 6730일 다운로드60Pub 점수
플랫폼 정보 없음
이것은 채팅 시스템에 사용되는 종속성 패키지입니다.

{"sdk":"flutter"}^6.6.0^13.0.0^2.0.0^3.4.1^6.1.2^2.0.2^0.19.0^4.4.0^1.1.2{"sdk":"flutter"}^5.0.0아래는 영문 원문 스냅샷입니다. 최신 내용은 GitHub에서 확인하세요.
This package is a powerful and versatile solution for implementing real-time chat functionality in your Flutter applications. Built on Firebase Firestore and Firebase Cloud, this package provides a unique and pre-designed chatting system with features such as push notifications and a customizable theme for the Inbox Screen and Chat Screen.
| Android | iOS | macOS | Web | Linux | Windows |
|---|---|---|---|---|---|
| ✔ | ✔ | :x: | :x: | :x: | :x: |
https://raw.githubusercontent.com/apptexsolutions/apptex_chat/main/imgs/Chats.png
https://raw.githubusercontent.com/apptexsolutions/apptex_chat/main/imgs/Messages.png
https://raw.githubusercontent.com/apptexsolutions/apptex_chat/main/imgs/emojis.PNG
To get started, add the following dependency to your pubspec.yaml file:
dependencies:
  apptex_chat: ^2.0.0
Then, run flutter pub get to install the package.
Step 1 : Firebase Configuration
Step 2 : User Authentication
To enable chat functionality, you need to authenticate users. When a user signs up or logs in, you can pass their information to AppTexChat using the initChat method.
// Here you can set the current user to the Apptex chat
AppTexChat.instance.initChat(
 currentUser: ChatUserModel(
   uid: "{uid}",
   profileUrl: "{Profile url}",
   name: "{Currect User Name}",
   fcmToken: "{Fcm Token}", //Pass empty string if you don't have fcm token
 ),
);
Replace Current User Name, uid, profile URL, and Fcm Token with the corresponding values for the user.
Step 3 : Starting a Chat
To start a chat with another user, call the startNewConversationWith function:
//Here you need to pass the other user's info
AppTexChat.instance.startNewConversationWith(
  ChatUserModel(
    uid: "Other user uid",
    profileUrl: 'Other user profile',
    name: 'Other user name',
    fcmToken: 'Other user fcm token',
  ),
);
To see a list of all the conversations, use the ConversationsScreen widget. It has a builder parameter which gives you the flexibility to list the conversation according to your app's design.
// Example
ConversationsScreen(
  builder: (conversations, isLoading) => ListView.separated(
    separatorBuilder: (context, index) => SizedBox(height: 20),
    shrinkWrap: true,
    padding: EdgeInsets.symmetric(horizontal: 10, vertical: 10),
    itemCount: conversations.length,
    itemBuilder: (context, index) => Container(
      decoration: BoxDecoration(
        borderRadius: BorderRadius.circular(10),
        color: Colors.white,
        boxShadow: [
          BoxShadow(
            color: Colors.grey.withOpacity(0.5),
            spreadRadius: 1,
            blurRadius: 2,
            offset: Offset(0, 1),
          )
        ],
      ),
      padding: EdgeInsets.all(10),
      child: ListTile(
        onTap: () {
          //TODO: Navigate to chat screen
        },
        leading: CircleAvatar(
          backgroundImage:
              NetworkImage(conversations[index].otherUser.profileUrl ?? ''),
        ),
        title: Text(conversations[index].otherUser.name),
        subtitle: Text(conversations[index].lastMessage),
        trailing: Container(
          padding: EdgeInsets.all(5),
          decoration: BoxDecoration(
            color: Colors.blue,
            shape: BoxShape.circle,
          ),
          child: Text(
            conversations[index].unreadMessageCount.toString(),
            style: TextStyle(color: Colors.white),
          ),
        ),
      ),
    ),
  ),
);
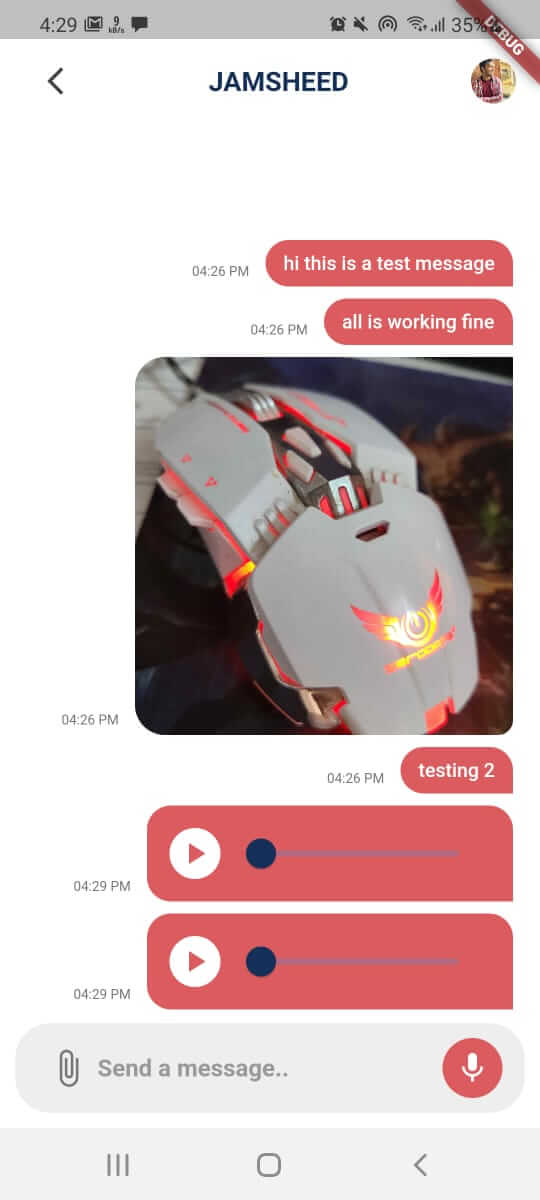
To see messages of a specific conversation, use the ChatScreen widget. It has an appBarBuilder(required) and
bubbleBuilder(optional) parameter which gives you the flexibility to create custom appbar and chat bubbles according to your app's design.
ChatScreen(
 conversationModel: conversationModel,
 showMicButton: false, //It is true by default, set it to false if you don't want voice messages
 appBarBuilder: ((currentUser, otherUser) => AppBar()), //Builder to create custom AppBar
);
More is about to Come:
Features that will be added later: