
होम-फाई
Flutter, Adafruit IO और Esp32 डेवलपमेंट बोर्ड का उपयोग करके होम ऑटोमेशन ऐप।

- स्टार
- 173
- फ़ोर्क
- 66
- अंतिम पुश (UTC)
- 5 नव॰ 2024
- प्रोजेक्ट स्थिति
- सक्रिय
मूल README
यह अंग्रेज़ी मूल स्नैपशॉट है। नवीनतम सामग्री GitHub पर देखें।
Home-Fi: Smart Home Automation System


A modern home automation solution combining Flutter's beautiful UI with ESP32's powerful capabilities and Adafruit IO's reliable cloud infrastructure.
✨ Features
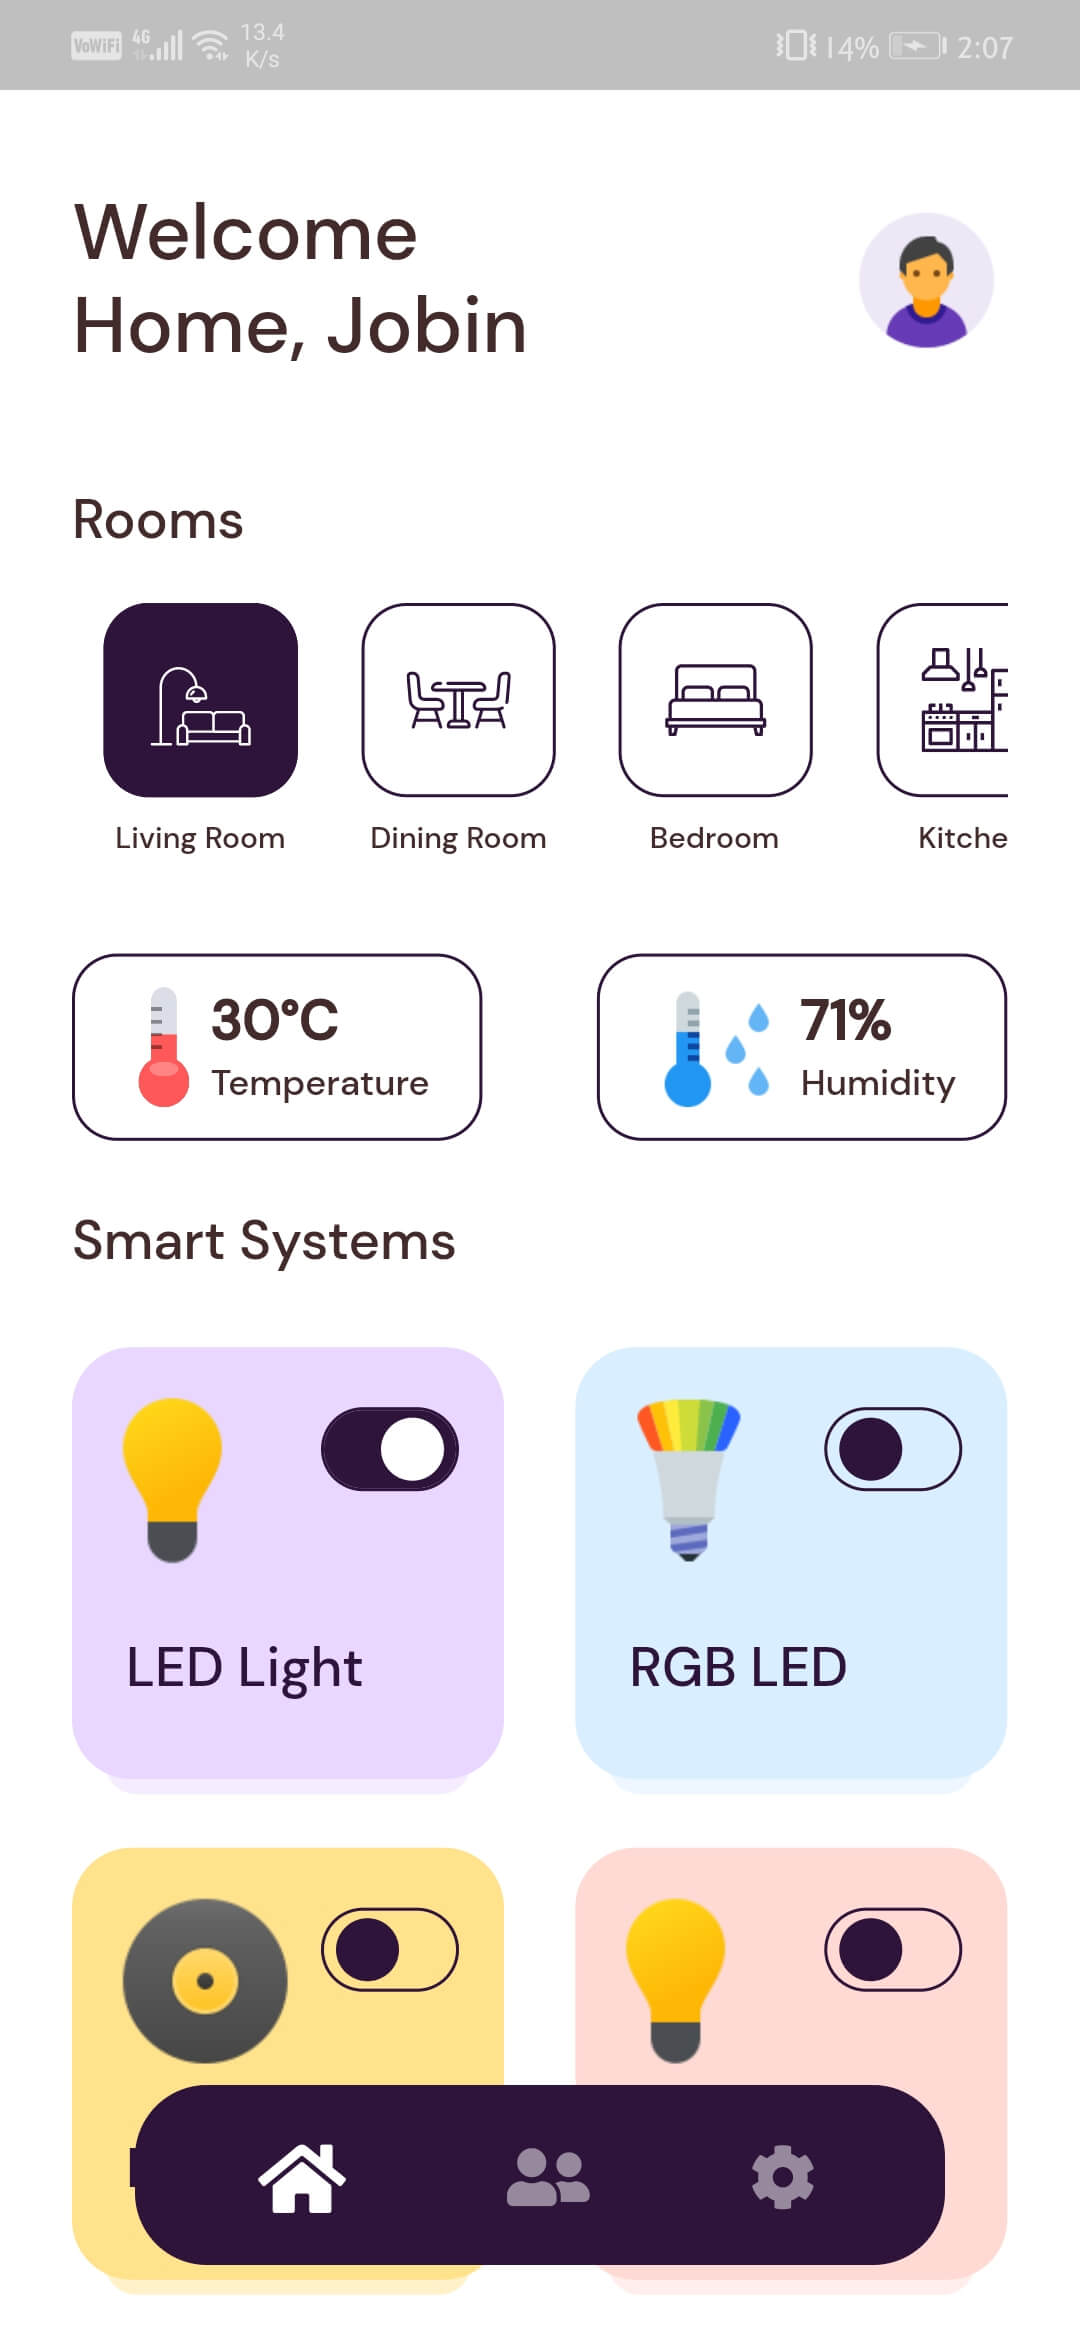
- 🏠 Control multiple home appliances remotely
- 💡 RGB light control with color picker
- 📊 Real-time device status monitoring
- 🌡️ Temperature and humidity sensing
- 🔐 Secure communication with Adafruit IO
- 📱 Beautiful, responsive Flutter UI
- ⚡ Low-latency ESP32 control
🎯 System Architecture
Mobile App (Flutter) <-> Adafruit IO Cloud <-> ESP32 Device <-> Home Appliances
- Flutter App: Handles user interface and cloud communication
- Adafruit IO: Manages device state and real-time data
- ESP32: Controls physical devices and sensors
🚀 Getting Started
Prerequisites
- Flutter SDK (2.0 or higher)
- Arduino IDE
- ESP32 Development Board
- Adafruit IO Account
- Basic electronic components (relays, RGB LED, sensors)
Installation
-
Clone the repository
git clone https://github.com/yourusername/home-fi.git cd home-fi -
Set up Flutter app
flutter pub get -
Configure Adafruit IO
- Create an Adafruit IO account
- Set up required feeds (switches, RGB values, sensor data)
- Copy your AIO Key
-
ESP32 Setup
- Install required libraries in Arduino IDE
- Update credentials in ESP32 code
#define IO_USERNAME "your_username" #define IO_KEY "your_aio_key" -
Run the app
flutter run
📱 User Interface
 |
 |
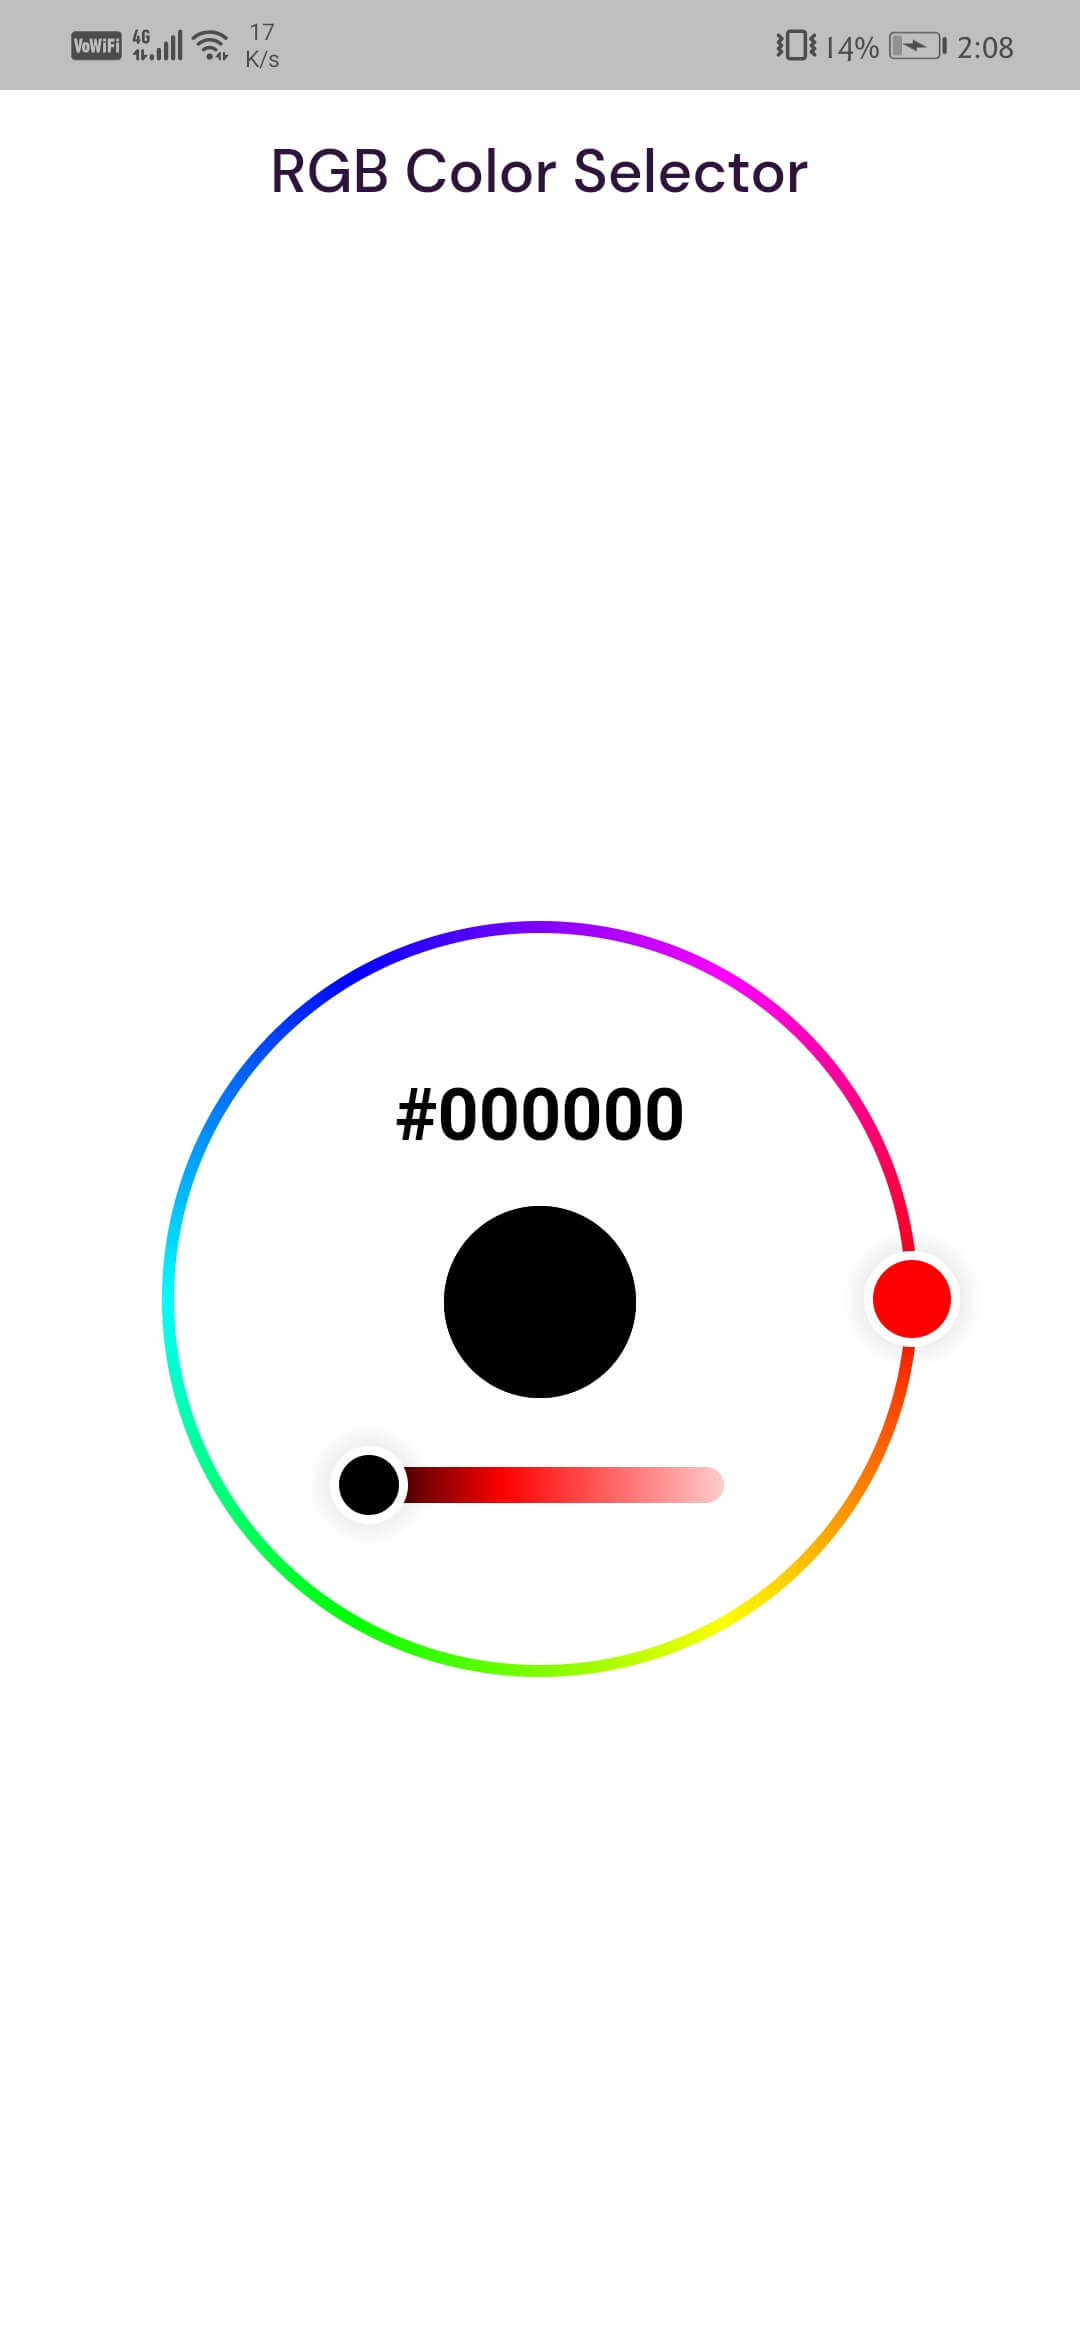 |
| Splash Screen | Dashboard | RGB Control |
🛠️ Hardware Setup
Components Required
- ESP32 Development Board
- Relay Module (for appliance control)
- RGB LED Strip
- DHT11/DHT22 Sensor (optional)
- Power Supply
- Connecting Wires
📡 Communication Protocol
The system uses MQTT protocol for communication:
- Topics: Organized by device type (switches/rgb/sensors)
- Message Format: JSON payloads for complex data
- Update Frequency: Real-time for switches, 1s for sensor data
🤝 Contributing
Contributions are welcome! Please feel free to submit a Pull Request.
- Fork the project
- Create your feature branch (
git checkout -b feature/AmazingFeature) - Commit your changes (
git commit -m 'Add some AmazingFeature') - Push to the branch (
git push origin feature/AmazingFeature) - Open a Pull Request
📝 License
This project is licensed under the MIT License - see the LICENSE file for details.
🙏 Acknowledgments
- Flutter team for the amazing framework
- Adafruit for their reliable IoT platform
- ESP32 community for their extensive documentation
☕ Support


GitHub लेखक
Jobin Biju ↗
भाषाएँDartC++SwiftKotlinObjective-C
श्रेणियाँ
उपयोग की गई निर्भरताएँ
निर्भरता सूची 13 आइटम
- flutter
{"sdk":"flutter"} - cupertino_icons
^1.0.3 - flutter_circle_color_picker
^0.3.0 - flutter_dotenv
^5.0.0 - flutter_svg
^0.22.0 - font_awesome_flutter
^9.1.0 - get
^4.1.4 - get_storage
^2.0.2 - google_fonts
^2.1.0 - http
^0.13.3 - lottie
^1.0.1 - mqtt_client
^9.3.1 - flutter_testडेवलपमेंट
{"sdk":"flutter"}
रैंकिंग
अपने प्रोजेक्ट के लिए रिपॉज़िटरी कैसे चुनें?
उपयोग के अनुसार छाँटें, गतिविधि की तुलना करें और अपनाने से पहले मूल प्रोजेक्ट की आवश्यकताएँ जाँचें।
- नाम, लेखक या विवरण से खोजें और तकनीकी विषय से परिणाम सीमित करें।
- स्टार, फ़ोर्क और हाल के पुश की तुलना करें। स्टार रुचि दर्शाते हैं, गुणवत्ता की गारंटी नहीं।
- उपयोग से पहले GitHub पर README, लाइसेंस और Issues जाँचें।
स्रोत और रखरखाव
“A repository is the most basic element of GitHub.”
GitHub Docs — About repositories ↗