

 v0.0.5
json_to_form
Flutter 플러그인은 JSON 형식을 사용자 정의 형식으로 변환합니다.
44좋아요 3230일 다운로드140Pub 점수
AndroidiOSWebmacOSWindowsLinux
JSON을 폼으로 변환하는 데 사용할 수 있는 플러터 플러그인

아래는 영문 원문 스냅샷입니다. 최신 내용은 GitHub에서 확인하세요.
A flutter plugin to use convert Json to Form
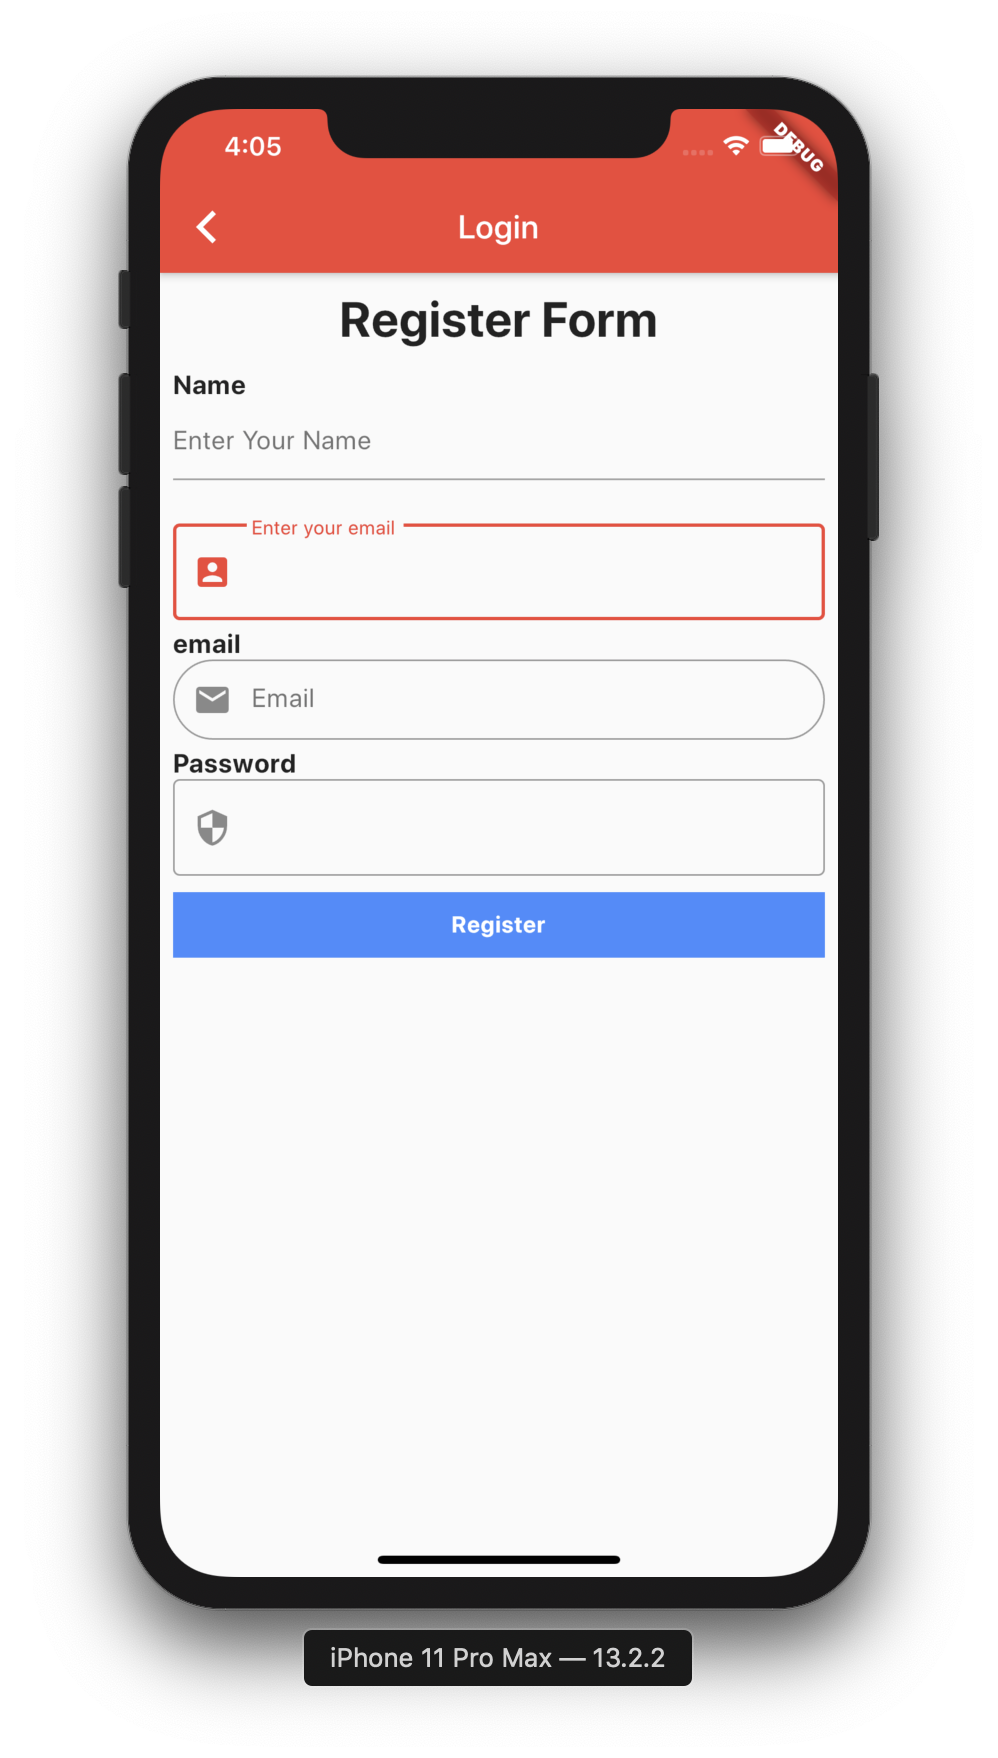
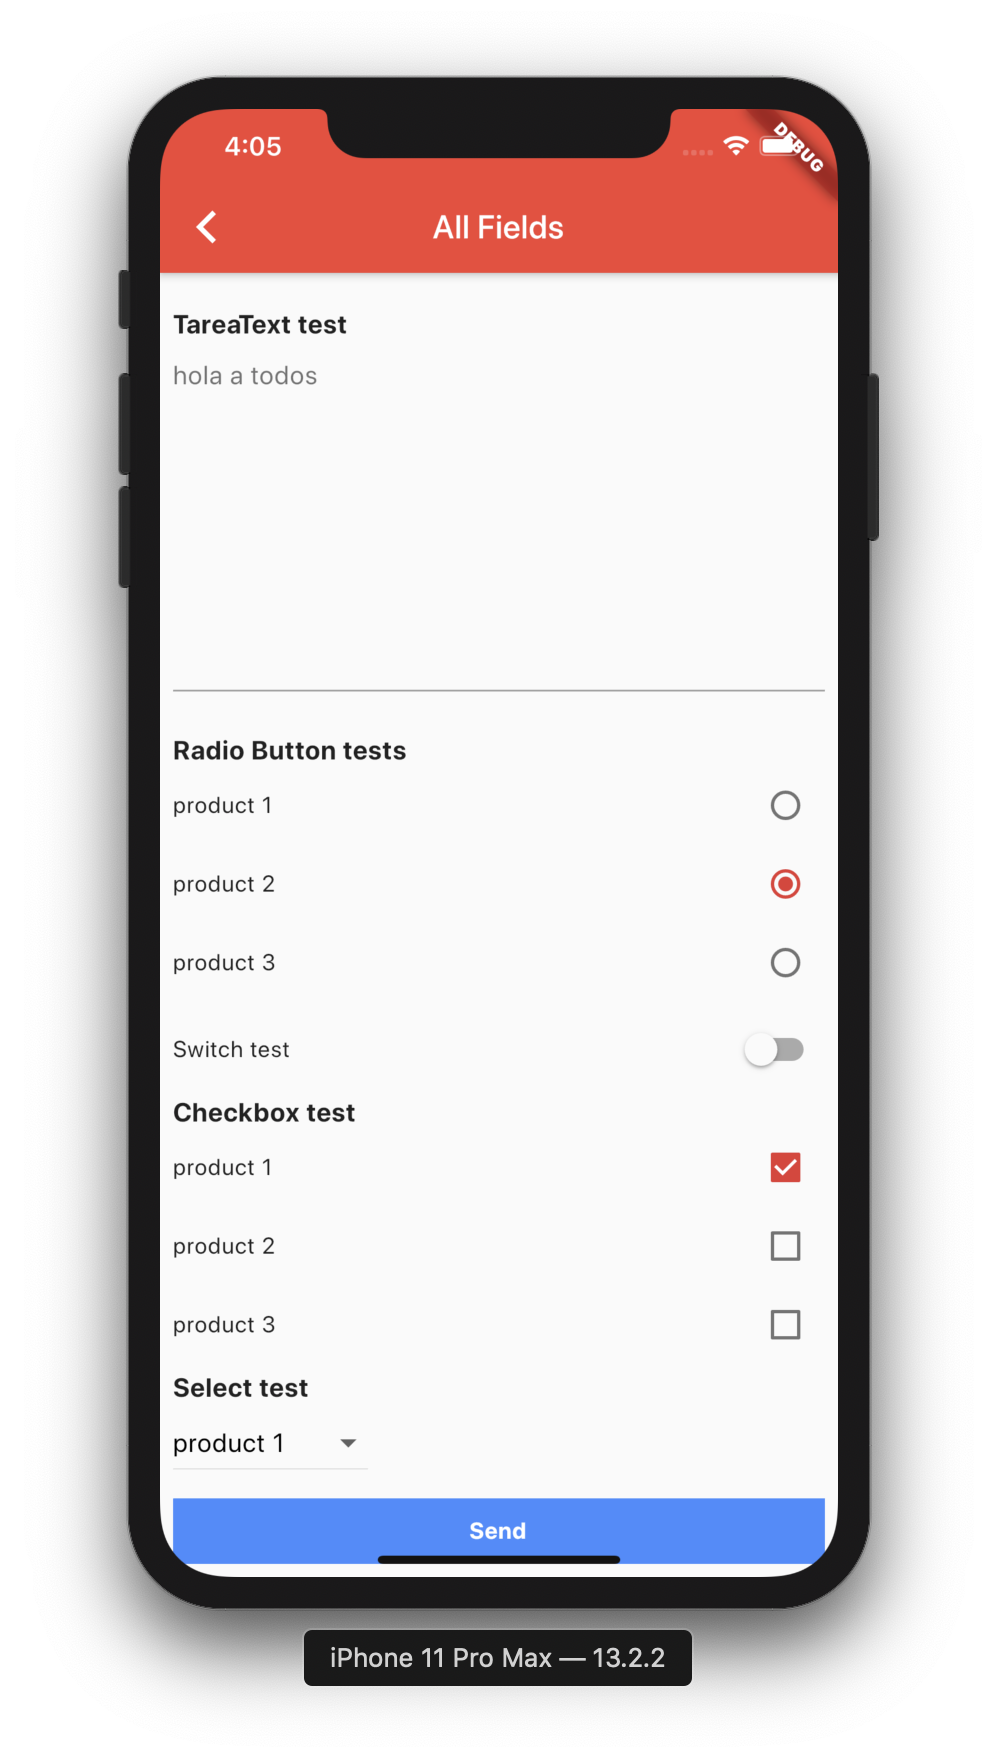
dependencies:
  json_to_form: "^0.0.1"
$ flutter packages get
import 'package:json_to_form/json_schema.dart';
new JsonSchema(
    decorations: decorations,
    form: form,
    onChanged: (dynamic response) {
        this.response = response;
    },
    actionSave: (data) {
        print(data);
    },
    autovalidateMode: AutovalidateMode.always,
    buttonSave: new Container(
        height: 40.0,
        color: Colors.blueAccent,
        child: Center(
            child: Text("Login",style:TextStyle(color: Colors.white,fontWeight: FontWeight.bold)),
        ),
    ),
),
Create Form String
String formString = json.encode({
    'title': 'form example',
    'description':'',
    'fields': [
        ...
    ]
});
Create Form Map
Map formMap = {
    'title': 'form example',
    'description':'',
    'fields': [
        ...
    ]
};
1.- Types?
// Example for json string
// to start with a default value you can add the value attribute
  String formString = json.encode({
    'fields': [
        {
             'key': 'inputKey',
             'type': 'Input',
             'label': 'Hi Group',
             'placeholder': "Hi Group flutter",
             'required': true
        },
        {
             'key': 'inputKey',
             'type': 'Input',
             'label': 'Initial Value',
             'value': 'Hello'
             'required': true
        },
    ]
 });
// Example for json Map
// in Map has Attributes validation and decoration

//important to receive 2 parameters in function of Validation
String validationExample(field, value) {
   if (value.isEmpty) {
     return 'Please enter some text';
   }
   return null;
}

Map formMap = {
    'fields': [
        {
                'key': 'inputKey',
                'type': 'Input',
                'label': 'Hi Group',
                'placeholder': "Hi Group flutter",
                'validator': 'digitsOnly',
                'required': true,
                'decoration': InputDecoration(
                          prefixIcon: Icon(Icons.account_box),
                          border: OutlineInputBorder(),
                ),
                'validation':validationExample,
                'keyboardType':TextInputType.number
        },
    ]
 };
1.- How can I place validations for my form String? Excellent :D.
Map decorations = {
    'inputKey': InputDecoration(
      labelText: "Enter your email",
      prefixIcon: Icon(Icons.account_box),
      border: OutlineInputBorder(),
    ),
  };

Map validations = {
    'inputKey': validationExample,
}

dynamic response;
new JsonSchema(
    decorations: decorations,
    validations: validations,
    form: formString,
    onChanged: (dynamic response) {
        this.response = response;
    },
    actionSave: (data) {
        print(data);
    },
    buttonSave: new Container(
        height: 40.0,
        color: Colors.blueAccent,
        child: Center(
            child: Text("Login",style:TextStyle(color: Colors.white,fontWeight: FontWeight.bold)),
        ,
    ),
)
 String formString = json.encode({
    'fields': [
         {
                'key': 'radiobutton1',
                'type': 'RadioButton',
                'label': 'Radio Button tests',
                'value': 2,
                'items': [
                  {
                    'label': "product 1",
                    'value': 1,
                  },
                  {
                    'label': "product 2",
                    'value': 2,
                  },
                  {
                    'label': "product 3",
                    'value': 3,
                  }
                ]
         },
    ],
 });
 String formString = json.encode({
    'fields': [
         {
                 'key': 'switch1',
                 'type': 'Switch',
                 'label': 'Switch test',
                 'value': false,
         },
    ],
 });
 String formString = json.encode({
    'fields': [
        {
                'key': 'checkbox1',
                'type': 'Checkbox',
                'label': 'Checkbox test',
                'items': [
                  {
                    'label': "product 1",
                    'value': true,
                  },
                  {
                    'label': "product 2",
                    'value': false,
                  },
                  {
                    'label': "product 3",
                    'value': false,
                  }
                ]
        }
    ],
 });
 String formString = json.encode({
    'fields': [
         {
                 'key': 'select1',
                 'type': 'Select',
                 'label': 'Select test',
                 'value':'product 1',
                 'items': [
                   {
                     'label': "product 1",
                     'value': "product 1",
                   },
                   {
                     'label': "product 2",
                     'value': "product 2",
                   },
                   {
                     'label': "product 3",
                     'value': "product 3",
                   }
                 ]
         }
    ],
 });
when text is added to the TextField, add field called response
// initial form_send_email
[{"type":"Input","label":"Subject","placeholder":"Subject"},{"type":"TextArea","label":"Message","placeholder":"Content"}]

// add text (hi) in TextField Message, update dynamic response; and add field called response
[{type: Input, label: Subject, placeholder: Subject, value: hello}, {type: TextArea, label: Message, placeholder: Content, value: hi }]
import 'package:json_to_form/json_to_form.dart';
  String form = json.encode([
    {
      'type': 'Input',
      'title': 'Hi Group',
      'placeholder': "Hi Group flutter"
    },
    {
      'type': 'Password',
      'title': 'Password',
    },
    {
      'type': 'Email',
      'title': 'Email test',
      'placeholder': "hola a todos"
    },
    {
      'type': 'TareaText',
      'title': 'TareaText test',
      'placeholder': "hola a todos"
    },
  ]);
 String form = json.encode([
    {
      'type': 'RadioButton',
      'title': 'Radio Button tests',
      'value': 2,
      'list': [
        {
          'title': "product 1",
          'value': 1,
        },
        {
          'title': "product 2",
          'value': 2,
        },
        {
          'title': "product 3",
          'value': 3,
        }
      ]
    },
  ]);
String form = json.encode([
    {
      'type': 'Switch',
      'title': 'Switch test',
      'switchValue': false,
    },
  ]);
String form = json.encode([
    {
      'type': 'Checkbox',
      'title': 'Checkbox test 2',
      'list': [
        {
          'title': "product 1",
          'value': true,
        },
        {
          'title': "product 2",
          'value': true,
        },
        {
          'title': "product 3",
          'value': false,
        }
      ]
    },
  ]);
 String form_send_email = json.encode([
    {'type': 'Input', 'title': 'Subject', 'placeholder': "Subject"},
    {'type': 'TareaText', 'title': 'Message', 'placeholder': "Content"},
  ]);
 dynamic response;

 @override
   Widget build(BuildContext context) {
     return new Scaffold(
       appBar: new AppBar(
         title: new Text(widget.title),
       ),
       body: new SingleChildScrollView(
         child: new Container(
           child: new Column(children: <Widget>[
             new CoreForm(
               form: form,
               onChanged: (dynamic response) {
                 this.response = response;
               },
             ),
             new RaisedButton(
                 child: new Text('Send'),
                 onPressed: () {
                   print(this.response.toString());
                 })
           ]),
         ),
       ),
     );
   }
When there is a change in the form, the (dynamic response;) is updated,
               onChanged: (dynamic response) {
                 this.response = response;
               },
when text is added to the TextField, add field called response
// initial form_send_email
[{"type":"Input","title":"Subject","placeholder":"Subject"},{"type":"TareaText","title":"Message","placeholder":"Content"}]

// add text (hi) in TextField Message, update dynamic response; and add field called response
[{type: Input, title: Subject, placeholder: Subject}, {type: TareaText, title: Message, placeholder: Content, response: hi }]
For help getting started with Flutter, view our online documentation.
For help on editing package code, view the documentation.
의존성 목록 2 개
{"sdk":"flutter"}{"sdk":"flutter"}사용 목적에 따라 검색하고 개발 활동을 비교한 뒤 원본 저장소에서 요구 사항을 확인하세요.
“A repository is the most basic element of GitHub.”
GitHub Docs — About repositories ↗