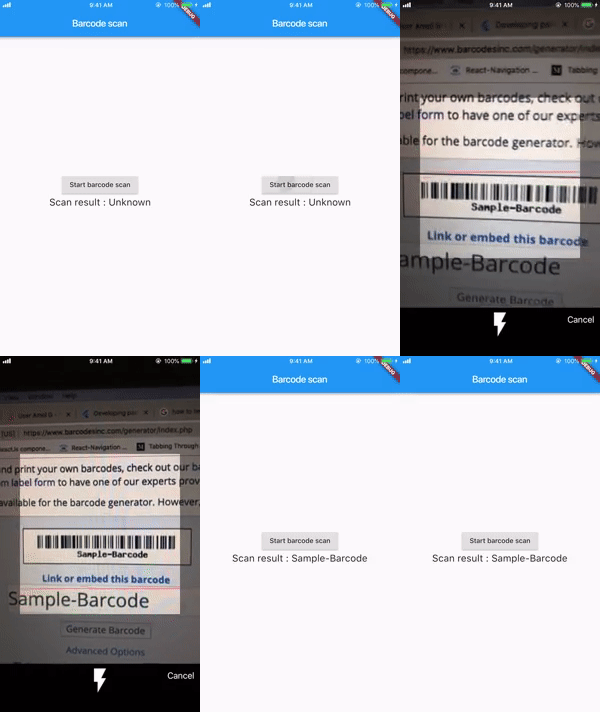
Package selection guidance compiled from public package information, community data, and project usage.
A Flutter plugin enabling barcode and QR code scanning on Android and iOS devices. It provides a simple interface to integrate camera-based scanning functionality into apps, supporting various barcode formats including QR codes. The plugin leverages native camera APIs for reliable performance and real-time scanning. Ideal for applications requiring quick data capture from barcodes or QR codes, such as inventory systems, ticketing, or product lookup tools.
Use cases
Inventory management
Ticket scanning
Product information lookup
User authentication via QR codes
Mobile payments
Key features
Real-time barcode scanning
Supports QR codes and multiple barcode types
Cross-platform (Android & iOS)
Simple API integration
Camera-based scanning with automatic focus
Suitable for
Retail apps
Event ticketing systems
Logistics and warehousing
Mobile payment platforms
Quick data entry interfaces
Considerations
Requires camera permissions
May need background execution handling
Performance varies by device hardware
Limited customization of scan UI
Depends on native camera access stability
Original README
Original README snapshot from the linked source repository. Visit the repository for the latest content.
flutter_barcode_scanner
A plugin for Flutter apps that adds barcode scanning support on both Android and iOS.
Try example
Just clone or download the repository, open the project in Android Studio/ VS Code, open pubspec.yaml and click on Packages get.
Connect device and hit run.
To run on iPhone you need to run from Xcode first time and just make pod install in example/ios then run from Xcode.
Getting Started
Follow the steps for Android and iOS
PLEASE FOLLOW iOS STEPS CAREFULLY
Android
:zap: Don't worry, you don't need to do anything.
iOS - Requires Swift support
Deployment target : 12
1. Fresh start:
Create a new flutter project. Please check for Include swift support for iOS code.
After creating new flutter project open /ios project in Xcode and set minimum deployment target to 12
and set Swift version to 5.
After setting up the deployment target and swift version, close the Xcode then run pod install in /ios in flutter project.
You have done with basic configuration now proceed to section How to use.
2. Adding to existing flutter app:
If your existing ios code is Swift then you just need to do following.
Set minimum deployment target to 12 and set Swift version to 5.
Close the Xcode and run pod install in /ios in flutter project.
Now proceed to section How to use.
If your existing ios code is Objective-C then you need to do following.
Create a new flutter project with same name at different location (Don't forget to check Include swift support for iOS code while creating)
Just copy newly created /ios folder from project and replace with existing /ios.
Open ios project in Xcode and set minimum deployment target to 12 and set Swift version to 5.
Run pod install in /ios
Note: If you did any changes in ios part before, you might need to make these configuration again
How to use ?
To use on iOS, you will need to add the camera usage description.
To do that open the Xcode and add camera usage description in Info.plist.
COLOR_CODE is hex-color which is the color of line in barcode overlay you can pass color of your choice,
CANCEL_BUTTON_TEXT is a text of cancel button on screen you can pass text of your choice and language,
isShowFlashIcon is bool value used to show or hide the flash icon,
scanMode is a enum in which user can pass any of { QR, BARCODE, DEFAULT }, if nothing is passed it will consider a default value which will be QR.
It shows the graphics overlay like for barcode and QR.
NOTE: Currently, scanMode is just to show the graphics overlay for barcode and QR. Any of this mode selected will scan both QR and barcode.
Continuous scan
If you need to scan barcodes continuously without closing camera use FlutterBarcodeScanner.getBarcodeStreamReceiver
params will be same like FlutterBarcodeScanner.scanBarcode
e.g.
FlutterBarcodeScanner.getBarcodeStreamReceiver("#ff6666", "Cancel", false, ScanMode.DEFAULT)
         .listen((barcode) {
         /// barcode to be used
         });
Contribution:
would :heart: to see any contribution, give :star: if you like