搜尋套件、儲存庫與 APP 分類

floating_view 封面
套件詳情v1.0.4

floating_view

一個實現 YouTube 折疊視窗行為的外掛程式。

AndroidiOSWebmacOSWindowsLinux
近 30 天下載
63
喜歡數
18
Pub 分數
160

安裝套件

flutter pub add floating_view

套件介紹

根據套件公開資料產生的選型評估,僅供參考。

Floating View 是一個 Flutter 插件,可實現類似畫中畫的功能,讓小部件能浮在其他內容之上——類似於 YouTube 的收縮視窗行為。它支援多個平台,包括 Android、iOS、Web、macOS、Windows 和 Linux。開發者可以建立可拖曳、可調整大小且具互動性的浮動視窗,為需要持續 UI 元素的應用程式提供更佳的使用者體驗。該插件可透過簡單的指令列安裝,順暢整合至現有的 Flutter 專案中。

適用情境

  • 實現持久聊天組件
  • 建立用於媒體播放的浮動控制項
  • 使用小覆蓋面板實現多任務處理
  • 始終可見的導航工具
  • 設計互動式浮動選單

主要特色

  • 可拖曳且可調整大小的浮動視窗
  • 跨平台支援(Android、iOS、Web、macOS、Windows、Linux)
  • 與 Flutter 小工具系統的簡單整合
  • 可自定義的外觀和行為
  • 支援觸控和指針互動

適合對象

  • 開發媒體應用的開發者
  • 需要持久化UI疊加層的應用
  • 多任務處理或注重生產力的應用程式
  • 尋求創新互動模式的UI設計師
  • 需要畫中畫功能的專案

使用建議

  • 在某些作業系統上可能需要特定於平台的權限
  • 複雜嵌套組件帶來的效能影響
  • 部分平台的原生動畫支援有限
  • 全螢幕版面可能存在的UI衝突
  • 需要仔細處理生命週期事件

原始 README

以下為關聯原始碼儲存庫的 README 原文快照,最新內容請造訪原始碼儲存庫。

FloatingView Package

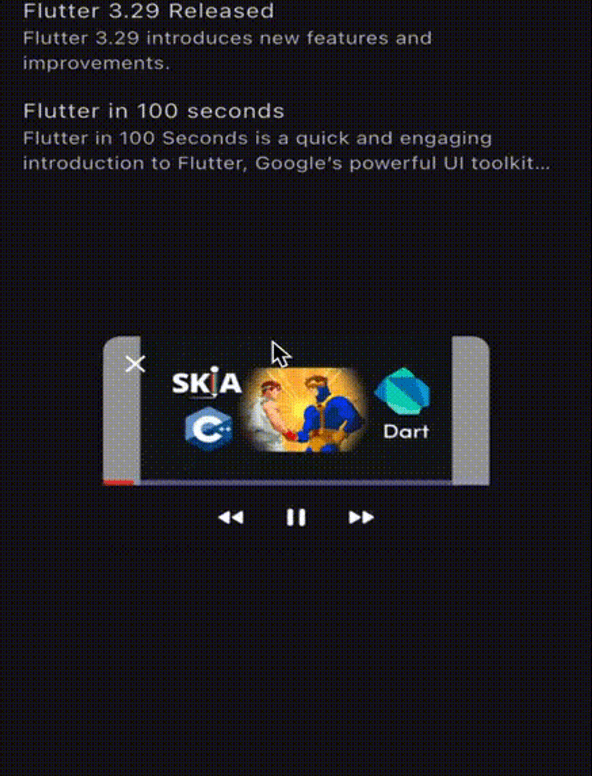
The FloatingView package enables you to create a floating window similar to YouTube's floating video feature. This allows the window to float on the screen and be draggable while scrolling.

The example app running in iOS

Table of Contents

Integration Steps

To integrate the package into your Flutter application, follow these steps:

  1. Wrap the Screen:

    Wrap the screen where you want to display the FloatingView:

    late final FloatingController _controller = FloatingController(
        context,
        initialPosition: FloatingPosition.bottomLeft,
    );
    
    @override
    void dispose() {
        super.dispose();
        _controller.dispose();
    }
    
    @override
    Widget build(BuildContext context) {
        return FloatingView(
            controller: _controller,
            childBuilder: () => Scaffold(
                body: ItemBuilder(list: dummyList, controller: _controller),
            ),
        );
    }
    

    Note: FloatingView will disappear when changing routes. To display it across routes, wrap your desired route screen with the FloatingView and use the same controller. The controller can be passed down in the widget tree or stored in state management solutions such as BLoC, Provider, etc. The FloatingView will be passed down across the screen using the Hero widget, which is currently the only option available.

    Navigator.push(
        context,
        MaterialPageRoute(
            builder: (context) => FloatingView(
                controller: _controller,
                childBuilder: () => NavigationTestScreen(),
            ),
        ),
    );
    
  2. Initialize the FloatingView:

    Initialize the controller and store the widget you want to display, such as a video, screen, or text. Here is an example of using FloatingView with a Video Player or a simple screen:

    void onTap(dynamic data) {
        switch (data) {
            case Video _:
                VideoPlayerController? videoController;
                videoController = VideoPlayerController.asset(data.url)
                    ..initialize().then((_) {
                        videoController?.play();
                    });
    
                widget.controller.initialize(
                    maxChild: MaximizedVideo(
                        videoController: videoController,
                        floatingController: widget.controller,
                        video: data,
                    ),
                    minChild: MinimizedVideo(
                        videoController: videoController,
                        floatingController: widget.controller,
                        video: data,
                    ),
                    onDispose: () {
                        videoController?.dispose();
                    },
                );
                break;
    
            case News _:
                widget.controller.initialize(
                    maxChild: MaximizedNewsScreen(
                        news: data,
                        controller: widget.controller,
                    ),
                    minChild: MinimizedNewsScreen(
                        news: data,
                        controller: widget.controller,
                    ),
                    onDispose: () {},
                );
                break;
    
            default:
                break;
        }
    }
    

    Note: controller.initialize() will run the previous onDispose() method to clear the previous controller data if you initialize another FloatingView while having an active one.

  3. Using the APIs:

    You can use the passed-down controller to control the FloatingView state like this:

    Padding(
        padding: const EdgeInsets.fromLTRB(15, 15, 15, 0),
        child: Row(
            children: [
                GestureDetector(
                    onTap: () {
                        widget.controller.close();
                    },
                    child: Icon(Icons.close, size: 24),
                ),
                const SizedBox(width: 20),
                GestureDetector(
                    onTap: () {
                        widget.controller.toggleSize();
                    },
                    child: Icon(Icons.aspect_ratio, size: 24),
                ),
            ],
        ),
    );
    
Available API Methods in FloatingController
  1. Initialize the Floating View:

    controller.initialize({
        required Widget maxChild,
        required Widget minChild,
        required VoidCallback onDispose,
    })
    
  2. Close an Active Floating View:

    controller.close()
    
  3. Toggle the Floating View Size:

    controller.toggleSize()
    
  4. #Dispose the controller:

    controller.dispose()
    

Contributing

Contributions are welcome! Please open an issue or submit a pull request if you have any improvements or bug fixes.

License

This project is licensed under the MIT License. See the LICENSE file for details.

Support Me

If you find this package helpful and want to support its development, consider making a donation. Thank you for your support!

Support via PayPal

所屬分類

原始碼儲存庫

使用此套件的專案

暫無相關資料。