Orientação gerada a partir de informações públicas. Apenas para referência.
O Tooltip Alinhado é um pacote do Flutter que fornece um componente de tooltip flexível e multidirecional capaz de exibir qualquer conteúdo personalizado. Ele posiciona inteligentemente o tooltip em relação ao widget-alvo, garantindo visibilidade ótima em diferentes orientações de tela e layouts. O tooltip se adapta dinamicamente ao espaço disponível, evitando transbordamento e mantendo a legibilidade. Projetado para interfaces limpas e acessíveis, suporta várias plataformas, incluindo móvel, web e desktop. Ideal para melhorar a experiência do usuário oferecendo informações contextuais sem poluir a interface.
Casos de uso
Exibindo texto de ajuda em formulários
Mostrando detalhes adicionais ao passar o mouse ou tocar
Melhorando a acessibilidade com dicas contextuais
Fornecendo feedback interativo em painéis
Guiando usuários por interfaces complexas
Principais recursos
Posicionamento multi-direcional
exibição de conteúdo personalizável
Tratamento automático de excesso
Compatibilidade multiplataforma
Suporta interações de toque e hover
Alinhamento e deslocamento configuráveis
Indicado para
Desenvolvedores construindo interfaces de usuário acessíveis
Designers que precisam de dicas dinâmicas
Aplicativos que exigem sistemas de ajuda contextual
Painéis interativos e visualizações de dados
Aplicações educacionais ou de introdução
Considerações
Pode exigir espaçamento cuidadoso para evitar sobreposição
Impacto no desempenho com muitas dicas
Necessita de testes em todas as plataformas-alvo
Estilo personalizado exige código adicional
Opções limitadas de animação embutida
README original
Snapshot do README original do repositório-fonte vinculado. Consulte o repositório para o conteúdo mais recente.
aligned_tooltip
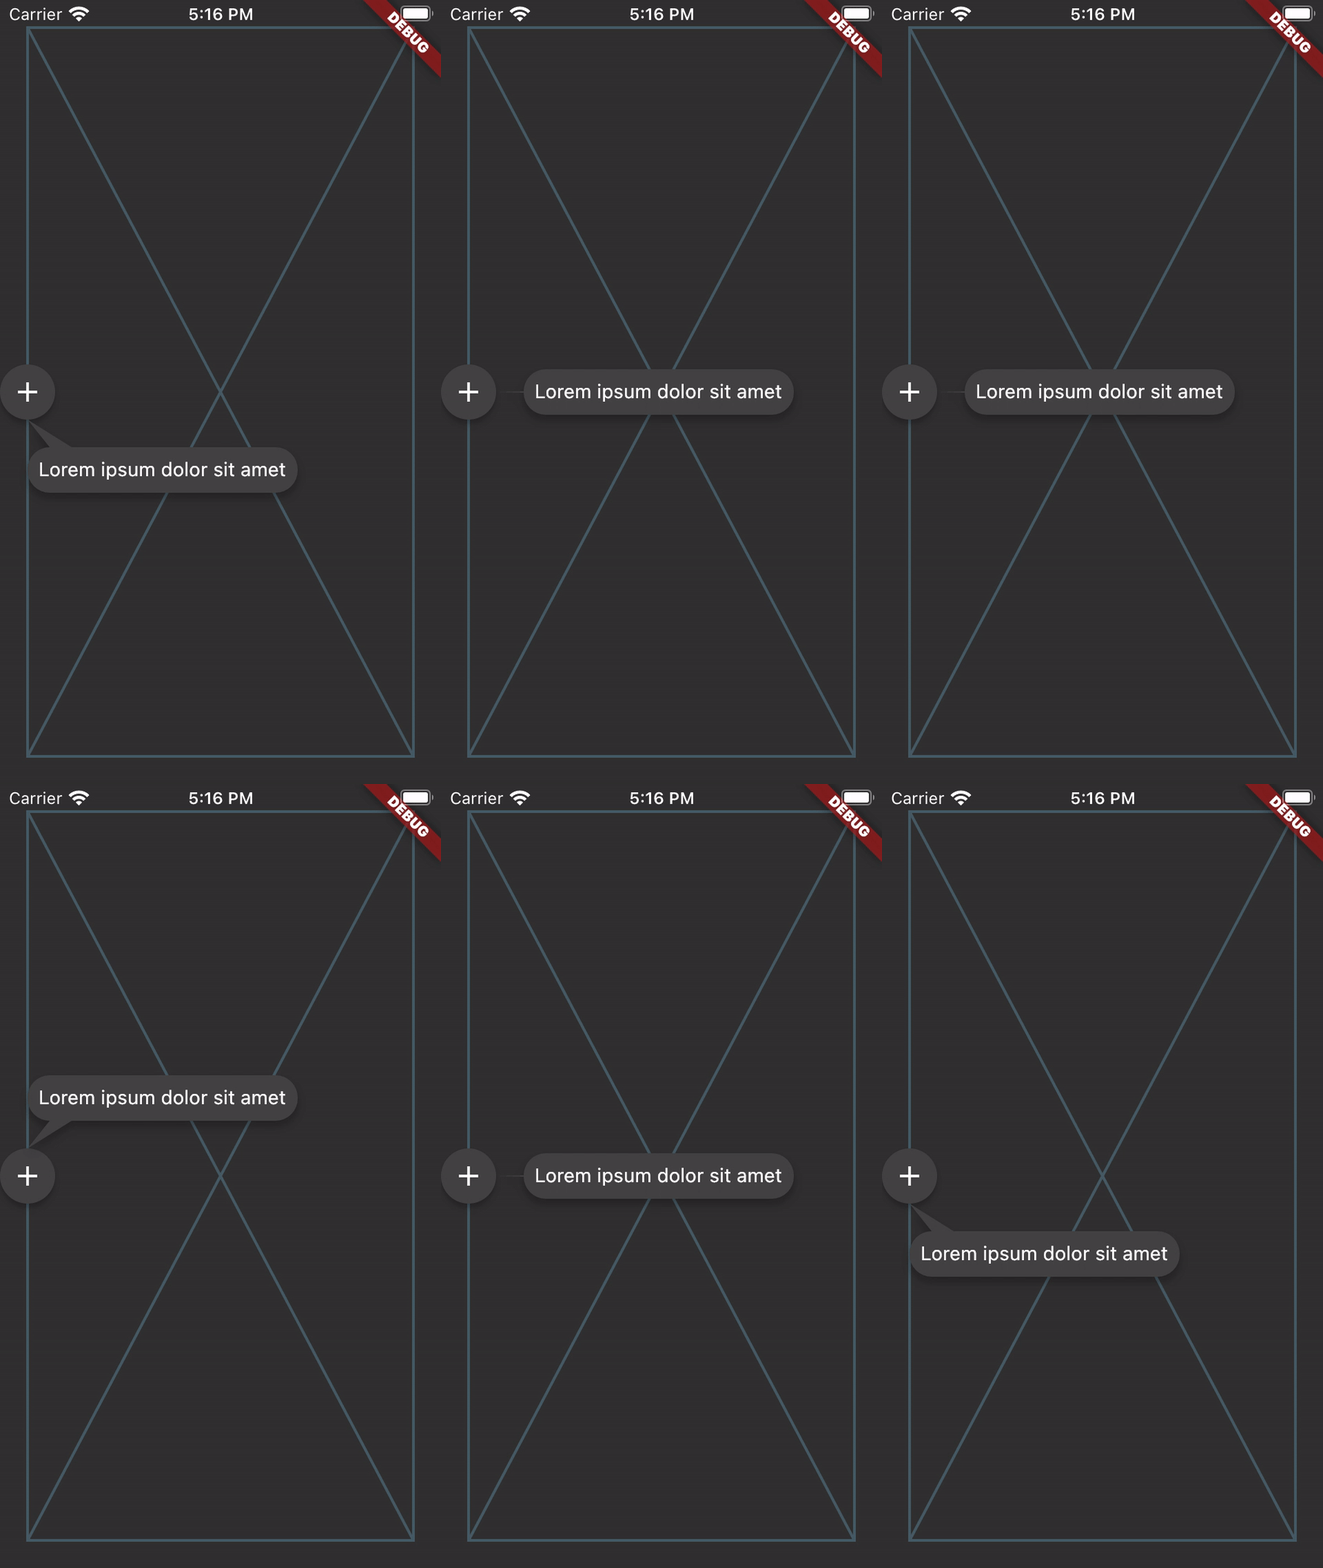
aligned_tooltip gives you more flexibility over the Flutter standard Tooltip by allowing you to set arbitrary content. It also expands on their single axis layout algorithm to fit both vertically and horizontally. The tooltip can be positioned along any axis and will fall back to the opposite side if overflowed.
Breaking
Right now this package is a direct fork of this package: https://pub.dev/packages/just_the_tooltip. We will update this package to support more features in the future.
AlignedTooltip needs two arguments. The direct child widget and the content (of the tooltip). The child widget will be wrapped with a GestureDetector or MouseRegion that is responsible for showing and hiding the content. Further handling of the tooltip state can be managed explicitly through a controller:
If you'd like to create a controller to manage the state of the tooltip, you can do so by defining an instance of a AlignedController and pass it through to constructor.
The controller itself is a ValueNotifier that carries the open/close state of the tooltip. To listen to these changes, add a listener to your controller.
@overridevoidinitState() {
// Programatically display tooltip after two secondsFuture.delayed(constDuration(seconds: 2), () {
tooltipController.showTooltip(immediately: false);
});
tooltipController.addListener(() {
// Prints the enum value of [TooltipStatus.isShowing] or [TooltipStatus.isHiding]print('controller: ${tooltipController.value}');
});
}
If you'd like to simply react to open or close states, you can pass through onDismiss or onShow callbacks to the default constructor.
If you'd like to keep the user from dismissing the tooltip by clicking on the barrier, you can change barrierDismissible to true which means pressing on the scrim area will not immediately hide the tooltip.
Customization
Modal
You can further define how a Tooltip will show by defining the isModal property. A modal will only open through clicking on the child and close by clicking on the background area (referred to as the skrim here). A non-modal (the default) is a more traditional tooltip opens and closes on hovers.
Note, phone emulators do not implement mouse controls. To test hover states, use a browser.
The fallback used when no mouse region is present but isModal is false is to only open when long pressed.
Tail Builder
If you'd like a custom tail (the nub on the end dialog bubble) drawn on your tooltip, you can pass through your own tailBuilder. The AlignedInterface.defaultTailBuilder (default) shows how to simply draw and return a path for your custom tails:
The library also provides a simple bezier curved tailbuilder AlignedInterface.defaultBezierTailBuilder.
ListViews
The tooltip should also work in lists and follow the target through scrolling. For even more consideration of the available space in ListViews, a ScrollController may be passed to the just_the_tooltip to give the layout algorithm a hint as to how much space is before and after the scroll axis. This allows tooltips that would otherwise overflow to use up space offscreen in one of the scroll directions.
Non-Overlay Tooltip
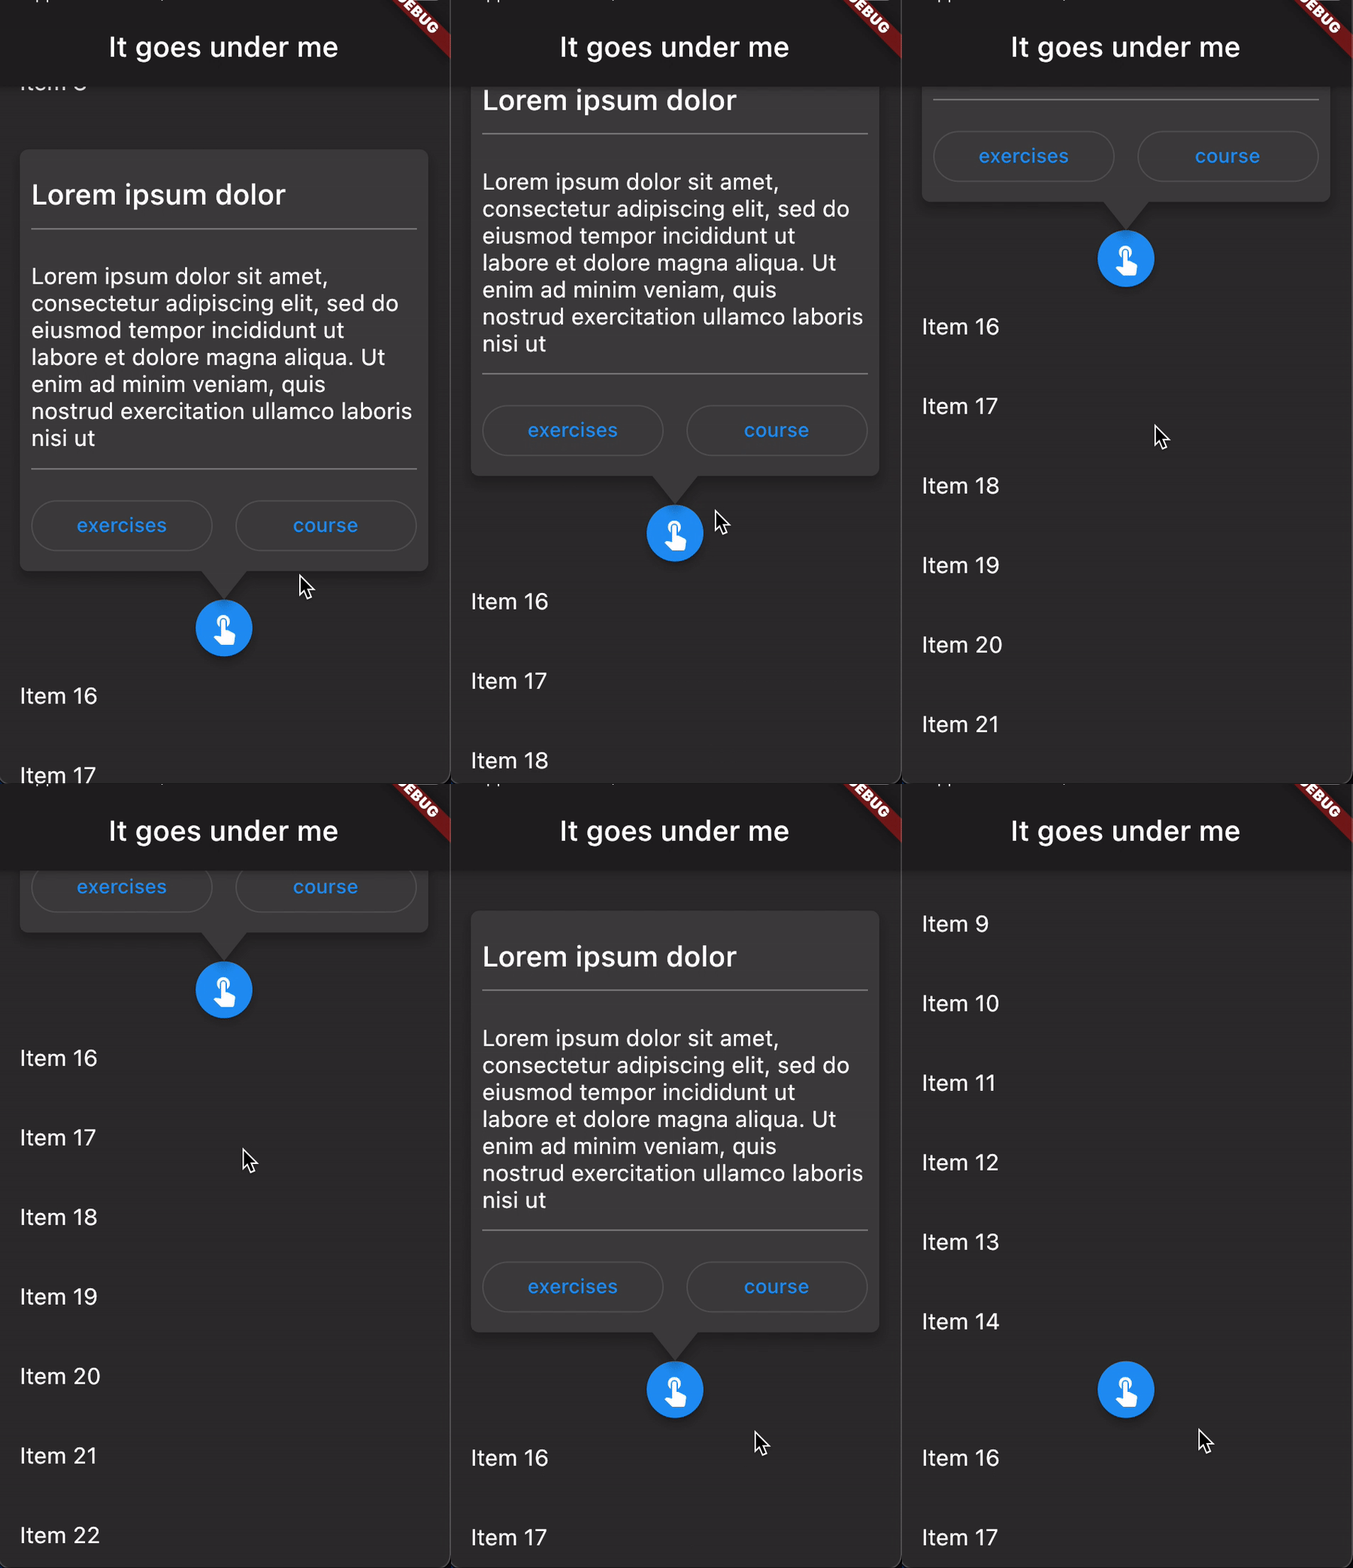
For use cases where the tooltip must be a part the widget tree rather than an overlay there is a AlignedTooltipEntry.
Scaffold(
appBar: AppBar(title: constText('It goes under me')),
body: AlignedTooltipArea(
builder: (context, tooltip, scrim) {
returnStack(
fit: StackFit.passthrough,
children: [
ListView.builder(
itemCount: 30,
itemBuilder: (context, index) {
if (index == 15) {
returnAlignedTooltipEntry(
tailLength: 10.0,
preferredDirection: AxisDirection.down,
isModal: true,
margin: constEdgeInsets.all(20.0),
child: constMaterial(
color: Colors.blue,
shape: CircleBorder(),
elevation: 4.0,
child: Padding(
padding: EdgeInsets.all(8.0),
child: Icon(
Icons.touch_app,
color: Colors.white,
),
),
),
content: Column(
mainAxisSize: MainAxisSize.min,
children: [
Container(
height: 120,
color: Colors.blue,
width: double.infinity,
),
constSizedBox(height: 8),
constText(
'Quia ducimus eius magni voluptatibus ut veniam ducimus. Ullam ab qui voluptatibus quos est in. Maiores eos ab magni tempora praesentium libero. Voluptate architecto rerum vel sapiente ducimus aut cumque quibusdam. Consequatur illo et quos vel cupiditate quis dolores at.',
),
],
),
);
}
returnListTile(title: Text('Item $index'));
},
),
// In the case of no scrim showing, this will return an SizedBox.shrink
scrim,
// In the case of no scrim showing, this will return an SizedBox.shrink
tooltip,
],
);
},
),
);
This will give you the positioned tooltip and scrim (an empty gesture detector that catches tap events and closes the tooltip) for you to enter into the tree however you like. By doing this, you can make tooltips that are visually "under" other parts of the UI such as the appbar in the above example.
API subject to change.
Contributing
Issues and PRs welcome. Unless otherwise specified, all contributions to this lib will be under MIT license.
Help wanted
If you're interested in becoming a contributor with push rights please ping me and we can talk about how to get you started ! :)