Orientação gerada a partir de informações públicas. Apenas para referência.
Simple Animations é um pacote do Flutter que permite aos desenvolvedores criar animações suaves e personalizáveis com código mínimo. Ele oferece uma API limpa e intuitiva para animar widgets usando quadros-chave, interpolação e controles de tempo. Ideal para adicionar efeitos dinâmicos a elementos da interface, como desvanecimentos, deslizes e transições de escala, simplifica a lógica complexa de animação mantendo o desempenho em todas as plataformas. O pacote suporta todas as principais plataformas do Flutter, tornando-o versátil para aplicativos multiplataforma.
Casos de uso
Criando animações de entrada para componentes da interface
Transições de texto e imagem animadas
Construindo interfaces de aplicativos interativas
Adicionando microinterações aos botões
Design de indicadores de carregamento
Implementando animações personalizadas baseadas em rolagem
Principais recursos
Sistema de animação baseado em quadros-chave fácil de usar
Suporte para vários tipos de animação (fade, deslize, escala, etc.)
Curvas de tempo e funções de suavização internas
Compatibilidade multiplataforma
Código de boilerplate mínimo
Integração sem problemas com widgets existentes do Flutter
Indicado para
Desenvolvedores iniciantes a intermediários do Flutter
Aplicativos que exigem feedback visual rico
Designers colaborando com desenvolvedores
Projetos focados na melhoria da experiência do usuário
Prototipagem de interfaces interativas
Considerações
Pode ser necessário aprender conceitos básicos de animação
Impacto no desempenho com animações excessivamente aninhadas
Recursos avançados limitados em comparação com controladores de animação de nível inferior
Mais adequado para animações declarativas em vez de animações complexas baseadas em estado
Não é ideal para animações altamente personalizadas ou baseadas em física
README original
Snapshot do README original do repositório-fonte vinculado. Consulte o repositório para o conteúdo mais recente.
🎬 Simple Animations
Simple Animations simplifies the process of creating beautiful custom animations:
Easily create custom animations in stateless widgets
Animate multiple properties at once
Create staggered animations within seconds
Simplified working with AnimationController instances
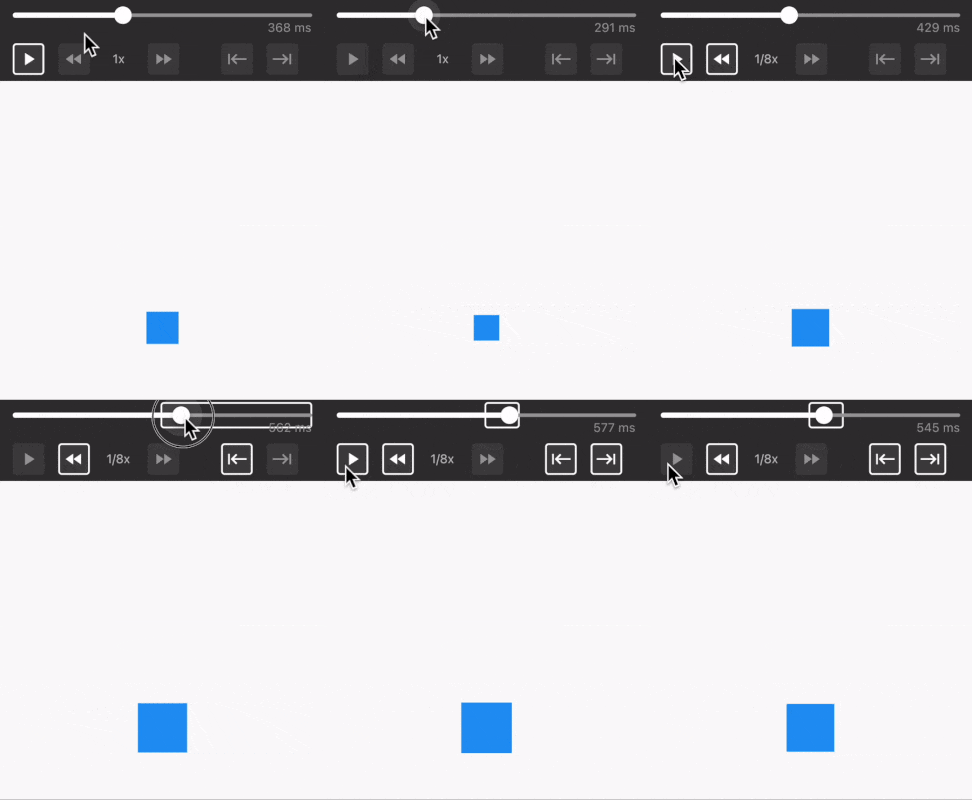
The Animation Developer Tools widget helps you fine-tune animations. It allows you to pause anywhere, scrub through the timeline, speed up, slow down, or focus on a specific part of an animation.
Animation Builder enables developers to craft custom animations with simple widgets.
Essential parts of the animation
You need three things to create an animation:
tween: What value is changing within the animation?
duration: How long does the animation take?
builder: How does the UI respond to the changing value?
Tween
The tween describes your animation. It usually changes a value from A to B. Tweens describe what will happen, but not how fast it will happen.
import'package:flutter/material.dart';
// Animate a color from red to bluevar colorTween = ColorTween(begin: Colors.red, end: Colors.blue);
// Animate a double value from 0 to 100var doubleTween = Tween<double>(begin: 0.0, end: 100.0);
To animate multiple properties, use a Movie Tween.
Duration
The duration is the time the animation takes.
Builder
The builder is a function that is called for each newly rendered frame of your animation. It takes three parameters: context, value and child.
context is your Flutter BuildContext
value is the current value produced by the tween. If your tween is Tween<double>(begin: 0.0, end: 100.0), the value is a double somewhere between 0.0 and 100.0.
child can be a widget that you pass into an Animation Builder widget. This widget stays constant and is not affected by the animation.
How often the builder function is called depends on the animation duration and the frame rate of the device.
Limit the frame rate
All Animation Builder widgets accept an optional fps parameter. This limits how often the widget rebuilds while the animation is running. It can be useful for expensive custom animations where you do not need to rebuild at the device's full frame rate.
PlayAnimationBuilder
The PlayAnimationBuilder is a widget that plays an animation once.
import'package:flutter/material.dart';
import'package:simple_animations/simple_animations.dart';
// Use type `Color?` because ColorTween produces type `Color?`var widget = PlayAnimationBuilder<Color?>(
tween: ColorTween(begin: Colors.red, end: Colors.blue), // define tween
duration: constDuration(seconds: 5), // define duration
builder: (context, value, _) {
returnContainer(
color: value, // use animated color
width: 100,
height: 100,
);
},
);
Delay
By default, animations will play automatically. You can set a delay to make PlayAnimationBuilder wait for a given amount of time.
The delay is ignored when developerMode is enabled because the Animation Developer Tools take over playback control.
Parts of the UI that are not affected by the animated value can be passed as a Widget into the child property. That Widget is available within the builder function.
It will not rebuild when the animated value changes, which improves performance.
If Flutter swaps out a PlayAnimationBuilder with a different PlayAnimationBuilder in a rebuild, it may recycle the first one.
This may lead to undesired behavior.
In such a case, use the key property.
Use CustomAnimationBuilder if the animation widgets discussed above aren't sufficient for your use case. In addition to all parameters mentioned for PlayAnimationBuilder, it lets you actively control the animation.
Control the animation
The control parameter can be set to the following values:
Control.VALUE
Description
stop
Stops the animation at the current position.
play
Plays the animation from the current position to the end.
playReverse
Plays the animation from the current position in reverse to the start.
playFromStart
Resets the animation position to the beginning (0.0) and starts playing to the end.
playReverseFromEnd
Resets the position of the animation to the end (1.0) and starts playing backwards to the start.
loop
Endlessly plays the animation from the start to the end.
mirror
Endlessly plays the animation from the start to the end, then reverses to the start, then plays forward again, and so on.
You can bind the control value to a state variable and change it during the animation. The CustomAnimationBuilder will adapt to that.
When developerMode is enabled, CustomAnimationBuilder does not apply the control instruction. The connected Animation Developer Tools control playback instead.
import'package:flutter/material.dart';
import'package:simple_animations/simple_animations.dart';
voidmain() => runApp(
constMaterialApp(
home: Scaffold(body: Center(child: SwappingButton())),
),
);
classSwappingButtonextendsStatefulWidget{
constSwappingButton({super.key});
@override_SwappingButtonStatecreateState() => _SwappingButtonState();
}
class_SwappingButtonStateextendsState<SwappingButton> {
var control = Control.play; // define variablevoid_toggleDirection() {
setState(() {
// let the animation play in the opposite direction
control = control == Control.play ? Control.playReverse : Control.play;
});
}
@overrideWidgetbuild(BuildContext context) {
returnCustomAnimationBuilder<double>(
control: control, // bind variable to control instruction
tween: Tween<double>(begin: -100.0, end: 100.0),
duration: constDuration(seconds: 1),
builder: (context, value, child) {
// moves child from left to rightreturnTransform.translate(offset: Offset(value, 0), child: child);
},
child: OutlinedButton(
// clicking button changes animation direction
onPressed: _toggleDirection,
child: constText('Swap'),
),
);
}
}
Start position
By default, the animation starts from the beginning (0.0). You can change this by setting the startPosition parameter. It can be set to a value between 0.0 (beginning) and 1.0 (end).
import'package:flutter/material.dart';
import'package:simple_animations/simple_animations.dart';
var widget = CustomAnimationBuilder<Color?>(
control: Control.play,
startPosition: 0.5, // set start position at 50%
duration: constDuration(seconds: 5),
tween: ColorTween(begin: Colors.red, end: Colors.blue),
builder: (context, value, child) {
returnContainer(color: value, width: 100, height: 100);
},
);
Animation lifecycle
You can react to the animation status by setting callbacks.
You can add scenes anywhere in your tween's timeline by using tween.scene(). You just need to provide two of these parameters:
begin (start time of the scene)
duration (duration of the scene)
end (end time of the scene)
final tween = MovieTween();
// start at 0ms and end at 1500msfinal scene1 = tween.scene(duration: constDuration(milliseconds: 1500));
// start at 200ms and end at 900msfinal scene2 = tween.scene(
begin: constDuration(milliseconds: 200),
duration: constDuration(milliseconds: 700),
);
// start at 700ms and end at 1400msfinal scene3 = tween.scene(
begin: constDuration(milliseconds: 700),
end: constDuration(milliseconds: 1400),
);
// start at 1000ms and end at 1600msfinal scene4 = tween.scene(
duration: constDuration(milliseconds: 600),
end: constDuration(milliseconds: 1600),
);
Relative scenes
You can also make scenes depend on each other by using thenFor().
It is also possible to add an optional delay to add more time between scenes.
Overlapping scenes
Avoid overlapping tweens for the same property unless you intentionally want the earlier matching scene to keep control until it ends. Overlaps are supported, but non-overlapping scenes are usually easier to reason about and maintain.
Hint on code style
By using builder-style Dart syntax and comments, you can easily create a readable animation.
You can use tween() to specify a tween for a single property.
final tween = MovieTween();
final scene = tween.scene(end: constDuration(seconds: 1));
scene.tween('width', Tween(begin: 0.0, end: 100.0));
scene.tween('color', ColorTween(begin: Colors.red, end: Colors.blue));
You can fine-tune the timing with shiftBegin or shiftEnd for each property.
scene.tween(
'width',
Tween(begin: 0.0, end: 100.0),
shiftBegin: constDuration(milliseconds: 200), // start later
shiftEnd: constDuration(milliseconds: -200), // end earlier
);
Curves
You can customize the default easing curve on the MovieTween, scene, or property tween level.
final tween = MovieTween(curve: Curves.easeIn);
// scene1 will use Curves.easeIn defined by the MovieTweenfinal scene1 = tween.scene(duration: constDuration(seconds: 1));
// scene2 will use Curves.easeOutfinal scene2 = tween.scene(
duration: constDuration(seconds: 1),
curve: Curves.easeOut,
);
// will use Curves.easeIn defined by the MovieTween
scene1.tween('value1', Tween(begin: 0.0, end: 100.0));
// will use Curves.easeOut defined by scene2
scene2.tween('value2', Tween(begin: 0.0, end: 100.0));
// will use Curves.easeInOut defined by property tween
scene2.tween(
'value3',
Tween(begin: 0.0, end: 100.0),
curve: Curves.easeInOut,
);
Extrapolation
All values that are not explicitly set in the timeline will be extrapolated per property. Before the first tween of a property, MovieTween uses that property's first value. After the last tween of a property, it keeps that property's last value.
Only properties that are part of the MovieTween can be read from the resulting Movie. Accessing a property that was never tweened is an error.
final tween = MovieTween()
// implicitly use 100.0 for width values from 0.0s - 1.0s// 1.0s - 2.0s
..scene(
begin: constDuration(seconds: 1),
duration: constDuration(seconds: 1),
).tween('width', Tween<double>(begin: 100.0, end: 200.0))
// implicitly use 200.0 for width values from 2.0s - 3.0s// 3.0s - 4.0s
..scene(
begin: constDuration(seconds: 3),
end: constDuration(seconds: 4),
).tween('height', Tween<double>(begin: 400.0, end: 500.0));
Use developer tools
Creating complex tweens with multiple or staggered properties can be time-consuming to create and maintain. Use the Animation Developer Tools to streamline this process.
Animation duration
Normally, an Animatable or Tween doesn't contain duration information. The MovieTween class has a duration property that stores the total duration of the animation.
💪 The AnimationMixin generates a preconfigured AnimationController as controller. You can use it directly. No need to worry about initialization or disposal.
The managed controllers automatically call setState() while they animate, so you can read animation values directly inside build().
Create multiple AnimationController instances
With multiple AnimationController instances, you can have many parallel animations at the same time.
AnimationMixin adds createController() to your state class, allowing you to create multiple managed AnimationController instances. ("Managed" means that you don't need to handle initialization or disposal.)
Create a managed AnimationController
First, create a class variable of type AnimationController. Then call createController() inside the initState() {...} method. That's all.
Use createController(fps: 30) to limit rebuilds for expensive animations. Use createController(unbounded: true) when you need an AnimationController.unbounded, for example for physics-style animations that can move beyond the default 0.0 to 1.0 range.
Shortcuts for AnimationController
The extension for AnimationController adds four convenience methods:
controller.play() plays the animation and stops at the end.
controller.playReverse() plays the animation in reverse and stops at the start.
controller.loop() repeatedly plays the animation from the start to the end.
controller.mirror() repeatedly plays the animation forward, then backwards, then forward again, and so on.
Each of these methods takes an optional duration named parameter to configure your animation action in one line of code.
Passing duration updates the controller's duration property. Future playback calls will keep using that value until you change it again.
have a constructor parameter developerMode that can be set to true. It will connect to the closest AnimationDeveloperTools widget.
With developerMode enabled, the developer toolbar drives the animation. The widget's normal playback instruction, such as control or delay, is not applied while debugging.
If your stateful widget uses AnimationMixin to manage your AnimationController instances, you can call enableDeveloperMode() to connect to the closest AnimationDeveloperTools widget.