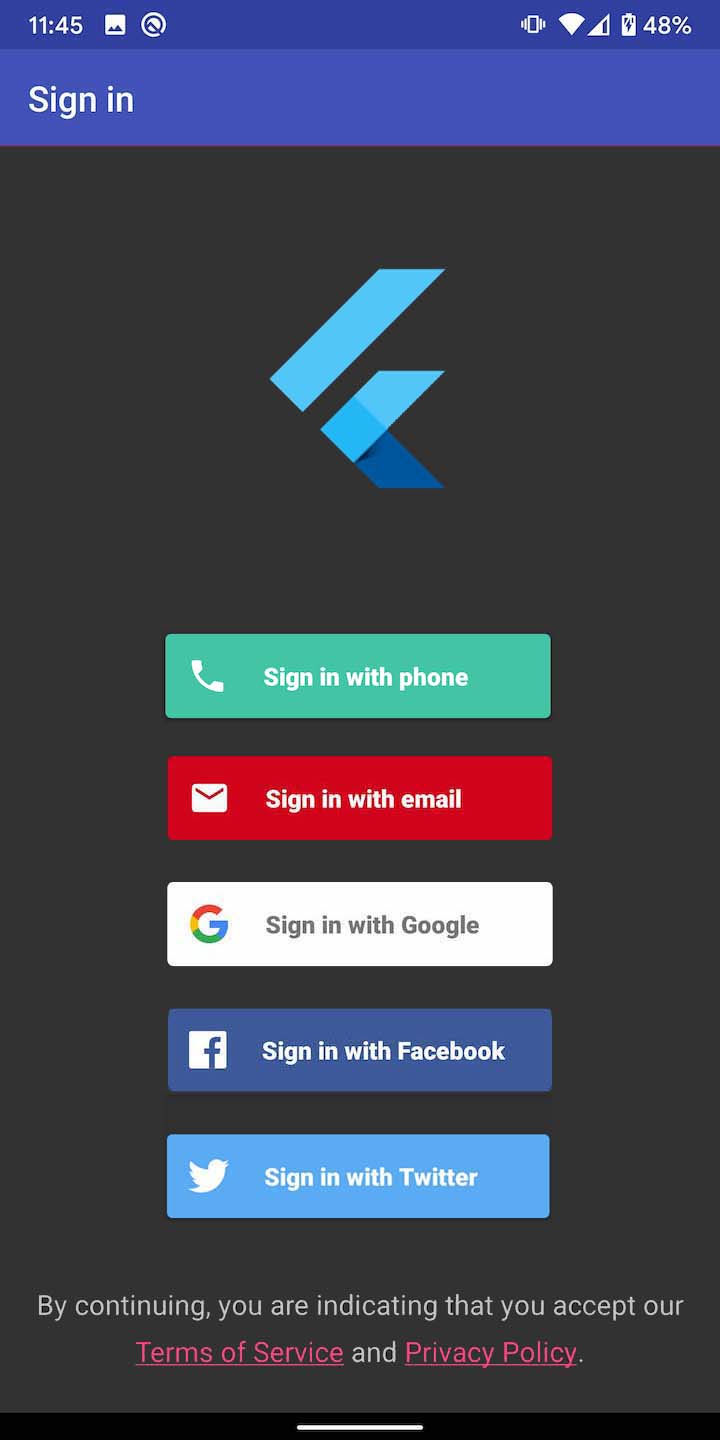
FirebaseAuthUi.instance()
.launchAuth(
[
AuthProvider.email(), // Login/Sign up with Email and passwordAuthProvider.google(), // Login with GoogleAuthProvider.facebook(), // Login with FacebookAuthProvider.twitter(), // Login with TwitterAuthProvider.phone(), // Login with Phone number
],
tosUrl: "https://my-terms-url", // Optional
privacyPolicyUrl: "https://my-privacy-policy", // Optional,
)
.then((firebaseUser) =>
print("Logged in user is ${firebaseUser.displayName}"))
.catchError((error) => print("Error $error"));
Logout
voidlogout() async {
final result = awaitFirebaseAuthUi.instance().logout();
// ...
}
Delete
voiddelete() async {
final result = awaitFirebaseAuthUi.instance().delete();
// ...
}
Plugin returns FirebaseUser with following details:
Field
Description
uid
UID of authenticated user
displayName
Display name of user
email
Email of user
phoneNumber
Phone number of user
photoUri
URI of user's photo
providerId
Indicates through which provider user was authenticated.
isNewUser
Indicates if user is new
metaData
Object of MetaData
MetaData
Field
Description
creationTimestamp
Timestamp of user's creation
lastSignInTimestamp
Timestamp of user's last sign in
Notes:
Above details may be null depending on the provider user used to sign and user's privacy settings on respective provider.
creationTimestamp seems to return wrong value sometimes on Android.
If you want to have full FirebaseUser object then please add firebase_auth dependency. You can then use FirebaseAuth.instance.currentUser().
Configuration
Create a project on Firebase console and add Android and iOS platform in Settings > Your apps
Open the Authentication section and then navigate to Sign in method. Please enable Email/Password, Google, Facebook, Twitter and Phone method depending on your need and click save.
Navigate back to Settings > Your apps
Download "google-services.json" for Android
Download "GoogleService-Info.plist"for iOS
Android
Open project's build.gradle ([flutter_project]/android/build.gradle) and add following in dependencies{ ... }:
classpath 'com.google.gms:google-services:4.3.2'
Open app module's build.gradle ([flutter_project]/android/app/build.gradle) and add following at the end of file, i.e as a last line:
apply plugin: 'com.google.gms.google-services'
Copy the downloaded google-services.json in [flutter_project]/android/app directory.
iOS
Copy the downloaded GoogleService-Info.plist in [[flutter_project]/ios/Runner directory.
Additional setup for Google, Facebook, Twitter and Phone sign-in
Google
Android
No additional setup required.
iOS
Open the GoogleService-Info.plist and copy REVERSED_CLIENT_ID. It should look like com.googleusercontent.apps.[APP_ID-somevalue]
Now open "Info.plist" ([flutter_project]/ios/Runner and paste following by replacing [REVERSED_CLIENT_ID] with yours copied in above step:
Add fbFACEBOOK_APP_ID as a URL scheme
Open open Info.plist ([flutter_project]/ios/Runner and paste following by replacing [YOUR_FACEBOOK_APP_ID] with yours:
NOTE: If you have configured Google sign-in by following above steps, you already have CFBundleURLSchemes key defined with [REVERSE_CLIENT_ID]. In that case, just add
If you have already configured Google sign-in for iOS following above steps, then you don't need to do anything else. If not, please follow the exact same step.
Phone number
Android
No additional setup required.
iOS
If you have already configured Google sign-in for iOS following above steps, then you don't need to do anything else. If not, please follow the exact same step.
Customization
Add logo
Rename your icon to auth_ui_logo.png then follow below steps:
Android
Place the png file in [flutter_project]/android/app/src/main/res/drawable
iOS
Create an imageset with auth_ui_logo and place the png inside it. For creating the imageset, you can open the iOS project in XCode and then drag and drop the png image in Assets.
Android specific
Actionbar title:
Define your app's name in strings.xml and that'll appear as title in action bar.
Actionbar and status bar color:
Add following in your colors.xml [flutter_project]/android/app/src/main/res/values
Note: If you don't have colors.xml, please create one.
Misc
The order of login buttons depends on the sequence of AuthProviders you passed in launchAuth(). For example if you have Email, Google and Facebook auth configured and would like the Facebook to appear first, you can simply pass the AuthProvider.facebook() as first element in the providers list.