パッケージ、リポジトリ、アプリカテゴリを検索

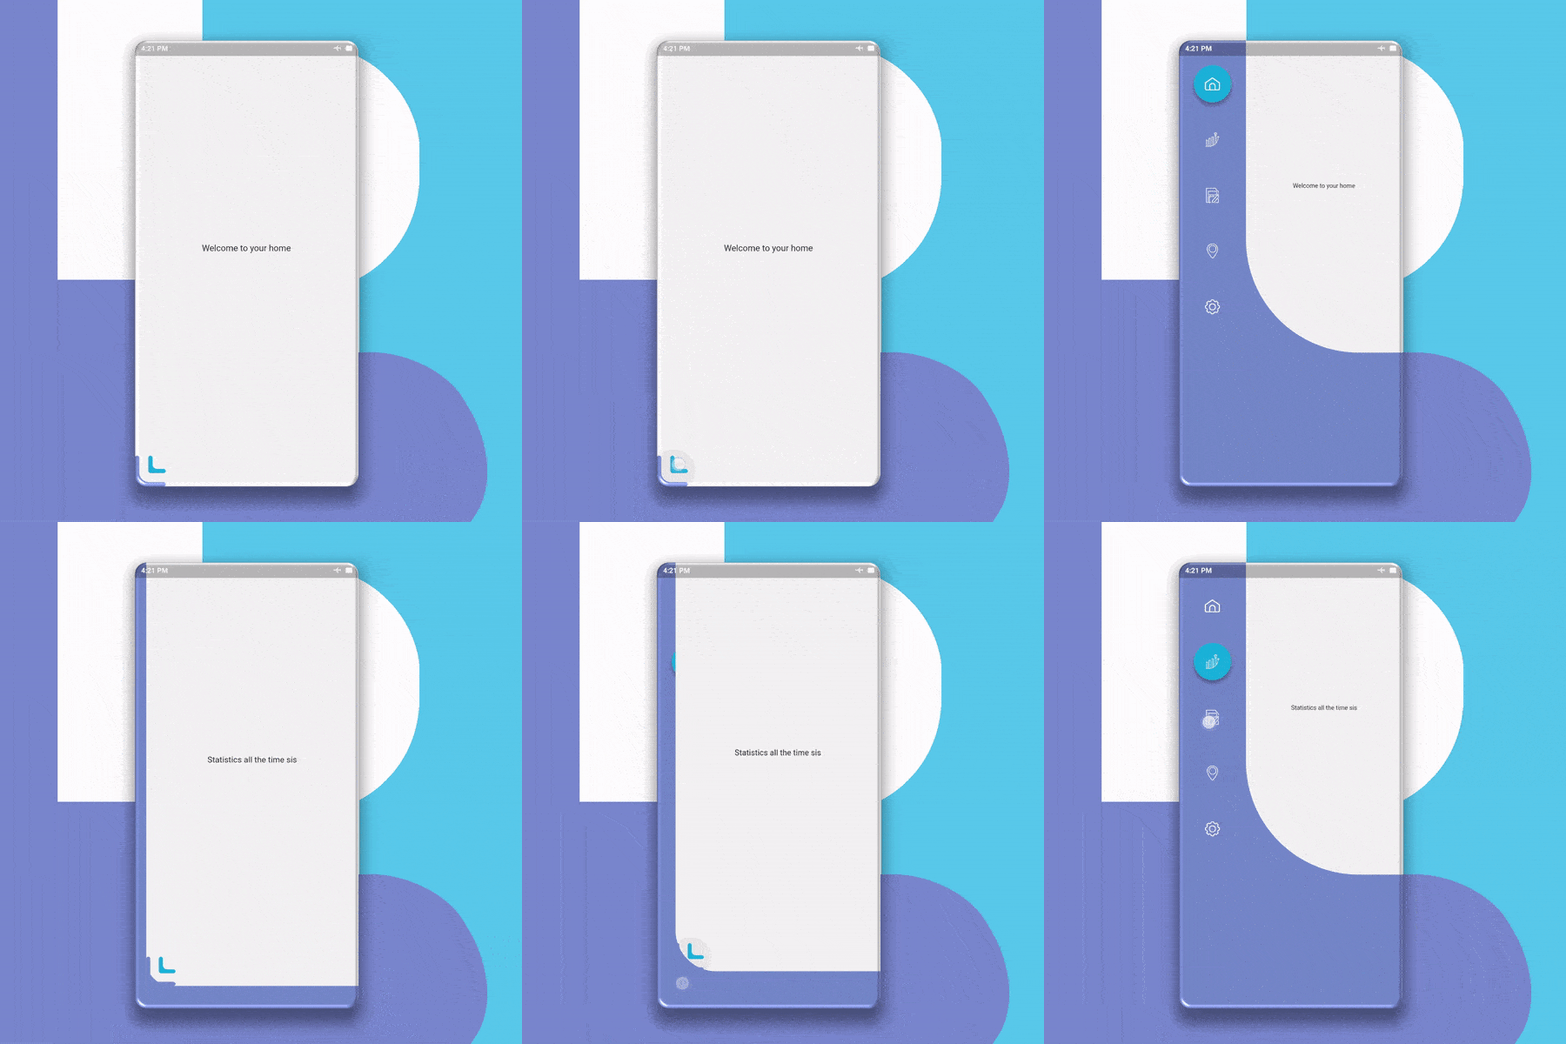
flurry_navigation のカバー
パッケージ詳細v0.2.0

flurry_navigation

Flutter用のスムーズでアニメーション付きのナビゲーションパッケージで、画面に干渉せず、色、形状、ナビゲーションロジックを調整可能。

30日間ダウンロード
45
いいね数
34
Pub ポイント
60

パッケージをインストール

flutter pub add flurry_navigation

パッケージ概要

公開情報に基づく選定ガイドです。参考としてご利用ください。

Flurry Navigation は、カスタマイズ可能な色、形状、ナビゲーションロジックを備えたスムーズでアニメーション付きのナビゲーションを提供するFlutterパッケージです。メイン画面のコンテンツに影響を与えることなくユーザー体験を向上させるように設計されており、ナビゲーションにクリーンでモダンなアプローチを提供します。洗練されたトランジションと柔軟なレイアウト制御が必要なアプリに最適で、既存のFlutterプロジェクトにシームレスに統合できます。パフォーマンスと視覚的魅力を維持しながらカスタマイズをサポートしています。

用途

  • カスタムアニメーション付きサイドメニュー
  • スムーズな画面遷移
  • ブランドナビゲーションドロワー
  • インタラクティブUIコンポーネント
  • モバイルアプリのナビゲーションバー
  • 動的形状ベースのナビゲーション

主な機能

  • アニメーションナビゲーション遷移
  • 調整可能な色と形状
  • 非侵襲的な画面統合
  • カスタマイズ可能なナビゲーション論理
  • 軽量でパフォーマンスに優れる
  • Flutterとの簡単な統合

適している対象

  • アニメーションナビゲーションを求める開発者
  • デザイン重視のFlutterアプリ
  • ブランドUIを備えたアプリが必要
  • スムーズなUXを必要とするプロジェクト
  • 再利用可能なナビゲーションコンポーネントを望むチーム

注意事項

  • 限定されたプラットフォーム固有の機能
  • 組み込みのダークモードサポートなし
  • 複雑なフローには手動設定が必要です
  • シンプルから中程度のナビゲーション構造に最適
  • 大規模なナビゲーション階層には最適化されていません

元の README

関連するソースリポジトリの README 原文のスナップショットです。最新の内容はリポジトリをご覧ください。

flurry_navigation

A Smooth and Animated navigation package for flutter that doesn’t interfere with the Screen with adjustable colors, shapes, and navigation logic.

this Image is not available

Getting Started

First of all, Depend on the package.

dependencies:
  ...
  flurry_navigation: ^0.2.0 #May not be the latest version
Changes to the Screens files

Add your code inside this variable below in every screen you want to navigate.

import 'package:flurry_navigation/flurry_navigation.dart';
//The variable name must be unique
final firstscreen = new Screen(

);

Changes in the main file

First You should declare a variable called activeScreen.

var activeScreen;

Now add a Widget builder class that returns new FlurryNavigation.

Widget build(BuildContext context) {
  return new FlurryNavigation(

  );
}

Add values to these attributes to FlurryNavigation.

Widget build(BuildContext context) {
  new FlurryNavigation(
    // The Icon data of the icon the BottomLeft
    expandIcon: Image.asset("Put your path here"),
    // The size of the icon on the BottomLeft
    iconSize: 50.0,
    // The content of the screen. leave it as it is
    contentScreen: activeScreen,
   )
}

Now add the menuScreen attribute FlurryNavigation and set it to the value below. [If you want to use your own menu, contact me and I will provide you with the instructions].

Widget build(BuildContext context) {
  new FlurryNavigation(
    ...
    menuScreen: new MenuScreen(

    )
  );
}

Add the bgColor attribute to MenuScreen and set it to the Background color you want.

Widget build(BuildContext context) {
  new FlurryNavigation(
    ...
    menuScreen: new MenuScreen(
      bgColor: Colors.white, //background color
    )
  )
}

Now add the menu attribute to MenuScreen and set it to the below value

Widget build(BuildContext context) {
  return new FlurryNavigation(
    ...
    menuScreen: new MenuScreen(
      ...
      menu: new Menu(

      )
    )
  )
}

Then add the "items" attribute to "Menu" and set it to the list of items you want in the menu "which usually matches the no. of screens", with "new MenuItem" like the example below.

Widget build(BuildContext context) {
  return new FlurryNavigation(
    ...
    menuScreen: new MenuScreen(
       menu: new Menu(
         items: [
            //You can add as many items as you want, it's scrollable!!
          new MenuItem(
            id: 'hom',//Set this to whatever you want but do not duplicate it. !Required!
            icon: 'assets/hom.png',//Set this to the path of the data for the icon of the button !Required!
            isSelected: true ,//make sure the default item "isSelected" attribute is set to "true" !Required!
            selectedBtnColor: Color.fromRGBO(38, 198, 218, 1
            //the color of the item if activated !Required!
            btnShape: BoxShape.rectangle
                    //the shape of the item !Required!
            #disabledBtnColor: Colors.transparent, //this have a default value of Colors.transparent
            #selectedShadowColor: Colors.blueGrey, //this have a default value of Colors.blueGrey
            #disabledShadowColor: Colors.transparent
          ), //this have a default value of Colors.transparent,
          new MenuItem(
             id: 'sta',
            icon: 'assets/sta.png',
            isSelected: false,
            selectedBtnColor: Color.fromRGBO(38, 198, 218, 1),
            btnShape: BoxShape.rectangle
          )
         ]
       )
    )
  )
}

Now add the onMenuItemSelected attribute to "MenuScreen" to specify the logic for the navigation.

Widget build(BuildContext context) {
  new FlurryNavigation(
    ...
    menuScreen: new MenuScreen(
      ...
      //this is the logic behind the navigation. tailor the code below to fit your needs. If you want any help message me.
      onMenuItemSelected: (String itemId) {
        if (itemId == 'hom') {
          setState(() => activeScreen = firstscreen);
        } else if (itemId == 'sta') {
          setState(() => activeScreen = secondscreen);
        }
      },
    ),
  );
}

Notice

  • This is my first markdown file so if you see any problems you're free to open an issue.
  • You can find a standalone full example in the example app or in the Github repo

Contributing

Pull requests are welcome. For major changes, please open an issue first to discuss what you would like to change.

License

MIT

By lasheen.dev

カテゴリー

ソースリポジトリ

このパッケージを使用しているプロジェクト

データはまだありません。