An SDK designed for the Flutter framework that enables developers to easily integrate Philips Hue smart devices into their applications.
Note: This SDK uses Philips Hue's new API v2.
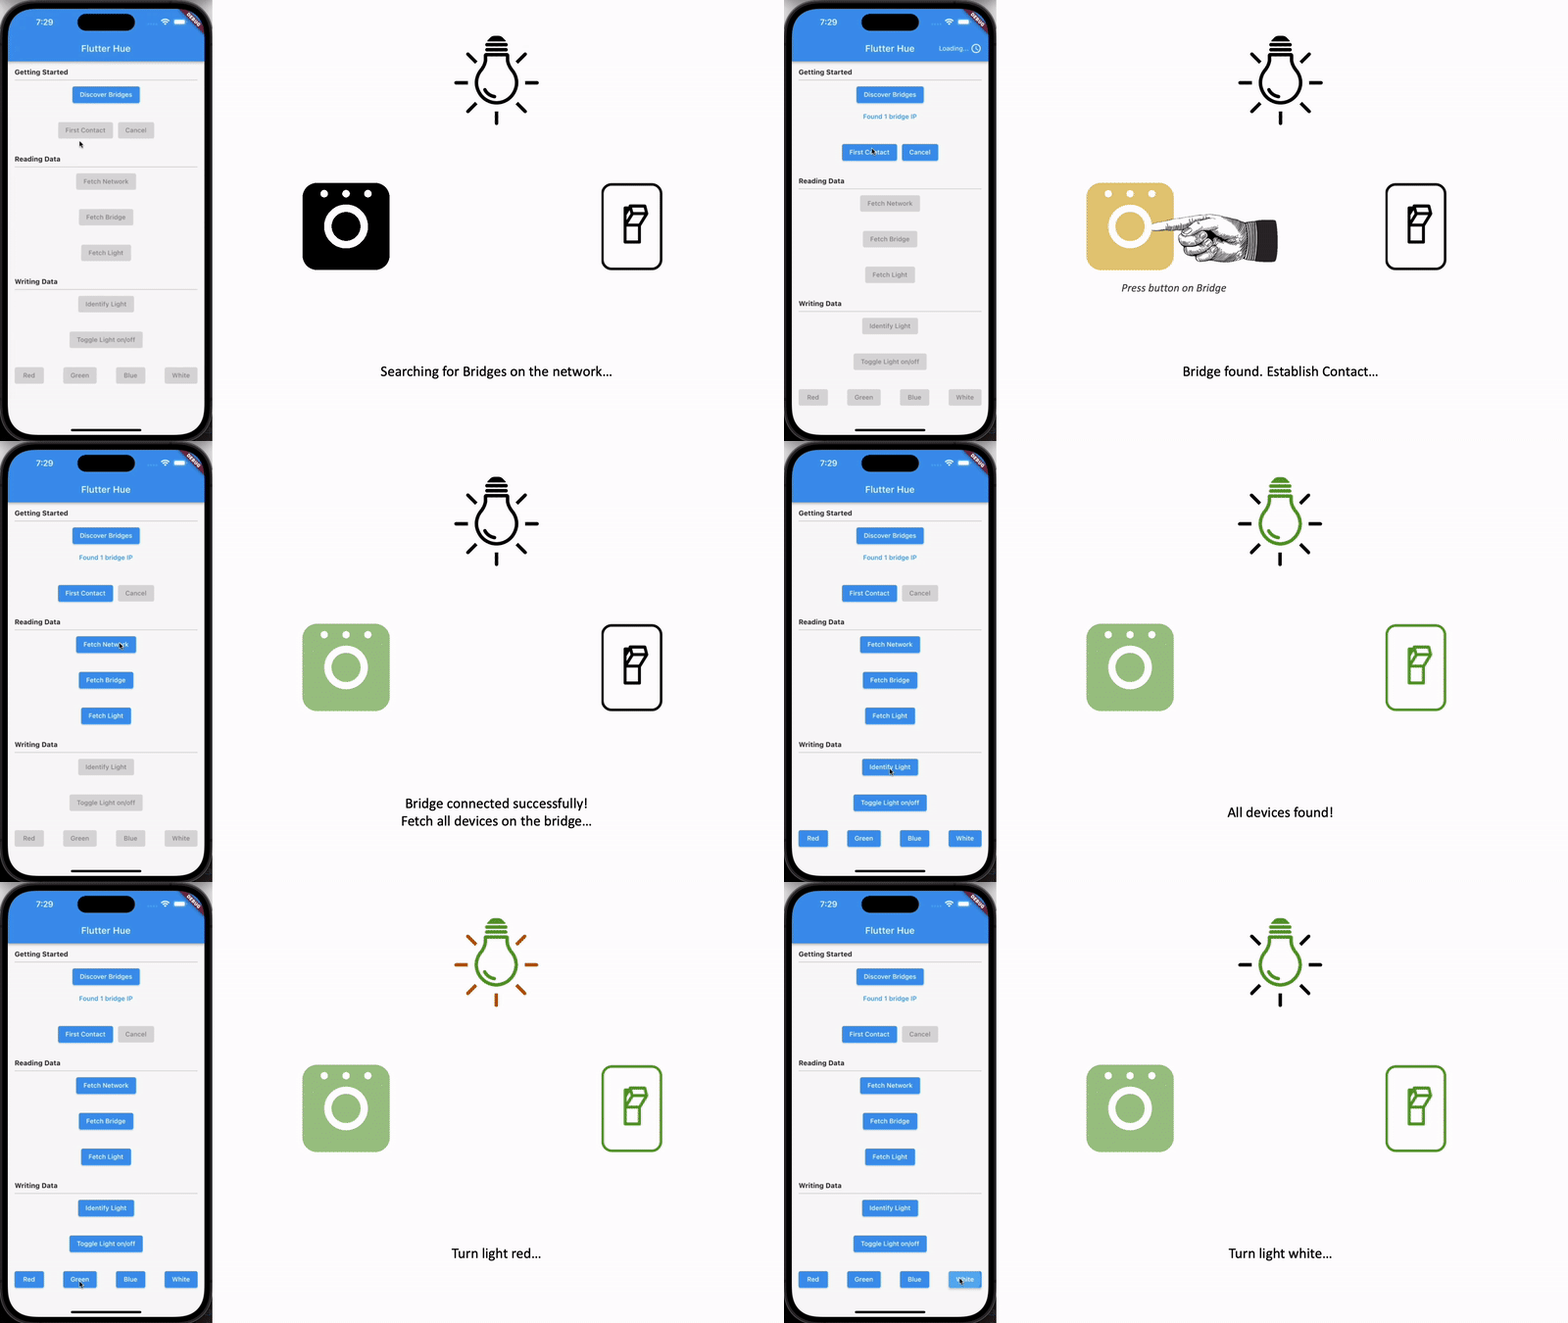
With Flutter Hue, developers can easily discover Hue bridges on the network, establish communication with them, and manipulate their connected devices. All of this is shown in the examples below. Also shown is how to change the color of lights and turning them on and off.
NOTE: If your project does not use Flutter and requires pure Dart, you can use dart_hue. Some features, such as local storage, are not provided and become the developer's responsibility in the pure Dart version.
Discover the devices that are connected to the bridges
Identify a light (used to let the user know what light they are configuring)
Toggle a light on and off
Change the color of a light
Installation
In the pubspec.yaml of your flutter project, add the following dependency:
dependencies:flutter_hue:^2.3.0
Import it to each file you use it in:
import'package:flutter_hue/flutter_hue.dart';
Usage
Establishing Remote Connection
Without doing this, your app will only be able to communicate with Philips Hue bridges that are on the same network as the user's device. This section will show you how to establish a remote connection with a bridge; that way, it can be controlled from anywhere in the world.
Due to the length of these instructions, they have been placed in their own document, here.
Once you have completed the steps in the above document, you will be able to communicate with a bridge remotely using the same steps as all of the examples below.
Highly Recommended
It is not necessary, but it is highly recommended that you add this code snippet to the root of your app. It will keep the locally stored data (bridges, tokens, etc.) up to date.
This example shows how to establish first contact with a bridge on a device. This is what causes the bridge to create an application key for the user's device.
Warning: Any device with this key will have access to the bridge. It is meant to be kept secret.
Bridge myBridge = awaitBridgeDiscoveryRepo.firstContact(
bridgeIpAddr: 192.168.1.1, // Get IP in example 1
controller: timeoutController,
);
Example 3 - Find all devices on Hue Network
This example shows how to find every Philips Hue device on the network.
Note: This is only for devices that are connected to a bridge that the user's device has access to (see example 2).
// Create the network object// Get the bridges in example 2HueNetwork myHueNetwork = HueNetwork(bridges: [bridge1, bridge2]);
// Populate the network objectawait hueNetwork.fetchAll();
Example 4 - Change light color
This example shows how to change the color of a light.
// Get a light to change the color of.// Hue Network can be found in example 3Light myLight = myHueNetwork.lights.first;
// Set a new color that you want to change the light to
myLight = myLight
.copyWith(
color: myLight.color.copyWith(
xy: LightColorXy(x: 0.6718, y: 0.3184),
),
);
// Send the PUT request to change the color of the light.await bridge.put(myLight);
Example 5 - Toggle light on/off
This example shows how to turn multiple lights on and off.
// Get the grouped light from the roomGroupedLight myGroupedLight = myHueNetwork.rooms.first.servicesAsResources
.firstWhere((resource) => resource isGroupedLight) asGroupedLight;
// Toggle the on/off state
myGroupedLight.on.isOn = !myGroupedLight.on.isOn;
// PUT the new state
myHueNetwork.put();
Example 6 - Color converters
This example shows how to use the color converters.
ColorConverter.xy2rgb(0.5, 0.5); // [255, 222, 0]ColorConverter.rgb2hsl(255, 0, 0); // [0.0, 1.0, 0.5]ColorConverter.hsv2hex(0, 1.0 , 1.0); // "ffff0000"ColorConverter.color2hsv(Color(0xffff0000)); // [0.0, 1.0, 1.0]ColorConverter.int2rgb(4286611584); // [128, 128, 128]// Also can be used as an extension of Flutter's `Color` objectColor myColor = Color(0xff8a4888);
myColor.toXy(); // [0.3209554122773742, 0.21993715851681886, 0.1181557673818057]
myColor.toRgb(); // [138, 72, 136]
myColor.toHex(); // "ff8a4888"
myColor.toInt(); // 4287252616
Example 7 - Hue icons
This example shows how to use Philips Hue's icons.
This example shows how to use Entertainment Streaming. It's important to note, you will need to use the official Philips Hue app to create entertainment areas before you can use Flutter Hue to interact with them. At the time of writing this, Philips does not give third party apps the ability to create entertainment areas.
Here is a video demonstration of what can be done with entertainment streaming. In the example code, there is a Back In Black section—this video shows that code in action (with the drums duplicated to two lights instead of just one).
// Get one of your stream areas that you made in the official Hue app.EntertainmentConfiguration myEntertainmentStreamConfiguration =
myHueNetwork.entertainmentConfigurations.first;
// Start the stream.
myEntertainmentStreamConfiguration.startStreaming(myBridge);
// These are the colors that are used by the stream commands.finalColorXy red = ColorXy.fromRgbNormalized(1.0, 0.0, 0.0, 1.0);
finalColorXy blue = ColorXy.fromRgbNormalized(0.0, 0.0, 1.0, 1.0);
// The amount of time the light will remain on each color before switching to// the next.constint waitDurationMillis = 500;
finalEntertainmentStreamCommand command1 = EntertainmentStreamCommand(
channel: 0,
color: red,
waitAfterAnimation: constDuration(milliseconds: waitDurationMillis),
);
finalEntertainmentStreamCommand command2 = EntertainmentStreamCommand(
channel: 0,
color: blue,
waitAfterAnimation: constDuration(milliseconds: waitDurationMillis),
);
// Infinity loop the stream commands. This toggles the light between red and// blue forever.while (true) {
// IMPORTANT NOTE: The copy method is used here to ensure that the same// command isn't added to the queue multiple times. If the same command is// added multiple times, the bridge will only execute the command once.
myEntertainmentStreamConfiguration.addAllToStreamQueue(
[command1.copy(), command2.copy()],
);
// Wait before adding the next set of instructions to the loop. This is not// required, but it is encouraged to improve efficiency.awaitFuture.delayed(constDuration(milliseconds: waitDurationMillis * 2));
}
If you found this helpful, please consider donating. Thanks!