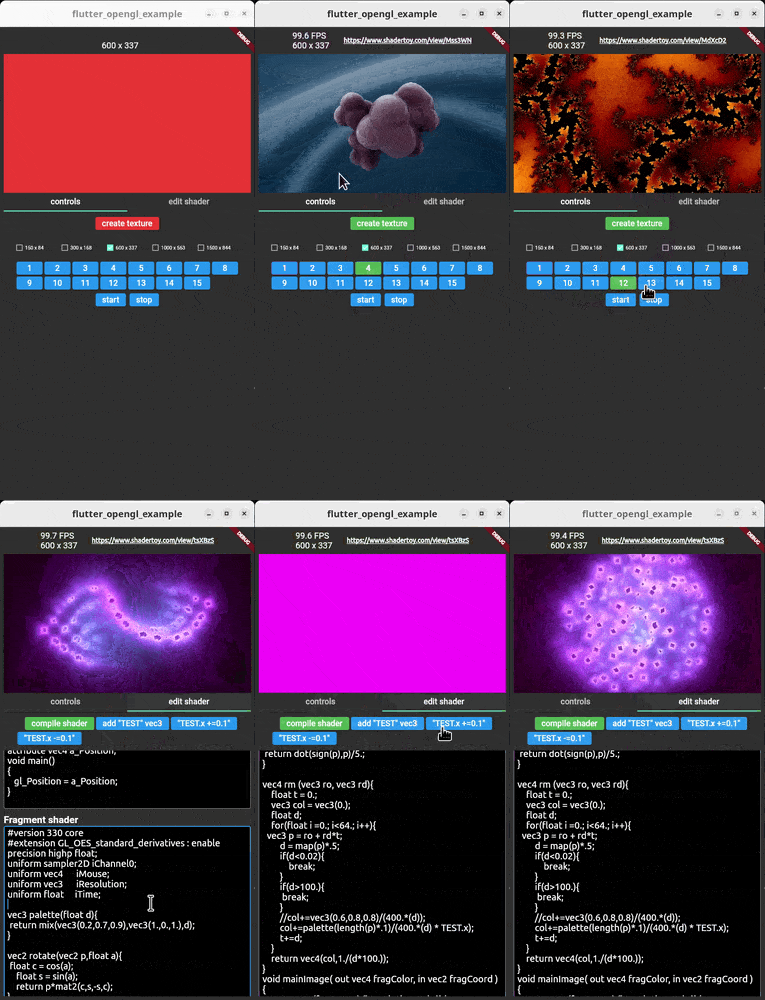
A Flutter OpenGL ES plugin using a Texture() widget. Supports Android, Linux and Windows. Many shaders from ShaderToy.com can be copy/pasted
Getting Started
Android
Windows
Linux
iOS
MacOS
Web
✅
✅
✅
x
x
x
The main workflow of the plugin is:
ask to native code with a MethodChannel for a texture ID
use the texture ID in a Texture() widget
set a vertex and a fragment sources
start the renderer
change shader sources on the fly
All functionalities, but the first call to the first method channel, use FFI calls.
The starting idea developing this plugin, was not just to use GLSL, but also take advantage of the wonderful ShaderToy web site.
For now it's possible to copy/paste shaders from ShaderToy, but only those which have only one layer.
Be aware that on a real device, many shaders could be very slow because they are hungry of power and some others needs ES 3 and for now is not supported on Android (ie latest 3 shaders in the lib/main_in_deep.dart example).
iResolution, iTime, iMouse, iChannel[0-3] are supported, other uniforms can be added at run-time.
iResolution is a vec3 uniform which represents the texture size
iTime is a float which represents the time since the shader was created
iMouse is a vec4 which the x and y values represent the coordinates where the mouse or the touch is grabbed hover the Texture() widget
iChannel[0-3] Sampler2D uniform textures
Simple example
SizedBox(
width: 400,
height: 300,
child: FutureBuilder(
/// The surface size identifies the real texture size and/// it is not related to the above SizedBox size
future: OpenGLController().openglPlugin.createSurface(300, 200),
builder: (_, snapshot) {
if (snapshot.hasError || !snapshot.hasData) {
returnconstSizedBox.shrink();
}
/// When the texture id is retrieved, it will be possible/// to start the renderer, set a shader and display it./// Start renderer threadOpenGLController().openglFFI.startThread();
/// Set the fragment shaderOpenGLController().openglFFI.setShaderToy(fShader);
/// build the texture widgetreturnOpenGLTexture(id: snapshot.data!);
},
),
)
Look at example/lib/main_in_deep.dart for a full fledged example.
Once the renderer is started all the below methods can be used via OpenGLController().openglFFI:
method
description
bool rendererStatus()
Returns true if the texture has been created successfully via OpenGLController().openglPlugin.createSurface()
Size getTextureSize()
Get the size of the current texture. If not set it returns Size(-1, -1)
startThread()
Starts the drawing thread loop.
stopThread()
Delete shader, delete texture and stops the drawing thread loop.
isContinuous not used yet. vertexShader String of the vertex shader source. fragmentShader String of the fragment shader source
returns the compiling shader error string or an empty string if no errors.
String setShaderToy(String fragmentShader)
Set the shader to be used in the current texture. These are only fragment shaders taken from ShaderToy.com Many of the shaders can be copy/pasted, but they must have only the "image" layer (ie no buffer). Also many of them could be heavy for mobile devices (few FPS).
The uniforms actually available and automatically registered are: float iTime vec4 iMouse vec3 iResolution Sampler2D iChannel[0-3]
String getVertexShader()
Get current vertex shader text.
String getFragmentShader()
Get current fragment shader text.
addShaderToyUniforms()
add these uniforms: vec4 iMouse vec3 iResolution float iTime Sampler2D iChannel[0-3] These uniforms are automatically set when using setShaderToy()
Set the iMouse uniform. How to use the mouse input (only left button supported): mouse.xy = mouse position during last button down abs(mouse.zw) = mouse position during last button click sign(mouze.z) = button is down sign(mouze.w) = button is clicked
This is automatically processed by OpenGLTexture widget
For reference: https://www.shadertoy.com/view/llySRh https://www.shadertoy.com/view/Mss3zH
Replace a texture with another image with the same size. Be sure the val length is the same as the previously stored image with the uniform named name.
extract the zip and rename its main directory to "glew"
run "SCRIPTS\setupOpenCV-windows.bat" or manually download OpenCV and extract it into SCRIPT dir:
https://github.com/opencv/opencv/releases/download/4.7.0/opencv-4.7.0-windows.exe
Android
Run the script SCRIPT/setupOpenCV-android.sh or manually download OpenCV from here https://github.com/opencv/opencv/releases/download/4.7.0/opencv-4.7.0-android-sdk.zip locate libs and include folders and copy them into android/src/opencv.
TODO
better docomentation
the c/c++ code is not "state of the art" written! PRs are welcomed