패키지, 저장소 및 앱 카테고리 검색

dart_periphery 표지
패키지 상세v0.9.20

dart_periphery

dart_periphery 는 Linux 외부 장치 I/O (GPIO, LED, PWM, SPI, I2C, MMIO, ADC 및 시리얼 외부 장치 I/O)용 원본 c-periphery 라이브러리의 Dart 버전입니다.

Linux
30일 다운로드
1.5만
좋아요
74
Pub 점수
150

패키지 설치

flutter pub add dart_periphery

패키지 개요

공개 정보를 바탕으로 생성한 선택 가이드입니다.

dart_periphery는 GPIO, I2C, SPI, PWM, LED, ADC, MMIO 및 시리얼 통신을 포함한 Linux 주변기기 I/O 인터페이스에 저수준 액세스를 제공하는 Dart 라이브러리입니다. c-periphery C 라이브러리의 Dart 버전으로, Linux 기반 시스템에서 직접 하드웨어 상호작용을 가능하게 합니다. IoT 및 임베디드 응용 프로그램을 위한 것으로, Dart 코드에서 물리적 장치를 프로그래밍 방식으로 제어하고 모니터링할 수 있게 해줍니다. 최소한의 추상화로 실시간 하드웨어 인터페이싱이 필요한 프로젝트에 이상적입니다.

사용 사례

  • GPIO 핀 제어
  • I2C/SPI를 통한 센서 데이터 읽기
  • PWM로 LED 및 모터 조작하기
  • 마이크로컨트롤러와의 인터페이스
  • 실시간 하드웨어 모니터링
  • 임베디드 시스템 개발

주요 기능

  • 여러 Linux 주변기기 인터페이스를 지원
  • 하드웨어에 대한 저수준 액세스
  • 크로스 플랫폼 리눅스 호환성
  • 네이티브 c-periphery 라이브러리에 대한 바인딩
  • 경량이고 효율적
  • 스레드 안전 연산

적합한 대상

  • IoT 기기 개발자
  • 임베디드 시스템 엔지니어
  • 하드웨어 프로토타이핑
  • 리눅스 기반 자동화 프로젝트
  • 물리 장치를 사용하는 Dart 개발자

고려 사항

  • Linux 운영 체제 필요
  • 루트 또는 권한 있는 액세스가 필요합니다
  • 리눅스 플랫폼에 한정
  • 하드웨어 고유의 구성이 필요합니다
  • 모바일 또는 웹 앱에 적합하지 않습니다

원본 README

연결된 소스 저장소의 README 원문 스냅샷입니다. 최신 내용은 저장소에서 확인하세요.

dart_periphery

alt text

pub package Pub Points All Contributors BSD License

📣 Important hints

The repository’s Wiki is now enabled.

📖 Introduction

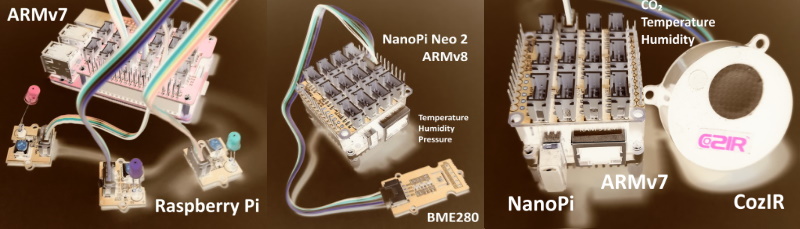
dart_periphery is a Dart port of the native c-periphery library (v2.5.0) for Linux Peripheral I/O (GPIO, LED, PWM, SPI, I2C, MMIO and Serial peripheral I/O). This package is designed for System on Chips (SoCs) such as Raspberry Pi, NanoPi, Banana Pi, and others.

What is c-periphery?

Abstract from the project web site:

c-periphery is a small C library for

  • GPIO,
  • LED,
  • PWM,
  • SPI,
  • I2C,
  • MMIO (Memory Mapped I/O)
  • Serial peripheral I/O

interface access in userspace Linux. c-periphery simplifies and consolidates the native Linux APIs to these interfaces. c-periphery is useful in embedded Linux environments (including Raspberry Pi, BeagleBone, etc. platforms) for interfacing with external peripherals. c-periphery is re-entrant, has no dependencies outside the standard C library and Linux, compiles into a static library for easy integration with other projects, and is MIT licensed

dart_periphery binds the c-periphery library with the help of the dart:ffi mechanism. Nevertheless, dart_periphery tries to be close as possible to the original library. See the following documentation. Thanks to Vanya Sergeev for his great job!

🤔 Why c-periphery?

The number of GPIO libraries/interfaces is shrinking:

dart_periphery

🪧 Examples

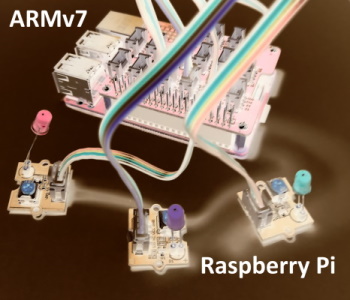
GPIO

alt text

import 'package:dart_periphery/dart_periphery.dart';
import 'dart:io';

void main() {
  var config = GPIOconfig();
  config.direction = GPIOdirection.gpioDirOut;
  print('Native c-periphery Version :  ${getCperipheryVersion()}');
  print('GPIO test');
  var gpio = GPIO(18, GPIOdirection.gpioDirOut);
  var gpio2 = GPIO(16, GPIOdirection.gpioDirOut);
  var gpio3 = GPIO.advanced(5, config);

  print('GPIO info: ' + gpio.getGPIOinfo());

  print('GPIO native file handle: ${gpio.getGPIOfd()}');
  print('GPIO chip name: ${gpio.getGPIOchipName()}');
  print('GPIO chip label: ${gpio.getGPIOchipLabel()}');
  print('GPIO chip name: ${gpio.getGPIOchipName()}');
  print('GPIO chip label: ${gpio.getGPIOchipLabel()}');

  for (var i = 0; i < 10; ++i) {
    gpio.write(true);
    gpio2.write(true);
    gpio3.write(true);
    sleep(Duration(milliseconds: 200));
    gpio.write(false);
    gpio2.write(false);
    gpio3.write(false);
    sleep(Duration(milliseconds: 200));
  }

  gpio.dispose();
  gpio2.dispose();
  gpio3.dispose();
}

I2C

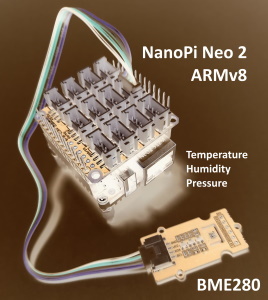
alt text

import 'package:dart_periphery/dart_periphery.dart';

/// https://wiki.seeedstudio.com/Grove-Barometer_Sensor-BME280/
/// Grove - Temp&Humi&Barometer Sensor (BME280) is a breakout board for Bosch BMP280 high-precision,
/// low-power combined humidity, pressure, and temperature sensor.
void main() {
  // Select the right I2C bus number /dev/i2c-?
  // 1 for Raspberry Pi, 0 for NanoPi (Armbian), 2 Banana Pi (Armbian)
  var i2c = I2C(1);
  try {
    print('I2C info:' + i2c.getI2Cinfo());
    var bme280 = BME280(i2c);
    var r = bme280.getValues();
    print('Temperature [°] ${r.temperature.toStringAsFixed(1)}');
    print('Humidity [%] ${r.humidity.toStringAsFixed(1)}');
    print('Pressure [hPa] ${r.pressure.toStringAsFixed(1)}');
  } finally {
    i2c.dispose();
  }
}


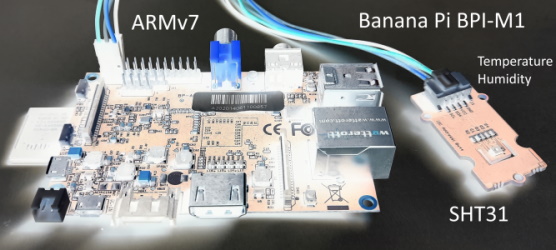
alt text

import 'package:dart_periphery/dart_periphery.dart';

/// Grove - Temp&Humi Sensor(SHT31) is a highly reliable, accurate,
/// quick response and integrated temperature & humidity sensor.
void main() {
  // Select the right I2C bus number /dev/i2c-?
  // 1 for Raspberry Pi, 0 for NanoPi (Armbian), 2 Banana Pi (Armbian)
  var i2c = I2C(1);
  try {
    var sht31 = SHT31(i2c);
    print(sht31.getStatus());
    print('Serial number ${sht31.getSerialNumber()}');
    print('Sensor heater active: ${sht31.isHeaterOn()}');
    var r = sht31.getValues();
    print('SHT31 [t°] ${r.temperature.toStringAsFixed(2)}');
    print('SHT31 [%°] ${r.humidity.toStringAsFixed(2)}');
  } finally {
    i2c.dispose();
  }
}
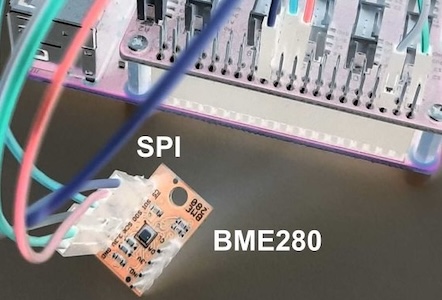
SPI

alt text

import 'package:dart_periphery/dart_periphery.dart';

void main() {
  var spi = SPI(0, 0, SPImode.mode0, 1000000);
  try {
    print('SPI info:' + spi.getSPIinfo());
    var bme280 = BME280.spi(spi);
    var r = bme280.getValues();
    print('Temperature [°] ${r.temperature.toStringAsFixed(1)}');
    print('Humidity [%] ${r.humidity.toStringAsFixed(1)}');
    print('Pressure [hPa] ${r.pressure.toStringAsFixed(1)}');
  } finally {
    spi.dispose();
  }
}
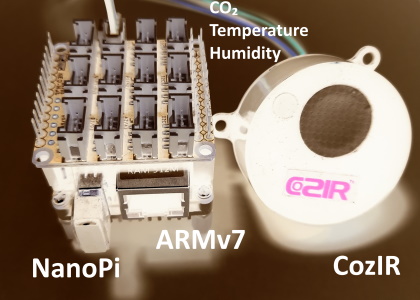
Serial

alt text

import 'package:dart_periphery/dart_periphery.dart';
import 'dart:io';

///
/// [COZIR CO2 Sensor](https://co2meters.com/Documentation/Manuals/Manual_GC_0024_0025_0026_Revised8.pdf)
///
void main() {
  print('Serial test - COZIR CO2 Sensor');
  var s = Serial('/dev/serial0', Baudrate.b9600);
  try {
    print('Serial interface info: ' + s.getSerialInfo());

    // Return firmware version and sensor serial number - two lines
    s.writeString('Y\r\n');
    var event = s.read(256, 1000);
    print(event.toString());

    // Request temperature, humidity and CO2 level.
    s.writeString('M 4164\r\n');
    // Select polling mode
    s.writeString('K 2\r\n');
    // print any response
    event = s.read(256, 1000);
    print('Response ${event.toString()}');
    sleep(Duration(seconds: 1));
    for (var i = 0; i < 5; ++i) {
      s.writeString('Q\r\n');
      event = s.read(256, 1000);
      print(event.toString());
      sleep(Duration(seconds: 5));
    }
  } finally {
    s.dispose();
  }
}
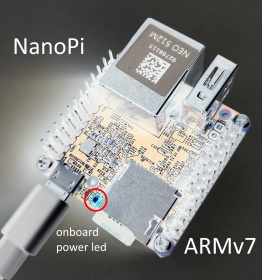
Led

alt text

import 'package:dart_periphery/dart_periphery.dart';
import 'dart:io';

void main() {
  /// Nano Pi power led - see 'ls /sys/class/leds/'
  var led = Led('nanopi:red:pwr');
  try {
    print('Led handle: ${led.getLedInfo()}');
    print('Led name: ${led.getLedName()}');
    print('Led brightness: ${led.getBrightness()}');
    print('Led maximum brightness: ${led.getMaxBrightness()}');
    var inverse = !led.read();
    print('Original led status: ${(!inverse)}');
    print('Toggle led');
    led.write(inverse);
    sleep(Duration(seconds: 5));
    inverse = !inverse;
    print('Toggle led');
    led.write(inverse);
    sleep(Duration(seconds: 5));
    print('Toggle led');
    inverse = !inverse;
    led.write(inverse);
    sleep(Duration(seconds: 5));
    print('Toggle led');
    led.write(!inverse);
  } finally {
    led.dispose();
  }
}

PWM

Ensure that PWM is correctly enabled. e.g. see the following documentation for the Raspberry Pi.

import 'package:dart_periphery/dart_periphery.dart';
import 'dart:io';

void main() {
  var pwm = PWM(0, 0);
  try {
    print(pwm.getPWMinfo());
    pwm.setPeriodNs(10000000);
    pwm.setDutyCycleNs(8000000);
    print(pwm.getPeriodNs());
    pwm.enable();
    print("Wait 20 seconds");
    sleep(Duration(seconds: 20));
    pwm.disable();
  } finally {
    pwm.dispose();
  }
}
MMIO

Memory Mapped I/O: Turns on a led at pin 18 on a Raspberry Pi using MMIO. This direct register access example is derived from elinux.org.

import 'package:dart_periphery/dart_periphery.dart';
import 'dart:io';

const int bcm2708PeriBase = 0x3F000000; // Raspberry Pi 3
const int gpioBase = bcm2708PeriBase + 0x200000;
const int blockSize = 4 * 1024;

class MemMappedGPIO {
  MMIO mmio;
  MemMappedGPIO(this.mmio);

  // #define INP_GPIO(g) *(gpio+((g)/10)) &= ~(7<<(((g)%10)*3))
  void setPinInput(final int pin) {
    var offset = (pin ~/ 10) * 4;
    var value = mmio[offset];
    value &= (~(7 << (((pin) % 10) * 3)));
    mmio[offset] = value;
  }

  // #define OUT_GPIO(g) *(gpio+((g)/10)) |=  (1<<(((g)%10)*3))
  void setPinOutput(final int pin) {
    setPinInput(pin);
    var offset = (pin ~/ 10) * 4;
    var value = mmio[offset];
    value |= (1 << (((pin) % 10) * 3));
    mmio[offset] = value;
  }

  // #define GPIO_SET *(gpio+7) - sets   bits which are 1 ignores bits which are 0
  void setPinHigh(int pin) {
    mmio[7 * 4] = 1 << pin;
  }

  // #define GPIO_CLR *(gpio+10) - clears bits which are 1 ignores bits which are 0
  void setPinLow(int pin) {
    mmio[10 * 4] = 1 << pin;
  }

  // #define GET_GPIO(g) (*(gpio+13)&(1<<g)) - 0 if LOW, (1<<g) if HIGH
  int getPin(int pin) {
    return mmio[13 * 4] & (1 << pin);
  }
}

void main() {
  // Needs root rights and the gpioBase must be correct!
  // var mmio = MMIO(gpioBase, blockSize);
  var mmio = MMIO.advanced(0, blockSize, '/dev/gpiomem');
  var gpio = MemMappedGPIO(mmio);
  try {
    print(mmio.getMMIOinfo());
    var pin = 18;
    print('Led (pin=18) on');
    gpio.setPinOutput(pin);
    gpio.setPinHigh(pin);
    sleep(Duration(seconds: 10));
    gpio.setPinLow(pin);
    print('Led (pin=18) off');
  } finally {
    mmio.dispose();
  }
}
ADC

alt text

Extension hats, such as the Grove Base Hat RaspberryPi Zero, add additional functionality like ADC (Analog-to-Digital Converter) support. See also complete example with support for FriendlyElec NanoHat Hub and Grove Base Hat RaspberryPi.

In this demo, the LED turns on when the value of the light sensor falls below a certain threshold.

import 'package:dart_periphery/dart_periphery.dart';
import 'dart:io';

const wait = 150;
const threshold = 100;

/// https://wiki.seeedstudio.com/Grove-Light_Sensor/ 
/// https://www.seeedstudio.com/Grove-Base-Hat-for-Raspberry-Pi.html
/// https://wiki.seeedstudio.com/Grove_Base_Hat_for_Raspberry_Pi_Zero
void main() {
  const analogPin = 0;
  const ledPin = 16;

  var hat = GroveBaseHat();
  print(hat.getFirmware());
  print(hat.getName());
  print("Analog pin: $analogPin");
  print("Led pin: $ledPin");

  var led = GPIO(ledPin, GPIOdirection.gpioDirOut);
  led.write(false);

  bool ledStatus = false;

  while (true) {
    var value = hat.readADCraw(analogPin);
    if (value < threshold) {
      if (!ledStatus) {
        ledStatus = true;
        led.write(true);
      }
    } else {
      if (ledStatus) {
        ledStatus = false;
        led.write(false);
      }
    }
    sleep(Duration(milliseconds: wait));
  }
}

🏗 Install Dart on Raspbian and Armbian

1.) Navigate to the home directory:

cd ~

2.) Download the last stable Dart SDK from archive for your CPU architecture/OS and unzip it.

arm
wget https://storage.googleapis.com/dart-archive/channels/stable/release/3.10.4/sdk/dartsdk-linux-arm-release.zip
unzip dartsdk-linux-arm-release.zip
arm64
wget https://storage.googleapis.com/dart-archive/channels/stable/release/3.10.4/sdk/dartsdk-linux-arm64-release.zip
unzip dartsdk-linux-arm64-release.zip
IA32 (deprecated)

Warning Dart 3.7.3 is the last version with ia32 support!

wget https://storage.googleapis.com/dart-archive/channels/stable/release/3.7.3/sdk/dartsdk-linux-ia32-release.zip
unzip dartsdk-linux-ia32-release.zip
X64
wget https://storage.googleapis.com/dart-archive/channels/stable/release/3.10.4/sdk/dartsdk-linux-x64-release.zip
unzip dartsdk-linux-x64-release.zip
RISC-V (RV64GC)
wget https://storage.googleapis.com/dart-archive/channels/stable/release/3.10.4/sdk/dartsdk-linux-riscv64-release.zip
unzip dartsdk-linux-riscv64-release.zip

3.) Move and grant the appropriate permissions to the SDK:

sudo mv dart-sdk /opt/
sudo chmod -R +rx /opt/dart-sdk

4.) Add Dart SDK to the path by editing ~/.profile and then apply the changes:

nano ~/.profile

following command

export PATH=$PATH:/opt/dart-sdk/bin

at the end of the file and call

source ~/.profile

after editing to apply the changes.

Test the installation

 dart --version
Dart SDK version: 3.10.4 (stable) (Tue Dec 9 00:01:55 2025 -0800) on "linux_arm"

📚 Native libraries

dart_periphery includes prebuilt native c-periphery libraries for

Important hint: dart_periphery includes an automatic mechanism to load the correct library.

The additional methods described here can be used to override this default mechanism if needed. But be aware, any of these methods to disable or change the behaviour the auto detection must be called before any dart_periphery interface is used!

/// Sets the tmp directory for the extraction of the libperiphery.so file.
void setTempDirectory(String tmpDir)

/// Allows to load an existing libperiphery.so file from tmp directory. 
void reuseTmpFileLibrary(bool reuse)
/// loads the shared library 
/// export LD_LIBRARY_PATH=/usr/local/lib:$LD_LIBRARY_PATH
useSharedLibrary(); 

If this method is called, dart_periphery loads the shared library. For this case c-periphery must be installed as a shared library. See the section Shared Library for details.

To load a custom library call following method

void setCustomLibrary(String absolutePath)

This method can also be helpful for a currently not supported platform.

If you want to load the library from the current directory call

void useLocalLibrary()

The appropriate library can be found here .

⏱️ Dart isolates

Starting from version 0.9.7, the default library handling mechanism creates a temporary library file, named in the format e.g. pid_1456_libperiphery_arm.so. The unique process ID for each isolate prevents repeated creation of the temporary library, avoiding crashes caused by overwriting an actively used library.

Library setup override methods, such as:

void useSharedLibrary();
void setCustomLibrary(String absolutePath);

must be called separately within each isolate. This is necessary because each isolate initializes dart_periphery independently.

🍓 flutter-pi

dart_periphery works with flutter-pi, a light-weight Flutter Engine Embedder for Raspberry Pi.

flutter-pi specific methods
// Loads the library from the flutter-pi asset directory.
void loadLibFromFlutterAssetDir(bool load) 

loads the appropriate library from the flutter asset directory. This overwrites the library self-extraction mechanism.

These methods must be called before any dart_periphery interface is used! See last section, native libraries for details.

List<String> getFlutterPiArgs();

returns the command line parameter list of the flutter-pi command. The last parameter contains the asset directory.

🔬 Tested SoC hardware

🖥 Supported devices (sensors, actuators, extensions hats and displays)

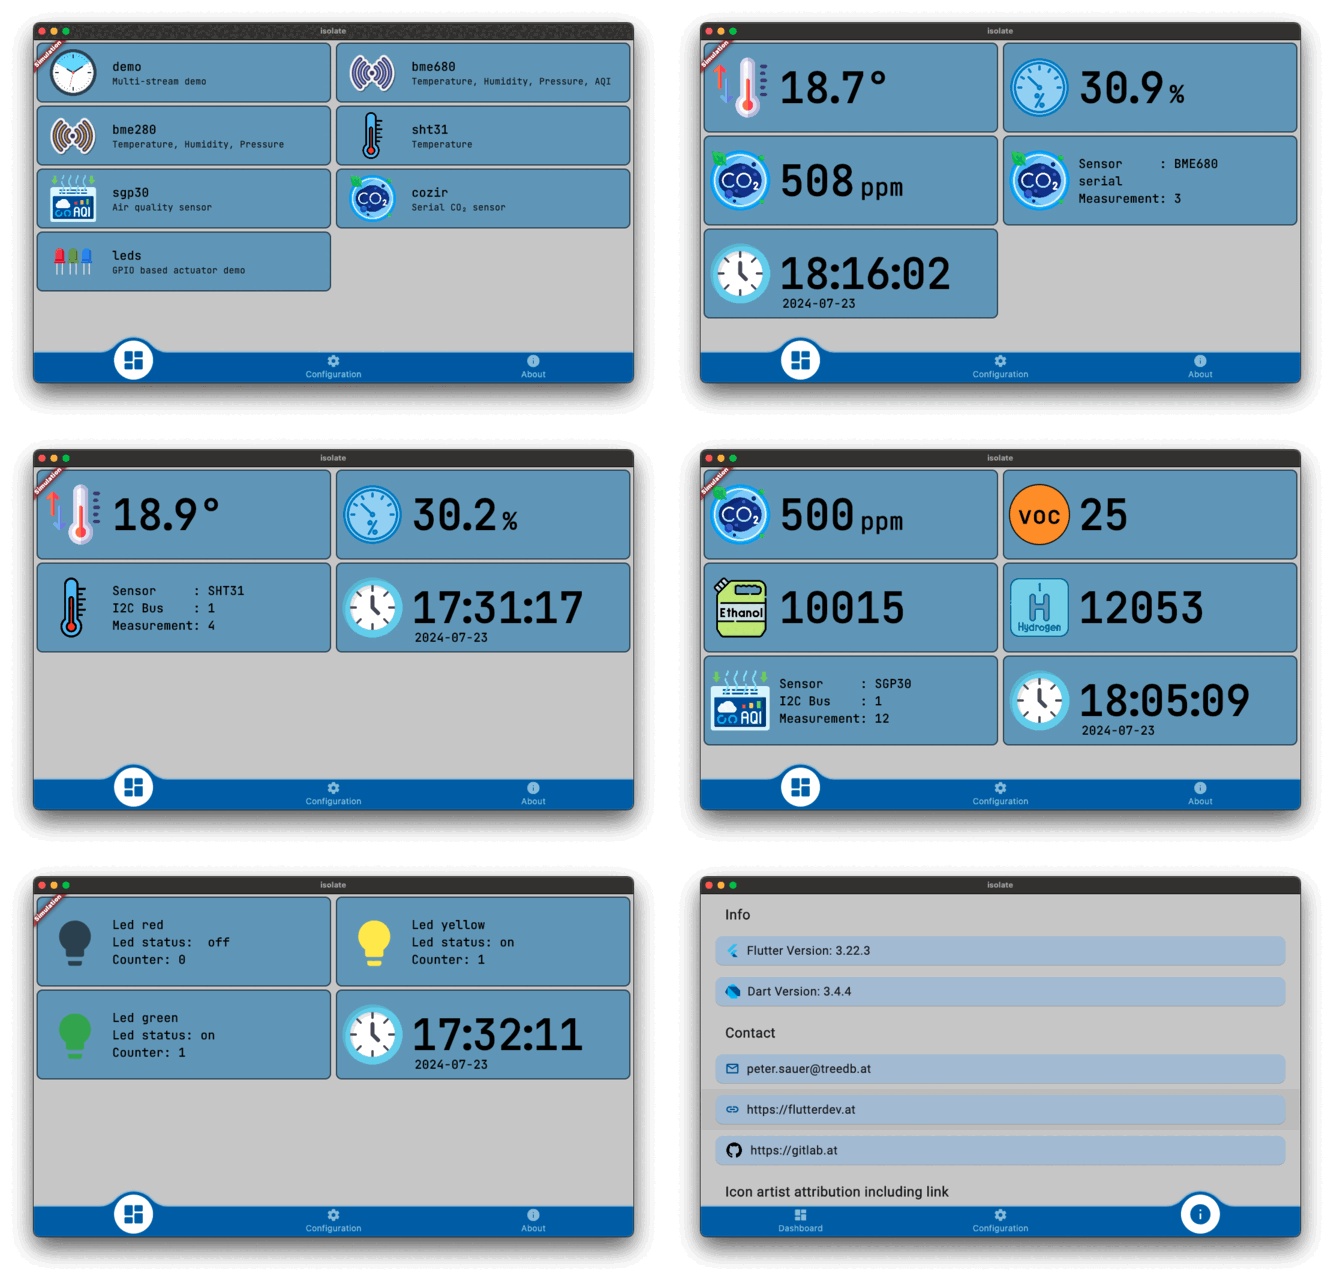
🌡 flutter_pi_sensor_tester

alt text

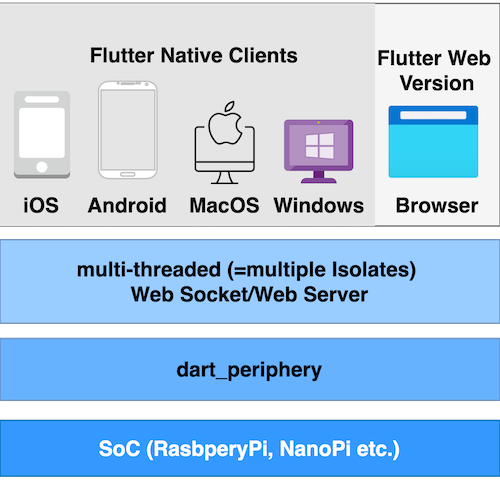
This subproject bases on flutter-pi and implements a simple Dart isolate/stream architecture designed to transfer sensor data from an isolate to the Flutter UI:

Isolate interface: This consists of the steps InitTask, MainTask, and ExitTask, along with a limited back channel for controlling the Dart isolate. This setup is typically used for sensor measurements:

  • InitTask: Initializes the sensor.
  • MainTask: Collects sensor data and passes it to a stream.
  • ExitTask: Disposes of the sensor.

Listening Mode: Supports user-defined handling for isolate events. This variant remains on standby for data; once data is processed, the result is passed to the stream and subsequently to the Flutter UI. This model is used for actuator control, such as operating a LED.

Support for Multiple Streams: Enables handling of multiple data streams simultaneously.

This project is currently still beta and development is ongoing.

💧 flutter_sensor_tester

This project builds upon the flutter_pi_sensor_tester by introducing a client/server architecture, enhancing its functionality for distributed applications.

alt text

Currently in its alpha stage, the project is scheduled for release in March 2025.

📋 Test matrix

Test suite

Architecture GPIO GPIOsysfs I2C SPI Serial MMIO PWM LED
ARM ² ✅ ✅ ✅ ✅ ✅ ✅ ✅ ✅
AARCH64 ³ ❌⁴ ✅ ✅ ✅ ✅ ✅ ✅ ✅
X86 ⁵ ☐ ☐ ☐ ☐ ☐ ☐ ☐ ☐
X86_64 ⁵ ☐ ☐ ☐ ☐ ☐ ☐ ☐ ☐
RISC V ⁶ ☐ ☐ ✅ ☐ ☐ ☐ ☐ ☐

☐ missing test | ✅ test passed | ❌ test failed

² Raspberry Pi 3 Model B

³ Raspberry Pi OS (64-bit), NanoPi Neo2 with a Allwinner H5, Quad-core 64-bit CPU

⁴ Fails for NanoPi, NanoPi Neo2 and Banana Pi on Armbian- same behavior like the original c-periphery test program. This is a point of deeper investigations

⁵ no X86/X86_64 SoC for testing available

⁶ Banana Pi BPI-F3, only limited tests

🙏 Help wanted

  • Testing dart_periphery on different SoC platforms
  • Documentation review - I am not a native speaker.
  • Code review - this is my first public Dart project. I am a Java developer and probably I tend to solve problems rather in the Java than in the Dart way.

카테고리

의존성

의존성 목록 8 개

소스 저장소

이 패키지를 사용하는 프로젝트