패키지, 저장소 및 앱 카테고리 검색

flutter_mapbox_navigation 표지
패키지 상세v0.2.2

flutter_mapbox_navigation

MapBox를 사용하여 Flutter 애플리케이션에 단계별 내비게이션을 추가하세요. 사용자를 특정 위치로 안내해야 할 때 앱을 떠나지 마세요.

AndroidiOS
30일 다운로드
622
좋아요
305
Pub 점수
120

패키지 설치

flutter pub add flutter_mapbox_navigation

패키지 개요

공개 정보를 바탕으로 생성한 선택 가이드입니다.

flutter_mapbox_navigation 패키지는 Mapbox의 라우팅 및 지도 서비스를 사용하여 Flutter 앱에서 차선별 내비게이션을 가능하게 합니다. 개발자는 외부 지도 앱으로 전환할 필요 없이 앱 내부에서 원활한 실시간 내비게이션을 통합할 수 있습니다. Android와 iOS 모두 지원하며, 경로 시각화, 음성 안내, 실시간 추적 기능을 포함해 네이티브에 가까운 내비게이션 경험을 제공합니다. 이 패키지는 통합과 커스터마이징이 쉬워 위치 기반 내비게이션 기능이 필요한 앱에 이상적입니다.

사용 사례

  • 앱 내 탐색
  • 타다 앱
  • 배송 추적
  • 관광 가이드 애플리케이션
  • 현장 서비스 관리

주요 기능

  • 단계별 안내
  • 실시간 위치 추적
  • 음성 안내
  • Mapbox 통합
  • 사용자 지정 가능한 UI

적합한 대상

  • 네비게이션 중심 앱
  • 위치 기반 서비스
  • 모바일 플릿 관리
  • 여행 및 물류 앱

고려 사항

  • Mapbox API 키가 필요합니다
  • 제한된 오프라인 지원
  • Mapbox SDK에 종속됨
  • 내비게이션 중 배터리 사용량 증가
  • 위치 액세스 권한이 필요합니다

원본 README

연결된 소스 저장소의 README 원문 스냅샷입니다. 최신 내용은 저장소에서 확인하세요.

Pub BuyMeACoffee

flutter_mapbox_navigation

Add Turn By Turn Navigation to Your Flutter Application Using MapBox. Never leave your app when you need to navigate your users to a location.

Features

IOS Configuration

  1. Go to your Mapbox account dashboard and create an access token that has the DOWNLOADS:READ scope. PLEASE NOTE: This is not the same as your production Mapbox API token. Make sure to keep it private and do not insert it into any Info.plist file. Create a file named .netrc in your home directory if it doesn’t already exist, then add the following lines to the end of the file:

    machine api.mapbox.com
      login mapbox
      password PRIVATE_MAPBOX_API_TOKEN
    

    where PRIVATE_MAPBOX_API_TOKEN is your Mapbox API token with the DOWNLOADS:READ scope.

  2. Mapbox APIs and vector tiles require a Mapbox account and API access token. In the project editor, select the application target, then go to the Info tab. Under the “Custom iOS Target Properties” section, set MBXAccessToken to your access token. You can obtain an access token from the Mapbox account page.

  3. In order for the SDK to track the user’s location as they move along the route, set NSLocationWhenInUseUsageDescription to:

    Shows your location on the map and helps improve OpenStreetMap.

  4. Users expect the SDK to continue to track the user’s location and deliver audible instructions even while a different application is visible or the device is locked. Go to the Capabilities tab. Under the Background Modes section, enable “Audio, AirPlay, and Picture in Picture” and “Location updates”. (Alternatively, add the audio and location values to the UIBackgroundModes array in the Info tab.)

Android Configuration

  1. Mapbox APIs and vector tiles require a Mapbox account and API access token. Add a new resource file called mapbox_access_token.xml with it's full path being <YOUR_FLUTTER_APP_ROOT>/android/app/src/main/res/values/mapbox_access_token.xml. Then add a string resource with name "mapbox_access_token" and your token as it's value as shown below. You can obtain an access token from the Mapbox account page.
<?xml version="1.0" encoding="utf-8"?>
<resources xmlns:tools="http://schemas.android.com/tools">
    <string name="mapbox_access_token" translatable="false" tools:ignore="UnusedResources">ADD_MAPBOX_ACCESS_TOKEN_HERE</string>
</resources>
  1. Add the following permissions to the app level Android Manifest
<manifest>
    ...
    <uses-permission android:name="android.permission.ACCESS_COARSE_LOCATION" />
    <uses-permission android:name="android.permission.ACCESS_FINE_LOCATION" />
    <uses-permission android:name="android.permission.ACCESS_NETWORK_STATE" />
    ...
</manifest>
  1. Add the MapBox Downloads token with the downloads:read scope to your gradle.properties file in Android folder to enable downloading the MapBox binaries from the repository. To secure this token from getting checked into source control, you can add it to the gradle.properties of your GRADLE_HOME which is usually at $USER_HOME/.gradle for Mac. This token can be retrieved from your MapBox Dashboard. You can review the Token Guide to learn more about download tokens
MAPBOX_DOWNLOADS_TOKEN=sk.XXXXXXXXXXXXXXX

After adding the above, your gradle.properties file may look something like this:

org.gradle.jvmargs=-Xmx1536M
android.useAndroidX=true
android.enableJetifier=true
MAPBOX_DOWNLOADS_TOKEN=sk.epe9nE9peAcmwNzKVNqSbFfp2794YtnNepe9nE9peAcmwNzKVNqSbFfp2794YtnN.-HrbMMQmLdHwYb8r
  1. Update MainActivity.kt to extends FlutterFragmentActivity vs FlutterActivity. Otherwise you'll get Caused by: java.lang.IllegalStateException: Please ensure that the hosting Context is a valid ViewModelStoreOwner.
//import io.flutter.embedding.android.FlutterActivity
import io.flutter.embedding.android.FlutterFragmentActivity

class MainActivity: FlutterFragmentActivity() {
}
  1. Add implementation platform("org.jetbrains.kotlin:kotlin-bom:1.8.0") to android/app/build.gradle

Usage

Set Default Route Options (Optional)
    MapBoxNavigation.instance.setDefaultOptions(MapBoxOptions(
                     initialLatitude: 36.1175275,
                     initialLongitude: -115.1839524,
                     zoom: 13.0,
                     tilt: 0.0,
                     bearing: 0.0,
                     enableRefresh: false,
                     alternatives: true,
                     voiceInstructionsEnabled: true,
                     bannerInstructionsEnabled: true,
                     allowsUTurnAtWayPoints: true,
                     mode: MapBoxNavigationMode.drivingWithTraffic,
                     mapStyleUrlDay: "https://url_to_day_style",
                     mapStyleUrlNight: "https://url_to_night_style",
                     units: VoiceUnits.imperial,
                     simulateRoute: true,
                     language: "en"))
Listen for Events
  MapBoxNavigation.instance.registerRouteEventListener(_onRouteEvent);
  Future<void> _onRouteEvent(e) async {

        _distanceRemaining = await _directions.distanceRemaining;
        _durationRemaining = await _directions.durationRemaining;
    
        switch (e.eventType) {
          case MapBoxEvent.progress_change:
            var progressEvent = e.data as RouteProgressEvent;
            _arrived = progressEvent.arrived;
            if (progressEvent.currentStepInstruction != null)
              _instruction = progressEvent.currentStepInstruction;
            break;
          case MapBoxEvent.route_building:
          case MapBoxEvent.route_built:
            _routeBuilt = true;
            break;
          case MapBoxEvent.route_build_failed:
            _routeBuilt = false;
            break;
          case MapBoxEvent.navigation_running:
            _isNavigating = true;
            break;
          case MapBoxEvent.on_arrival:
            _arrived = true;
            if (!_isMultipleStop) {
              await Future.delayed(Duration(seconds: 3));
              await _controller.finishNavigation();
            } else {}
            break;
          case MapBoxEvent.navigation_finished:
          case MapBoxEvent.navigation_cancelled:
            _routeBuilt = false;
            _isNavigating = false;
            break;
          default:
            break;
        }
        //refresh UI
        setState(() {});
      }
Begin Navigating

    final cityhall = WayPoint(name: "City Hall", latitude: 42.886448, longitude: -78.878372);
    final downtown = WayPoint(name: "Downtown Buffalo", latitude: 42.8866177, longitude: -78.8814924);

    var wayPoints = List<WayPoint>();
    wayPoints.add(cityHall);
    wayPoints.add(downtown);
    
    await MapBoxNavigation.instance.startNavigation(wayPoints: wayPoints);
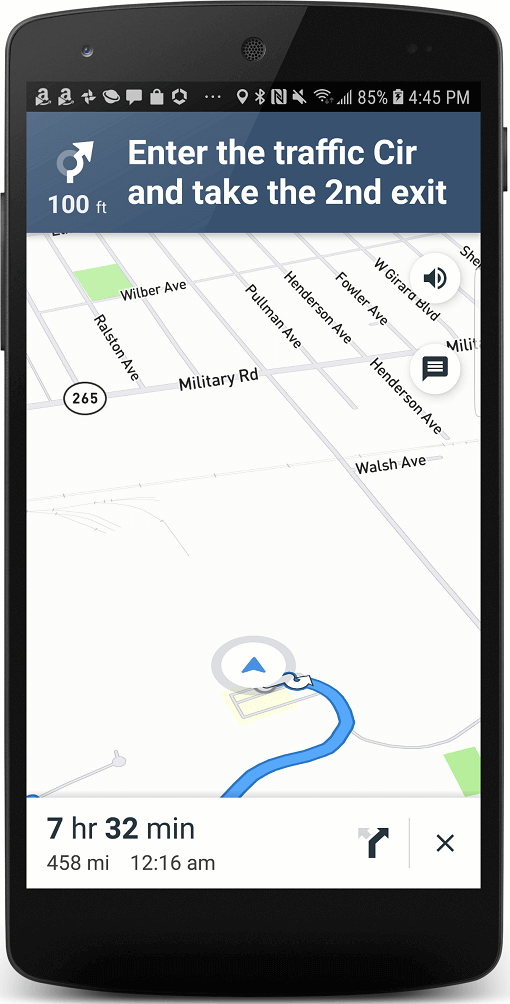
Screenshots
Navigation View Android View
iOS View Android View

Embedding Navigation View

Declare Controller
      MapBoxNavigationViewController _controller;
Add Navigation View to Widget Tree
            Container(
                color: Colors.grey,
                child: MapBoxNavigationView(
                    options: _options,
                    onRouteEvent: _onRouteEvent,
                    onCreated:
                        (MapBoxNavigationViewController controller) async {
                      _controller = controller;
                    }),
              ),
Build Route
        var wayPoints = List<WayPoint>();
                            wayPoints.add(_origin);
                            wayPoints.add(_stop1);
                            wayPoints.add(_stop2);
                            wayPoints.add(_stop3);
                            wayPoints.add(_stop4);
                            wayPoints.add(_origin);
                            _controller.buildRoute(wayPoints: wayPoints);
Start Navigation
    _controller.startNavigation();
Additional IOS Configuration

Add the following to your info.plist file

    <dict>
        ...
        <key>io.flutter.embedded_views_preview</key>
        <true/>
        ...
    </dict>
Embedding Navigation Screenshots
Navigation View Navigation View
Embedded iOS View Embedded Android View

To Do

  • [DONE] Android Implementation
  • [DONE] Add more settings like Navigation Mode (driving, walking, etc)
  • [DONE] Stream Events like relevant navigation notifications, metrics, current location, etc.
  • [DONE] Embeddable Navigation View
  • Offline Routing

카테고리

의존성

의존성 목록 2 개

소스 저장소

이 패키지를 사용하는 프로젝트

아직 데이터가 없습니다.