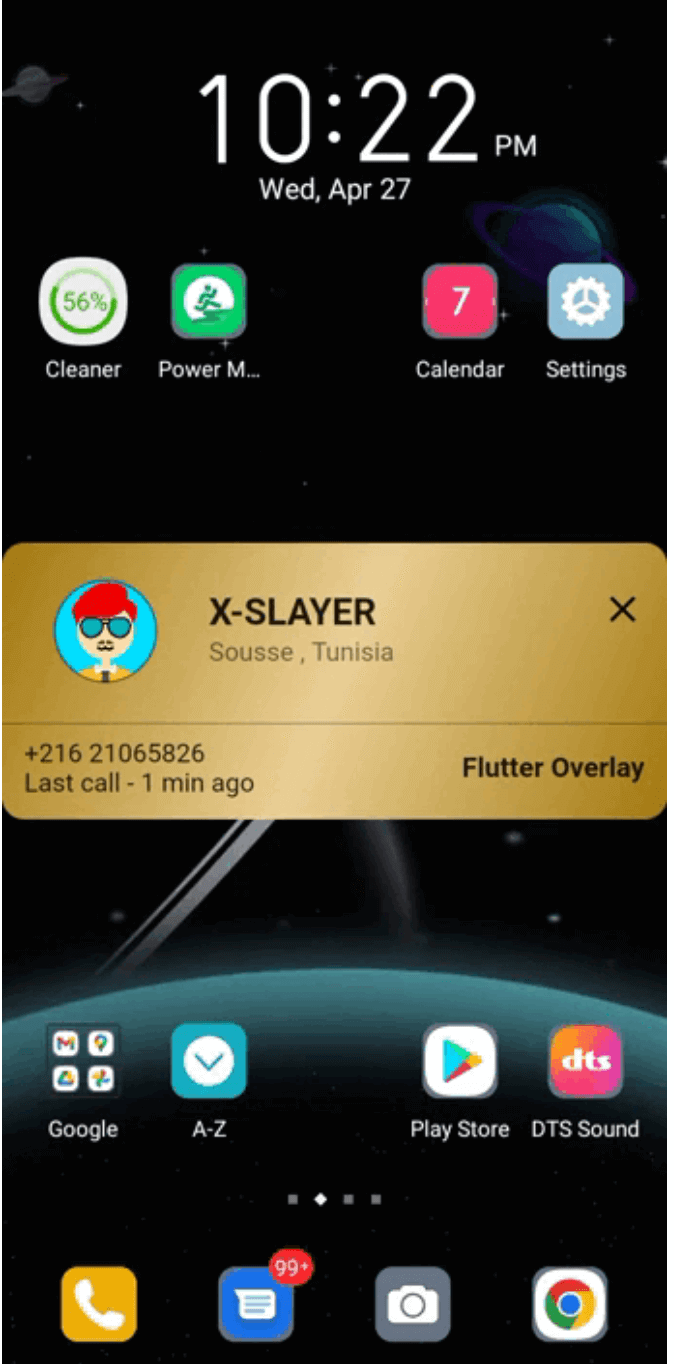
Flutter 플러그인으로 Android에서 다른 애플리케이션 위에 콘텐츠를 표시할 수 있게 해주는 기능을 제공합니다. 예를 들어 플로팅 윈도우 또는 오버레이입니다. 개발자는 다양한 앱 컨텍스트에서 항상 보이는 지속적인 UI 요소를 만들 수 있으며, 채팅 헤드, 미디어 컨트롤 또는 실시간 알림과 같은 도구에 이상적입니다. 이 플러그인은 Android 시스템의 오버레이 권한과 통합되어 오버레이 창의 위치, 가시성 및 상호작용을 관리하는 간단한 API를 제공합니다. 전체 화면 방해 없이 사용자 주의를 지속적으로 요구하는 앱에 특히 유용합니다.
사용 사례
플로팅 채팅 헤드
실시간 알림
미디어 제어 오버레이
지속적인 UI 위젯
화면 녹화 도우미
주요 기능
안드로이드 전용 지원
시스템 오버레이 권한 처리
사용자 정의 가능한 오버레이 크기 및 위치
표시/숨기기용 간단한 API
백그라운드 실행 호환성
적합한 대상
지속적인 화면 요소가 필요한 앱
인터랙티브 오버레이를 구축하는 개발자
사용자 상호작용이 최소한으로 필요한 도구
Android 중심의 Flutter 프로젝트
접근성 또는 유틸리티 앱
고려 사항
Android 시스템 오버레이 권한이 필요합니다
안드로이드 플랫폼에 제한됨
기기 제조업체에 의해 제한될 수 있습니다
사용자는 수동으로 오버레이 권한을 활성화해야 합니다
잠재적인 배터리 및 성능 영향
원본 README
연결된 소스 저장소의 README 원문 스냅샷입니다. 최신 내용은 저장소에서 확인하세요.
Flutter plugin for displaying your Flutter app over other apps on the screen
Preview
TrueCaller overlay example
click-through overlay example
Messanger chat-head example
Installation
Add package to your pubspec:
dependencies:flutter_overlay_window:any# or the latest version on Pub
Android
You'll need to add the SYSTEM_ALERT_WINDOW permission and OverlayService to your Android Manifest.
Replace explanation_for_special_use with your custom explanation.
/// check if overlay permission is grantedfinalbool status = awaitFlutterOverlayWindow.isPermissionGranted();
/// request overlay permission/// it will open the overlay settings page and return `true` once the permission granted.finalbool status = awaitFlutterOverlayWindow.requestPermission();
/// Open overLay content////// - Optional arguments:////// `height` the overlay height and default is [WindowSize.fullCover]////// `width` the overlay width and default is [WindowSize.matchParent]////// `alignment` the alignment postion on screen and default is [OverlayAlignment.center]////// `visibilitySecret` the detail displayed in notifications on the lock screen and default is [NotificationVisibility.visibilitySecret]////// `OverlayFlag` the overlay flag and default is [OverlayFlag.defaultFlag]////// `overlayTitle` the notification message and default is "overlay activated"////// `overlayContent` the notification message////// `enableDrag` to enable/disable dragging the overlay over the screen and default is "false"////// `positionGravity` the overlay postion after drag and default is [PositionGravity.none]////// `startPosition` the overlay start position and default is nullawaitFlutterOverlayWindow.showOverlay();
/// closes overlay if openawaitFlutterOverlayWindow.closeOverlay();
/// broadcast data to and from overlay appawaitFlutterOverlayWindow.shareData("Hello from the other side");
/// streams message shared between overlay and main appFlutterOverlayWindow.overlayListener.listen((event) {
log("Current Event: $event");
});
/// use [OverlayFlag.focusPointer] when you want to use fields that show keyboardsawaitFlutterOverlayWindow.showOverlay(flag: OverlayFlag.focusPointer);
/// update the overlay flag while the overlay in actionawaitFlutterOverlayWindow.updateFlag(OverlayFlag.defaultFlag);
/// Update the overlay size in the screenawaitFlutterOverlayWindow.resizeOverlay(80, 120);
/// Update the overlay position in the screen////// `position` the new position of the overlay////// `return` true if the position updated successfullyawaitFlutterOverlayWindow.moveOverlay(OverlayPosition(0, 156))
/// Get the current overlay position////// `return` the current overlay positionawaitFlutterOverlayWindow.getOverlayPosition()
enumOverlayFlag {
/// Window flag: this window can never receive touch events./// Usefull if you want to display click-through overlay
clickThrough,
/// Window flag: this window won't ever get key input focus/// so the user can not send key or other button events to it.
defaultFlag,
/// Window flag: allow any pointer events outside of the window to be sent to the windows behind it./// Usefull when you want to use fields that show keyboards.
focusPointer,
}
/// Type of dragging behavior for the overlay.enumPositionGravity {
/// The `PositionGravity.none` will allow the overlay to postioned anywhere on the screen.
none,
/// The `PositionGravity.right` will allow the overlay to stick on the right side of the screen.
right,
/// The `PositionGravity.left` will allow the overlay to stick on the left side of the screen.
left,
/// The `PositionGravity.auto` will allow the overlay to stick either on the left or right side of the screen depending on the overlay position.
auto,
}