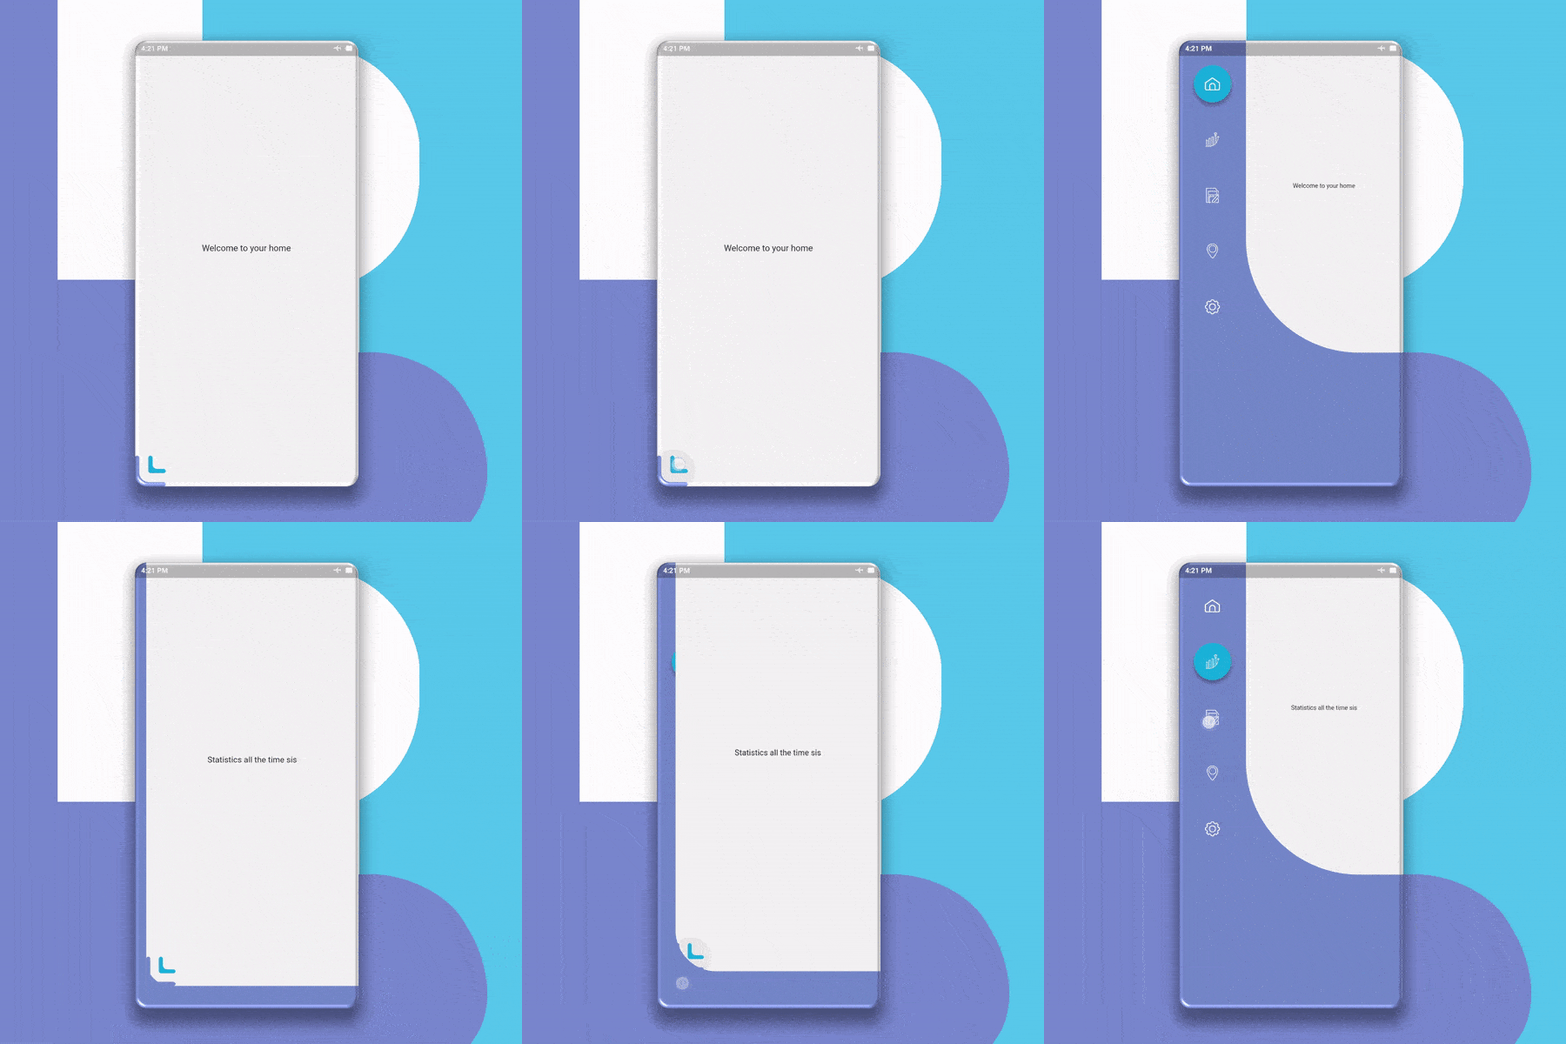
Ein reibungsloser und animierter Navigations-Paket für Flutter, das den Bildschirm nicht beeinträchtigt und mit anpassbaren Farben, Formen und Navigationslogik ausgestattet ist.
Aus öffentlichen Paketdaten erstellte Orientierung.
Flurry Navigation ist ein Flutter-Paket, das glatte, animierte Navigation mit anpassbaren Farben, Formen und Navigationslogik bietet. Es wurde entwickelt, um die Benutzererfahrung zu verbessern, ohne den Hauptbildschirminhalt zu beeinträchtigen, und bietet einen sauberen und modernen Ansatz für die Navigation. Ideal für Apps, die elegante Übergänge und flexible Layoutsteuerung erfordern, integriert es sich nahtlos in bestehende Flutter-Projekte. Das Paket unterstützt Anpassung, während Leistung und visuelle Attraktivität erhalten bleiben.
Anwendungsfälle
Benutzerdefinierte animierte Seitenmenüs
Glatte Bildschirmübergänge
Branded Navigation Drawers
Interaktive Benutzeroberflächenkomponenten
Mobile App-Navigationsleisten
Dynamikformbasierte Navigation
Hauptmerkmale
Animierte Navigationsübergänge
Einstellbare Farben und Formen
nicht-invasive Bildschirmintegration
Anpassbare Navigationslogik
Leicht und leistungsstark
Einfache Integration mit Flutter
Geeignet für
Entwickler, die animierte Navigation suchen
designorientierte Flutter-Apps
Apps mit brandbezogener Benutzeroberfläche benötigen
Projekte, die eine reibungslose Benutzererfahrung erfordern
Teams, die wiederverwendbare Navigationskomponenten wollen
Hinweise
eingeschränkte plattformspezifische Funktionen
Keine integrierte Dunkelmodus-Unterstützung
Benötigt manuelle Konfiguration für komplexe Flows
Am besten geeignet für einfache bis moderate Navigationsstrukturen
Nicht für große Navigationshierarchien optimiert
Original-README
Originaler README-Schnappschuss aus dem verknüpften Quell-Repository. Aktuelle Inhalte finden Sie im Repository.
flurry_navigation
A Smooth and Animated navigation package for flutter that doesn’t interfere with the Screen with adjustable colors, shapes, and navigation logic.
Getting Started
First of all, Depend on the package.
dependencies:...flurry_navigation:^0.2.0#May not be the latest version
Changes to the Screens files
Add your code inside this variable below in every screen you want to navigate.
import'package:flurry_navigation/flurry_navigation.dart';
//The variable name must be uniquefinal firstscreen = newScreen(
);
Changes in the main file
First You should declare a variable called activeScreen.
var activeScreen;
Now add a Widget builder class that returns new FlurryNavigation.
Add values to these attributes to FlurryNavigation.
Widgetbuild(BuildContext context) {
newFlurryNavigation(
// The Icon data of the icon the BottomLeft
expandIcon: Image.asset("Put your path here"),
// The size of the icon on the BottomLeft
iconSize: 50.0,
// The content of the screen. leave it as it is
contentScreen: activeScreen,
)
}
Now add the menuScreen attribute FlurryNavigation and set it to the value below.
[If you want to use your own menu, contact me and I will provide you with the instructions].
Then add the "items" attribute to "Menu" and set it to the list of items you want in the menu "which usually matches the no. of screens", with "new MenuItem" like the example below.
Widgetbuild(BuildContext context) {
returnnewFlurryNavigation(
...
menuScreen: newMenuScreen(
menu: newMenu(
items: [
//You can add as many items as you want, it's scrollable!!newMenuItem(
id: 'hom',//Set this to whatever you want but do not duplicate it. !Required!
icon: 'assets/hom.png',//Set this to the path of the data for the icon of the button !Required!
isSelected: true ,//make sure the default item "isSelected" attribute is set to "true" !Required!
selectedBtnColor: Color.fromRGBO(38, 198, 218, 1//the color of the item if activated !Required!
btnShape: BoxShape.rectangle
//the shape of the item !Required!
#disabledBtnColor: Colors.transparent, //this have a default value of Colors.transparent
#selectedShadowColor: Colors.blueGrey, //this have a default value of Colors.blueGrey
#disabledShadowColor: Colors.transparent
), //this have a default value of Colors.transparent,newMenuItem(
id: 'sta',
icon: 'assets/sta.png',
isSelected: false,
selectedBtnColor: Color.fromRGBO(38, 198, 218, 1),
btnShape: BoxShape.rectangle
)
]
)
)
)
}
Now add the onMenuItemSelected attribute to "MenuScreen" to specify the logic for the navigation.
Widgetbuild(BuildContext context) {
newFlurryNavigation(
...
menuScreen: newMenuScreen(
...
//this is the logic behind the navigation. tailor the code below to fit your needs. If you want any help message me.
onMenuItemSelected: (String itemId) {
if (itemId == 'hom') {
setState(() => activeScreen = firstscreen);
} elseif (itemId == 'sta') {
setState(() => activeScreen = secondscreen);
}
},
),
);
}
Notice
This is my first markdown file so if you see any problems you're free to open an issue.
You can find a standalone full example in the example app or in the Github repo
Contributing
Pull requests are welcome. For major changes, please open an issue first to discuss what you would like to change.