Aus öffentlichen Paketdaten erstellte Orientierung.
SpriteWidget ist ein Open-Source-Toolkit, das zur Erstellung von hochleistungsfähigen 2D-Animationen und Spielen in Flutter entwickelt wurde. Es bietet eine flexible, komponentenbasierte Architektur, die Sprite-Management, Physik, Partikeleffekte und reibungslose Frame-für-Frame-Animationen unterstützt. Auf Leistung ausgelegt, nutzt es den Rendering-Engine von Flutter, um flüssige Visualisierungen auf mehreren Plattformen zu liefern. Ideal für Entwickler, die interaktive Spiele oder animierte Erlebnisse erstellen, vereinfacht SpriteWidget komplexe grafische Workflows mit intuitiven APIs und erweiterbaren Komponenten.
Anwendungsfälle
2D-Spieleentwicklung
interaktive Animationen
spritebasierte Benutzeroberflächenelemente
Spieleprototypen
Partikeleffekte
Cross-Platform-Spieleveröffentlichung
Hauptmerkmale
Leistungsstarkes Rendern
Sprite- und Animationsystem
Eingebautes Physik-Engine
Partikel-Effekte-Unterstützung
erweiterbare Komponentenarchitektur
Plattformübergreifende Kompatibilität
Geeignet für
Flutter-Spieleentwickler
UI-Animator
Interaktive App-Ersteller
Bildungsspielprojekte
Prototyping von Spielmechaniken
Hinweise
Steiler Lernkurve für Anfänger
Beschränkte Dokumentation im Vergleich zu etablierten Frameworks
Erfordert Verständnis von 2D-Spielkonzepten
Am besten geeignet für 2D-Inhalte und nicht für 3D-Inhalte
Möglicherweise werden zusätzliche Pakete für erweiterte Funktionen benötigt
Original-README
Originaler README-Schnappschuss aus dem verknüpften Quell-Repository. Aktuelle Inhalte finden Sie im Repository.
SpriteWidget
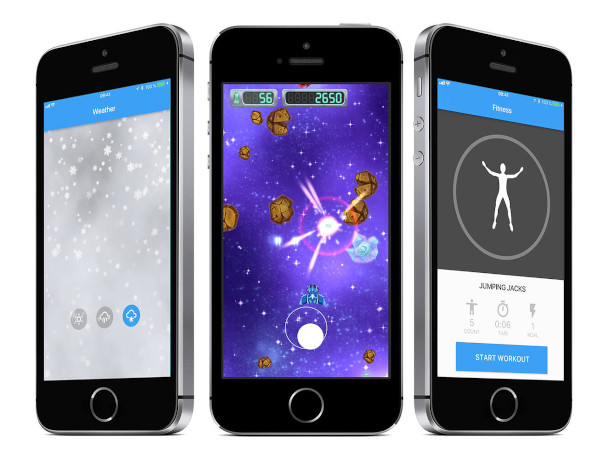
SpriteWidget is a toolkit for building complex, high performance animations and 2D games with Flutter. Your sprite render tree lives inside a widget that mixes seamlessly with other Flutter and Material widgets. You can use SpriteWidget to create anything from an animated icon to a full fledged game. Checkout a SpaceBlast a complete open source game made with SpriteWidget!
SpriteWidget is sponsored by Serverpod, the missing backend for Flutter. It's perfect if you need a backend for your game or any other app.
This guide assumes a basic knowledge of Flutter and Dart. Get support by posting a question tagged spritewidget on StackOverflow.
You can find examples in the example directory, or check out the complete Space Blast game.
Creating a SpriteWidget
The first thing you need to do to use SpriteWidget is to setup a root node that is used to draw it's contents. Any sprite nodes that you add to the root node will be rendered by the SpriteWidget. Typically, your root node is part of your app's state. This is an example of how you can setup a custom stateful widget with a SpriteWidget:
The root node that you provide the SpriteWidget is a NodeWithSize, the size of the root node defines the coordinate system used by the SpriteWidget. By default the SpriteWidget uses letterboxing to display its contents. This means that the size that you give the root node will determine how the SpriteWidget's contents will be scaled to fit. If it doesn't fit perfectly in the area of the widget, either its top and bottom or the left and right side will be trimmed. You can optionally pass in a parameter to the SpriteWidget for other scaling options depending on your needs.
When you have added the SpriteWidget to your app's build method it will automatically start running animations and handling user input. There is no need for any other extra setup.
Adding objects to your node graph
Your SpriteWidget manages a node graph, the root node is the NodeWithSize that is passed in to the SpriteWidget when it's created. To render sprites, particles systems, or any other objects simply add them to the node graph.
Each node in the node graph has a transform. The transform is inherited by its children, this makes it possible to build more complex structures by grouping objects together as children to a node and then manipulating the parent node. For example the following code creates a car sprite with two wheels attached to it. The car is added to the root node.
You can manipulate the transform by setting the position, rotation, scale, and skew properties.
Sprites, textures, and sprite sheets
To load image resources, the easiest way is to use the ImageMap class. The ImageMap can load one or multiple images at once.
The Image class isn't automatically imported through flutter/material, so you may need to add an import at the top of your file.
import'dart:ui'as ui;
Now you can load images using the ImageMap. Note that the loading methods are asynchronous, so this example code will need to go in an asynch method. For a full example of loading images see the Weather Demo.
ImageMap images = ImageMap();
// Load a single imagevar myImage = await images.loadImage('assets/my_image.png');
// Load multiple imagesawait images.load([
'assets/image_0.png',
'assets/image_1.png',
'assets/image_2.png',
]);
// Access a loaded image from the ImageMapvar image0 = images['assets/image_0.png'];
The most common node type is the Sprite node. A sprite simply draws an image to the screen. Sprites can be drawn from Image objects or SpriteTexture objects. A texture is a part of an Image. Using a SpriteSheet you can pack several texture elements within a single image. This saves space in the device's gpu memory and also make drawing faster. Currently SpriteWidget supports sprite sheets in json format and produced with a tool such as TexturePacker. It's uncommon to manually edit the sprite sheet files. You can create a SpriteSheet with a definition in json and an image:
Each time a new frame is rendered to screen SpriteWidget will perform a number of actions. Sometimes when creating more advanced interactive animations or games, the order in which these actions are performed may matter.
This is the order things will happen:
Handle input events
Run animation motions
Call update functions on nodes
Apply constraints
Render the frame to screen
Read more about each of the different phases below.
Handling user input
You can subclass any node type to handle touches. To receive touches, you need to set the userInteractionEnabled property to true and override the handleEvent method. If the node you are subclassing doesn't have a size, you will also need to override the isPointInside method.
If you want your node to receive multiple touches, set the handleMultiplePointers property to true. Each touch down or dragged touch will generate a separate call to the handleEvent method, you can distinguish each touch by its pointer property.
Animating using motions
SpriteWidget provides easy to use functions for animating nodes through motions. You can combine simple motion blocks to create more complex animations.
To execute a motion animation you first build the motion itself, then pass it to the run method of a nodes motion manager (see the Tweens section below for an example).
Tweens
Tweens are the simplest building block for creating an animation. It will interpolate a value or property over a specified time period. You provide the MotionTween class with a setter function, its start and end value, and the duration for the tween.
After creating a tween, execute it by running it through a node's motion manager.
var myNode = Node();
var myTween = MotionTween<Offset> (
setter: (a) => myNode.position = a,
start: Offset.zero,
end: constOffset(100.0, 0.0),
duration: 1.0,
);
myNode.motions.run(myTween);
You can animate values of different types, such as floats, points, rectangles, and even colors. You can also optionally provide the MotionTween class with an easing function.
Sequences
When you need to play two or more motions in a sequence, use the MotionSequence class:
Each frame, update events are sent to each node in the current node tree. Override the update method to manually do animations or to perform game logic.
MyNodeextendsNode {
@overrideupdate(double dt) {
// Move the node at a constant speed
position += Offset(dt * 1.0, 0.0);
}
}
Defining constraints
Constraints are used to constrain properties of nodes. They can be used to position nodes relative other nodes, or adjust the rotation or scale. You can apply more than one constraint to a single node.
For example, you can use a constraint to make a node follow another node at a specific distance with a specified dampening. The dampening will smoothen out the following node's movement.
Constraints are applied at the end of the frame cycle. If you need them to be applied at any other time, you can directly call the applyConstraints method of a Node object.
Perform custom drawing
SpriteWidget provides a default set of drawing primitives, but there are cases where you may want to perform custom drawing. To do this you will need to subclass either the Node or NodeWithSize class and override the paint method:
If you are overriding a NodeWithSize you may want to call applyTransformForPivot before starting drawing to account for the node's pivot point. After the call the coordinate system is setup so you can perform drawing starting at origo to the size of the node.
Particle systems are great for creating effects such as rain, smoke, or fire. It's easy to setup a particle system, but there are very many properties that can be tweaked. The best way of to get a feel for how they work is to simply play around with them.
If you want to play around with particle systems, try out the Particle Designer (web app).
This is an example of how a particle system can be created, configured, and added to the scene: