Catcher_2는 여러 플랫폼에서 처리되지 않은 오류를 캐치하도록 설계된 Flutter 플러그인으로, 개발자에게 사용자 정의 가능한 오류 핸들러를 제공합니다. 애플리케이션 코드에서 빠져나가는 예외를 가로채어 강력한 오류 관리를 보장하며, 자세한 로깅과 실행 가능한 피드백을 제공합니다. Android, iOS, Web, macOS, Windows, Linux를 지원하여 디버깅을 향상시키고 앱의 안정성을 높입니다. 간단한 명령어를 통해 기존 프로젝트에 원활하게 통합되며, 콘솔 로그, 파일 저장 또는 원격 보고와 같은 다양한 출력 형식을 지원합니다.
사용 사례
생산 앱에서 처리되지 않은 예외 처리
사후 분석을 위한 오류 로깅
사용자 정의 로직과 함께 크래시 보고서 통합
다양한 플랫폼 간 앱 신뢰성 향상
개발 중 디버깅
외부 서비스로 오류 보고서 전송
주요 기능
여러 오류 핸들러 구성
크로스 플랫폼 오류 가로채기
사용자 지정 가능한 오류 보고 대상
세부 오류 메타데이터 수집
동기 및 비동기 오류 지원
최소한의 설정으로 간편한 통합
적합한 대상
강력한 오류 처리를 찾는 개발자
앱 안정성과 신뢰성에 집중하는 팀
중앙 집중식 오류 모니터링이 필요한 프로젝트
다중 플랫폼에 배포된 애플리케이션
복잡한 상태 관리에 종사하는 프론트엔드 엔지니어
고려 사항
원격 보고를 위해 추가 구성이 필요할 수 있습니다
과도한 로깅으로 인한 성능에 대한 잠재적 영향
로그에서 민감한 데이터를 신중하게 처리해야 합니다
적절한 예외 처리의 대체가 아님
Flutter에서 오류 전파에 대한 이해가 필요합니다
원본 README
연결된 소스 저장소의 README 원문 스냅샷입니다. 최신 내용은 저장소에서 확인하세요.
Catcher 2
This project is a continuation of catcher by Jakub Homlala with many new features and bug fixes.
Catcher 2 is a Flutter plugin which automatically catches errors/exceptions and offers multiple ways to handle them.
It is heavily inspired from ACRA: https://github.com/ACRA/acra.
It supports Android, iOS, Web, Linux, Windows and MacOS platforms.
Install
Add this line to your pubspec.yaml:
dependencies:catcher_2:^2.0.0
Then run this command:
$ flutter packages get
Then add this import:
import'package:catcher_2/catcher_2.dart';
And now you can use all the features as demonstrated below!
Upgrading from catcher
If you used catcher correctly (and without extra hackage) before, it should be sufficient to replace the following strings everywhere:
Catcher -> Catcher2
catcher -> catcher_2 (only in very few places you need to use catcher2 instead)
Also note the following:
HttpHandler had some breaking changes due to the upgrade to dio 5.x
If you are still unsure or something is not working as well as before, please open a new issue.
To check which features of Catcher 2 are available in given platform visit this page: Platform support
Basic example
Basic example utilizes debug config with Dialog Report Mode and Console Handler and release config with Dialog Report Mode and Email Manual Handler.
To start using Catcher 2, you have to:
Create Catcher 2 configuration (you can use only debug config at start)
Create Catcher 2 instance and pass your root widget along with its configuration
Add navigator key to MaterialApp or CupertinoApp
Here is complete example:
import'package:flutter/material.dart';
import'package:catcher_2/catcher_2.dart';
main() {
/// STEP 1. Create Catcher 2 configuration. /// Debug configuration with dialog report mode and console handler. It will show dialog and once user accepts it, error will be shown /// in console.Catcher2Options debugOptions =
Catcher2Options(DialogReportMode(), [ConsoleHandler()]);
/// Release configuration. Same as above, but once user accepts dialog, user will be prompted to send email with crash to support.Catcher2Options releaseOptions = Catcher2Options(DialogReportMode(), [
EmailManualHandler(["support@email.com"])
]);
/// STEP 2. Pass your root widget (MyApp) along with Catcher 2 configuration:Catcher2(rootWidget: MyApp(), debugConfig: debugOptions, releaseConfig: releaseOptions);
}
classMyAppextendsStatefulWidget{
@override_MyAppStatecreateState() => _MyAppState();
}
class_MyAppStateextendsState<MyApp> {
@overridevoidinitState() {
super.initState();
}
@overrideWidgetbuild(BuildContext context) {
returnMaterialApp(
/// STEP 3. Add navigator key from Catcher 2. It will be used to navigate user to report page or to show dialog.
navigatorKey: Catcher2.navigatorKey,
home: Scaffold(
appBar: AppBar(
title: constText('Plugin example app'),
),
body: ChildWidget()),
);
}
}
classChildWidgetextendsStatelessWidget{
@overrideWidgetbuild(BuildContext context) {
returnContainer(
child: TextButton(
child: Text("Generate error"),
onPressed: () => generateError()));
}
generateError() async {
throw"Test exception";
}
}
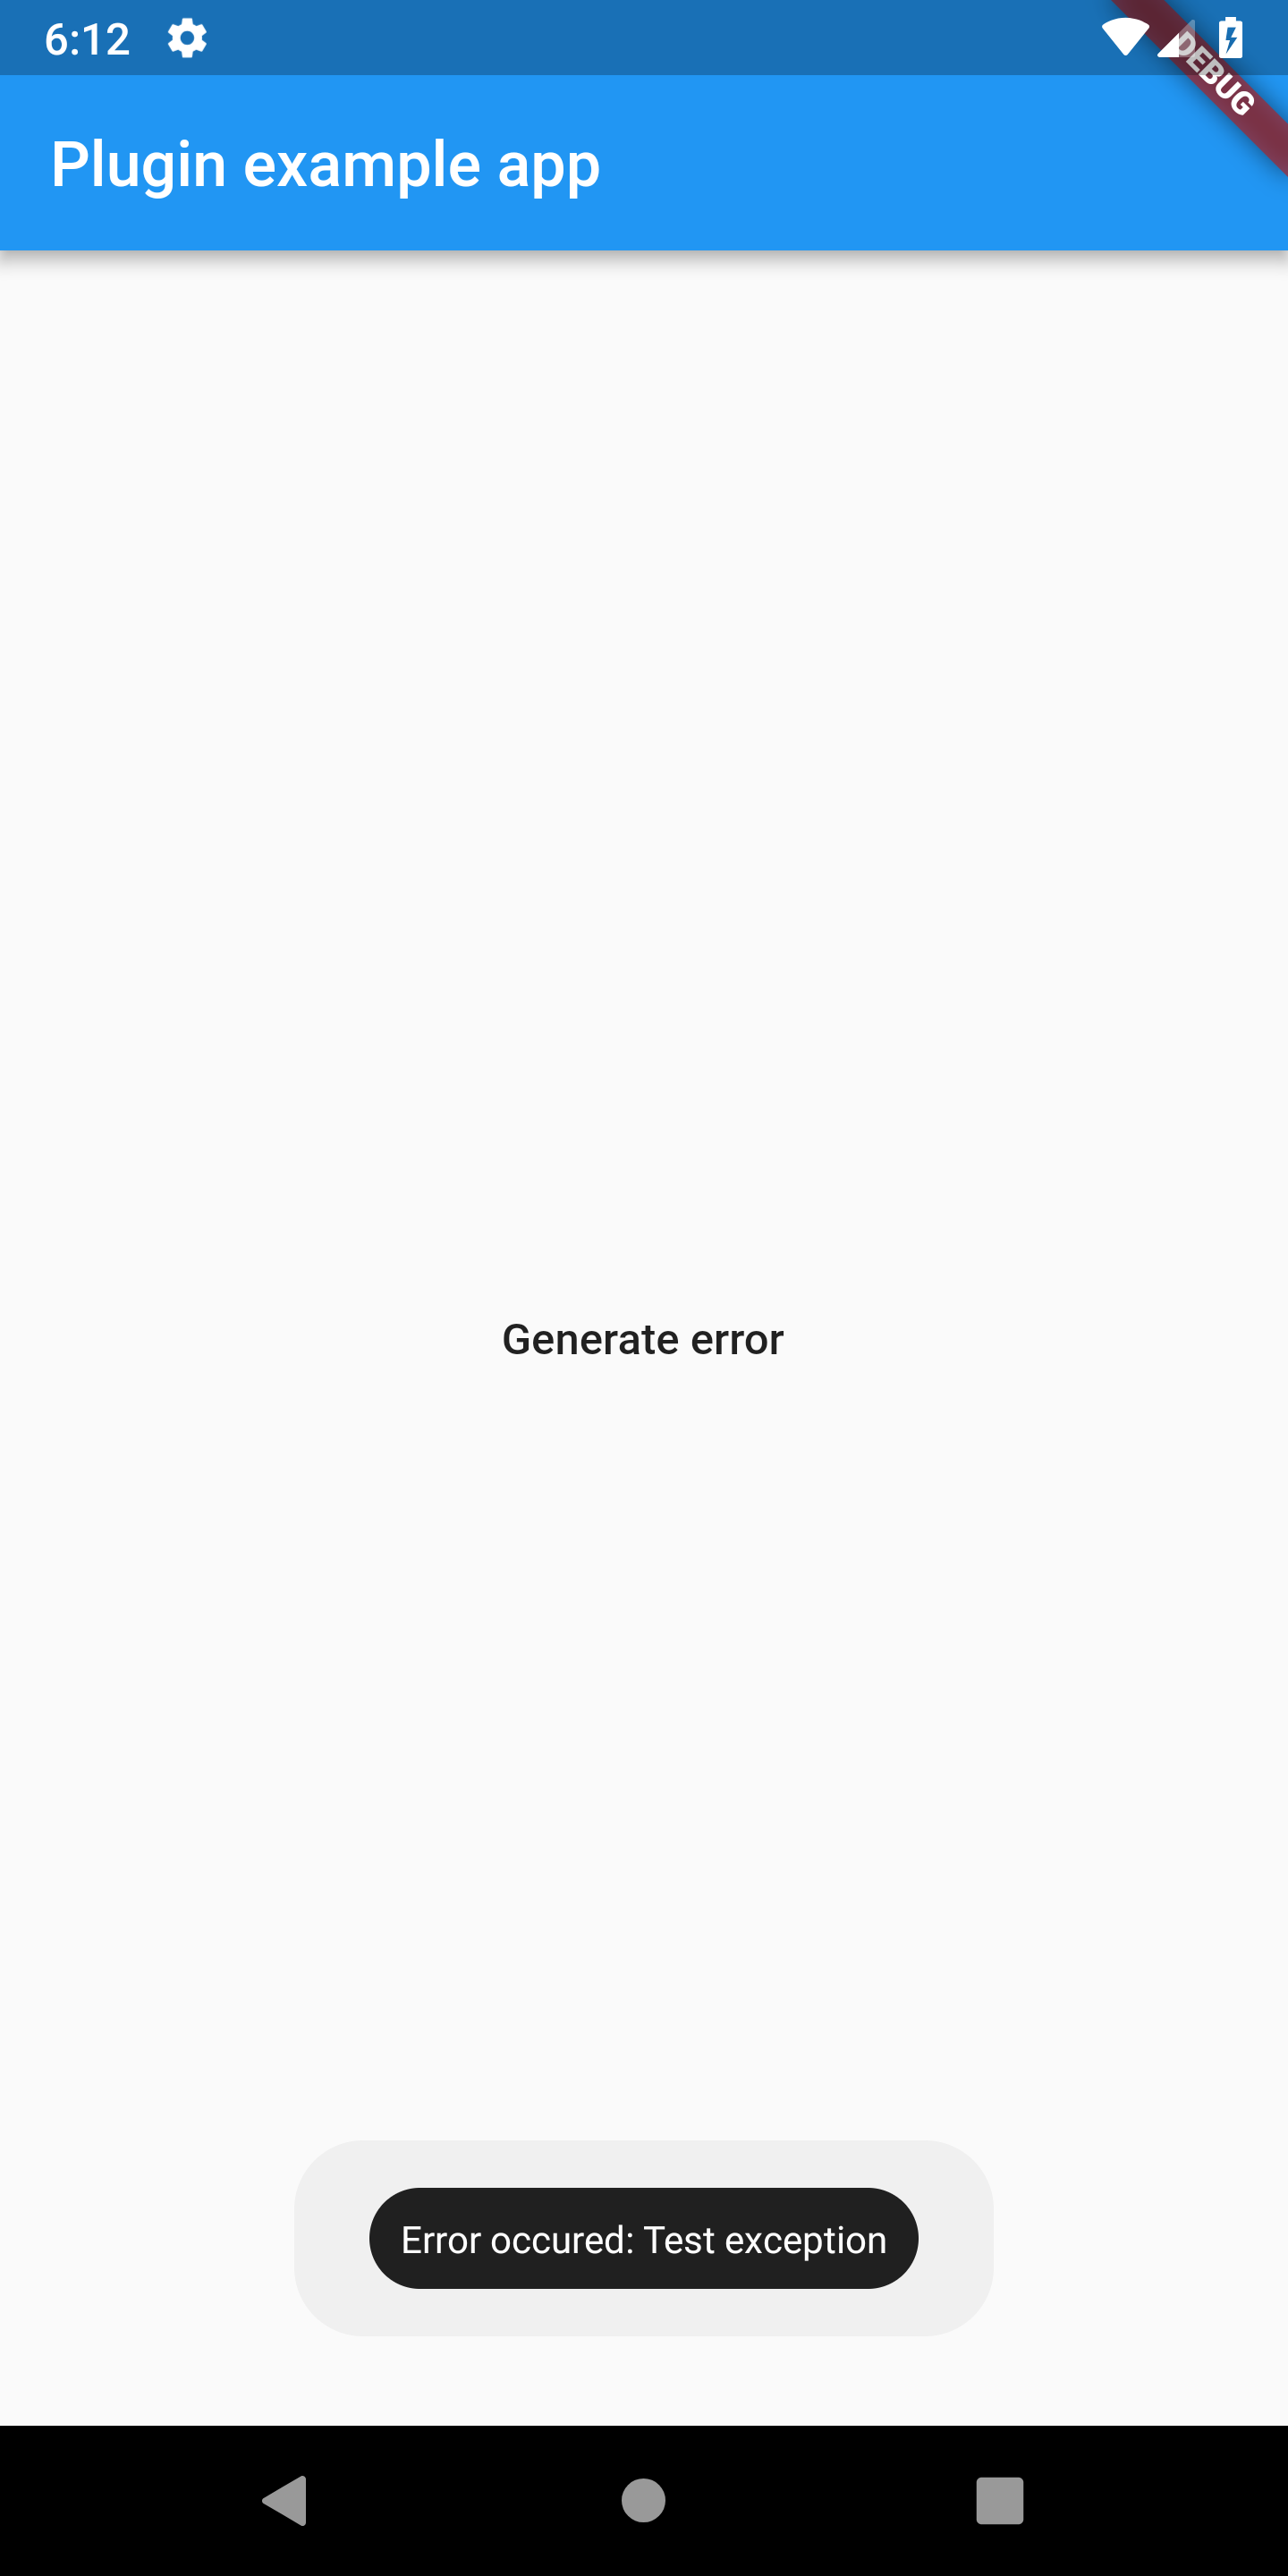
If you run this code you will see screen with "Generate error" button on the screen.
After clicking on it, it will generate test exception, which will be handled by Catcher 2. Before Catcher 2 process exception to handler, it will
show dialog with information for user. This dialog is shown because we have used DialogReportHandler. Once user confirms action in this dialog,
report will be send to console handler which will log to console error information.
In order to make Page Report Mode and Dialog Report Mode work, you must include navigator key. Catcher 2 plugin exposes the key which must be included in your MaterialApp or WidgetApp:
You need to provide this key, because Catcher 2 needs context of navigator to show dialogs/pages. There is no need to include this navigator key if you won't use Page/Dialog Report Mode.
You can also provide your own navigator key if need to. You can provide it with Catcher 2 constructor (see below). Please check custom navigator key example to see basic example.
Catcher 2 configuration
Catcher 2 instance needs rootWidget or runAppFunction in setup time. Please provide one of it.
rootWidget (optional) - instance of your root application widget
runAppFunction (optional) - function where runApp() will be called
debugConfig (optional) - config used when Catcher 2 detects that application runs in debug mode
releaseConfig (optional) - config used when Catcher 2 detects that application runs in release mode
profileConfig (optional) - config used when Catcher 2 detects that application runs in profile mode
Catcher2Options parameters:
handlers - list of handlers, which will process report, see handlers to get more information.
handlerTimeout - timeout in milliseconds, this parameter describes max time of handling report by handler.
reportMode - describes how error report will be shown to user, see report modes to get more information.
localizationOptions - translations used by report modes nad report handlers.
explicitExceptionReportModesMap - explicit report modes map which will be used to trigger specific report mode for specific error.
explicitExceptionHandlersMap - Explicit report handler map which will be used to trigger specific report report handler for specific error.
customParameters - map of additional parameters that will be included in report (for example user id or user name).
handleSilentError - should handle silent errors reported, see FlutterErrorDetails.silent for more details.
screenshotsPath - path where screenshots will be saved.
excludedParameters - parameters which will be excluded from report.
filterFunction - function used to filter errors which shouldn't be handled.
onFlutterError - additional error handler for Flutter errors. Set this to FlutterError.onError when using Catcher 2 within test suites.
onPlatformError - additional error handler for platform errors. Set this to PlatformDispatcher.instance.onError when using Catcher 2 within test suites.
Report caught exception
Catcher 2 won't process exceptions caught in try/catch block. You can send exception from try catch block to Catcher 2:
import'package:flutter/material.dart';
import'package:catcher_2/catcher_2.dart';
import'package:flutter_localizations/flutter_localizations.dart';
main() {
Catcher2Options debugOptions = Catcher2Options(DialogReportMode(), [
ConsoleHandler(),
HttpHandler(HttpRequestType.post, Uri.parse("https://httpstat.us/200"),
printLogs: true)
], localizationOptions: [
LocalizationOptions("pl",
notificationReportModeTitle: "Wystąpił błąd aplikacji",
notificationReportModeContent:
"Naciśnij tutaj aby wysłać raport do zespołu wpsarcia",
dialogReportModeTitle: "Błąd aplikacji",
dialogReportModeDescription:
"Wystąpił niespodziewany błąd aplikacji. Raport z błędem jest gotowy do wysłania do zespołu wsparcia. Naciśnij akceptuj aby wysłać raport lub odrzuć aby odrzucić raport.",
dialogReportModeAccept: "Akceptuj",
dialogReportModeCancel: "Odrzuć",
pageReportModeTitle: "Błąd aplikacji",
pageReportModeDescription:
"Wystąpił niespodziewany błąd aplikacji. Raport z błędem jest gotowy do wysłania do zespołu wsparcia. Naciśnij akceptuj aby wysłać raport lub odrzuć aby odrzucić raport.",
pageReportModeAccept: "Akceptuj",
pageReportModeCancel: "Odrzuć",
toastHandlerDescription: "Wystąpił błąd:",
)
]);
Catcher2Options releaseOptions = Catcher2Options(NotificationReportMode(), [
EmailManualHandler(["recipient@email.com"])
]);
Catcher2(rootWidget: MyApp(), debugConfig: debugOptions, releaseConfig: releaseOptions);
}
classMyAppextendsStatefulWidget{
@override_MyAppStatecreateState() => _MyAppState();
}
class_MyAppStateextendsState<MyApp> {
@overridevoidinitState() {
super.initState();
}
@overrideWidgetbuild(BuildContext context) {
returnMaterialApp(
navigatorKey: Catcher2.navigatorKey,
localizationsDelegates: [
GlobalMaterialLocalizations.delegate,
GlobalWidgetsLocalizations.delegate,
],
supportedLocales: [
constLocale('en', 'US'),
constLocale('pl', 'PL'),
],
home: Scaffold(
appBar: AppBar(
title: constText('Plugin example app'),
),
body: ChildWidget()),
);
}
}
classChildWidgetextendsStatelessWidget{
@overrideWidgetbuild(BuildContext context) {
returnContainer(
child: TextButton(
child: Text("Generate error"), onPressed: () => generateError()));
}
generateError() async {
throw"Test exception";
}
}
Report modes
Report mode is the process of gathering user permission to handle error. User can accept or deny permission to handle error. There are 4 types of report mode:
Silent Report Mode
Silent Report Mode is default report mode. This report mode doesn't ask user for permission to handle crash logs. It will push logs automatically to handlers.
ReportMode reportMode = SilentReportMode();
Notification Report Mode
Notification Report Mode has been removed because of incompatibility with firebase. Please check local_notifications_example to re-add local notifications to your app.
Dialog Report Mode
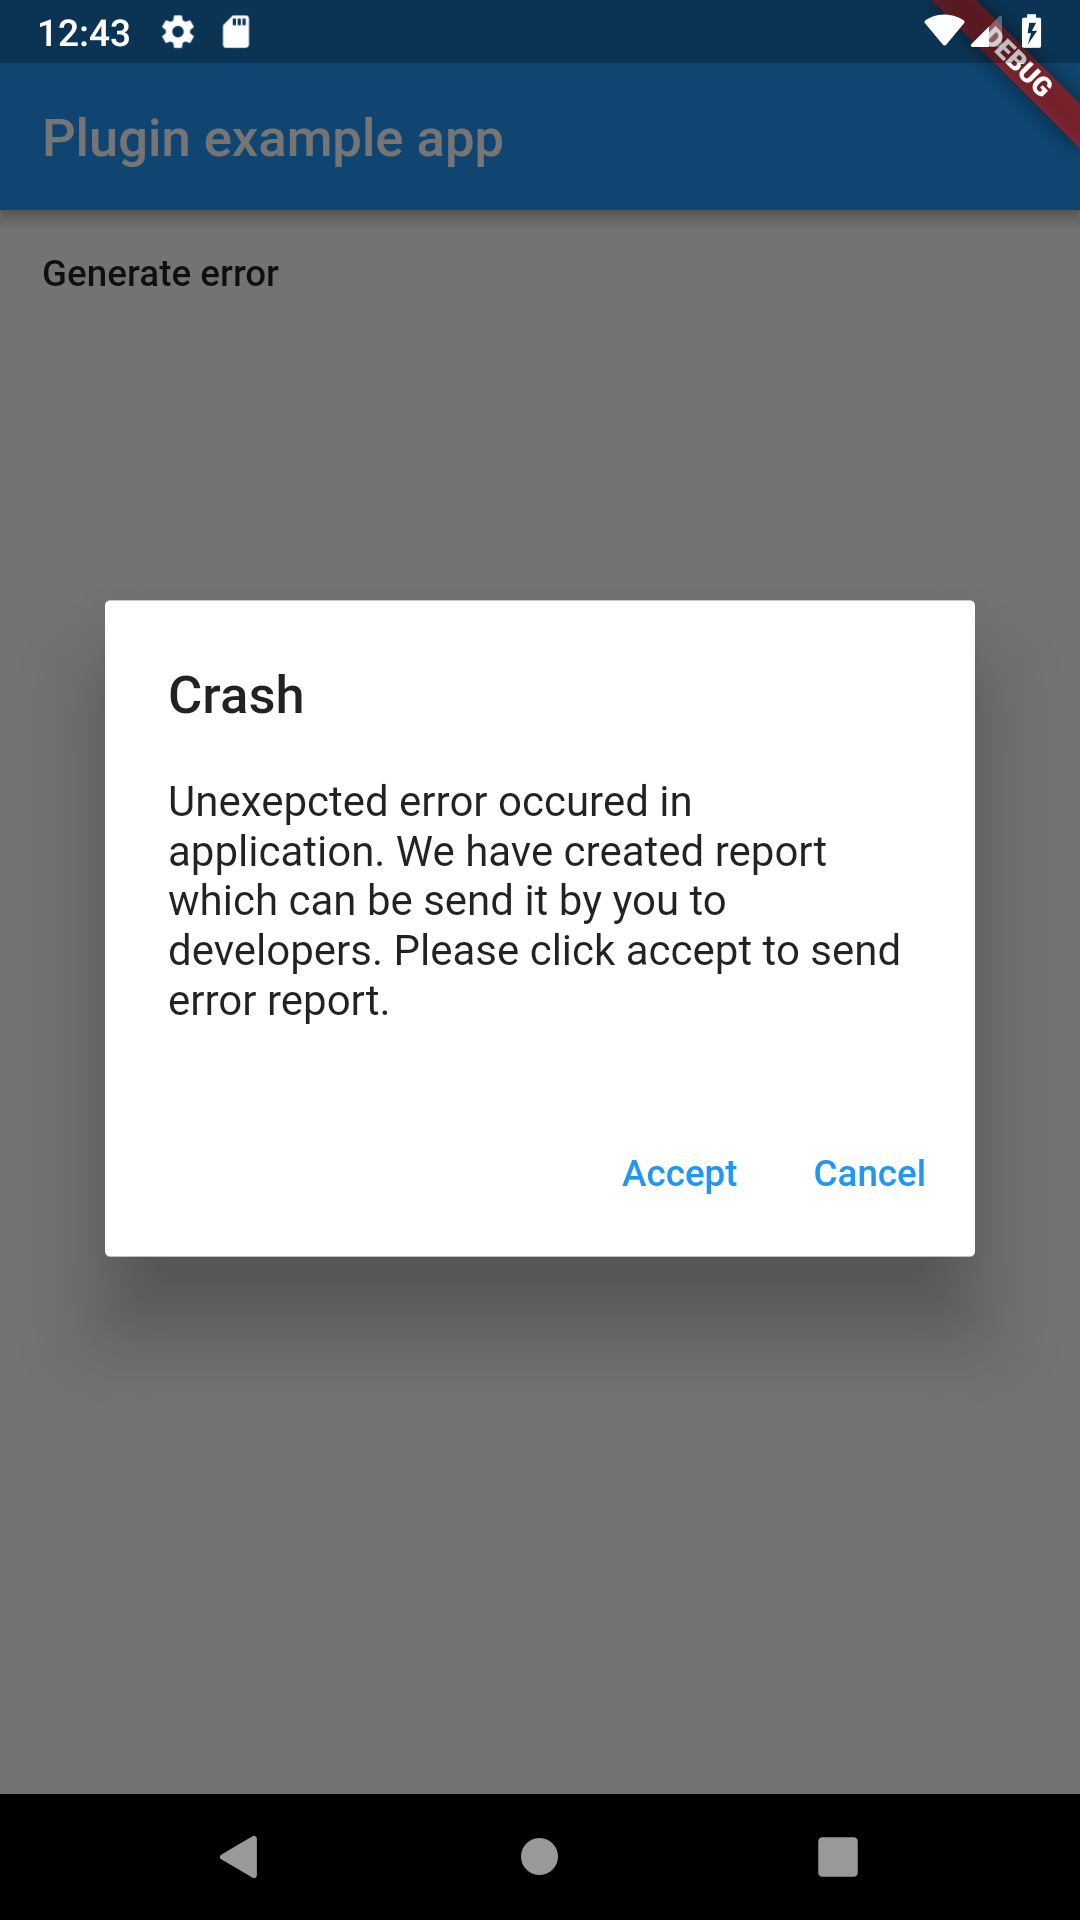
Dialog Report Mode shows dialog with information about error. Dialog has title, description and 2 buttons: Accept and Cancel. Once user clicks on Accept button, report will be pushed to handlers.
ReportMode reportMode = DialogReportMode();
See localization options to change default texts.
Dialog report mode
Page Report Mode
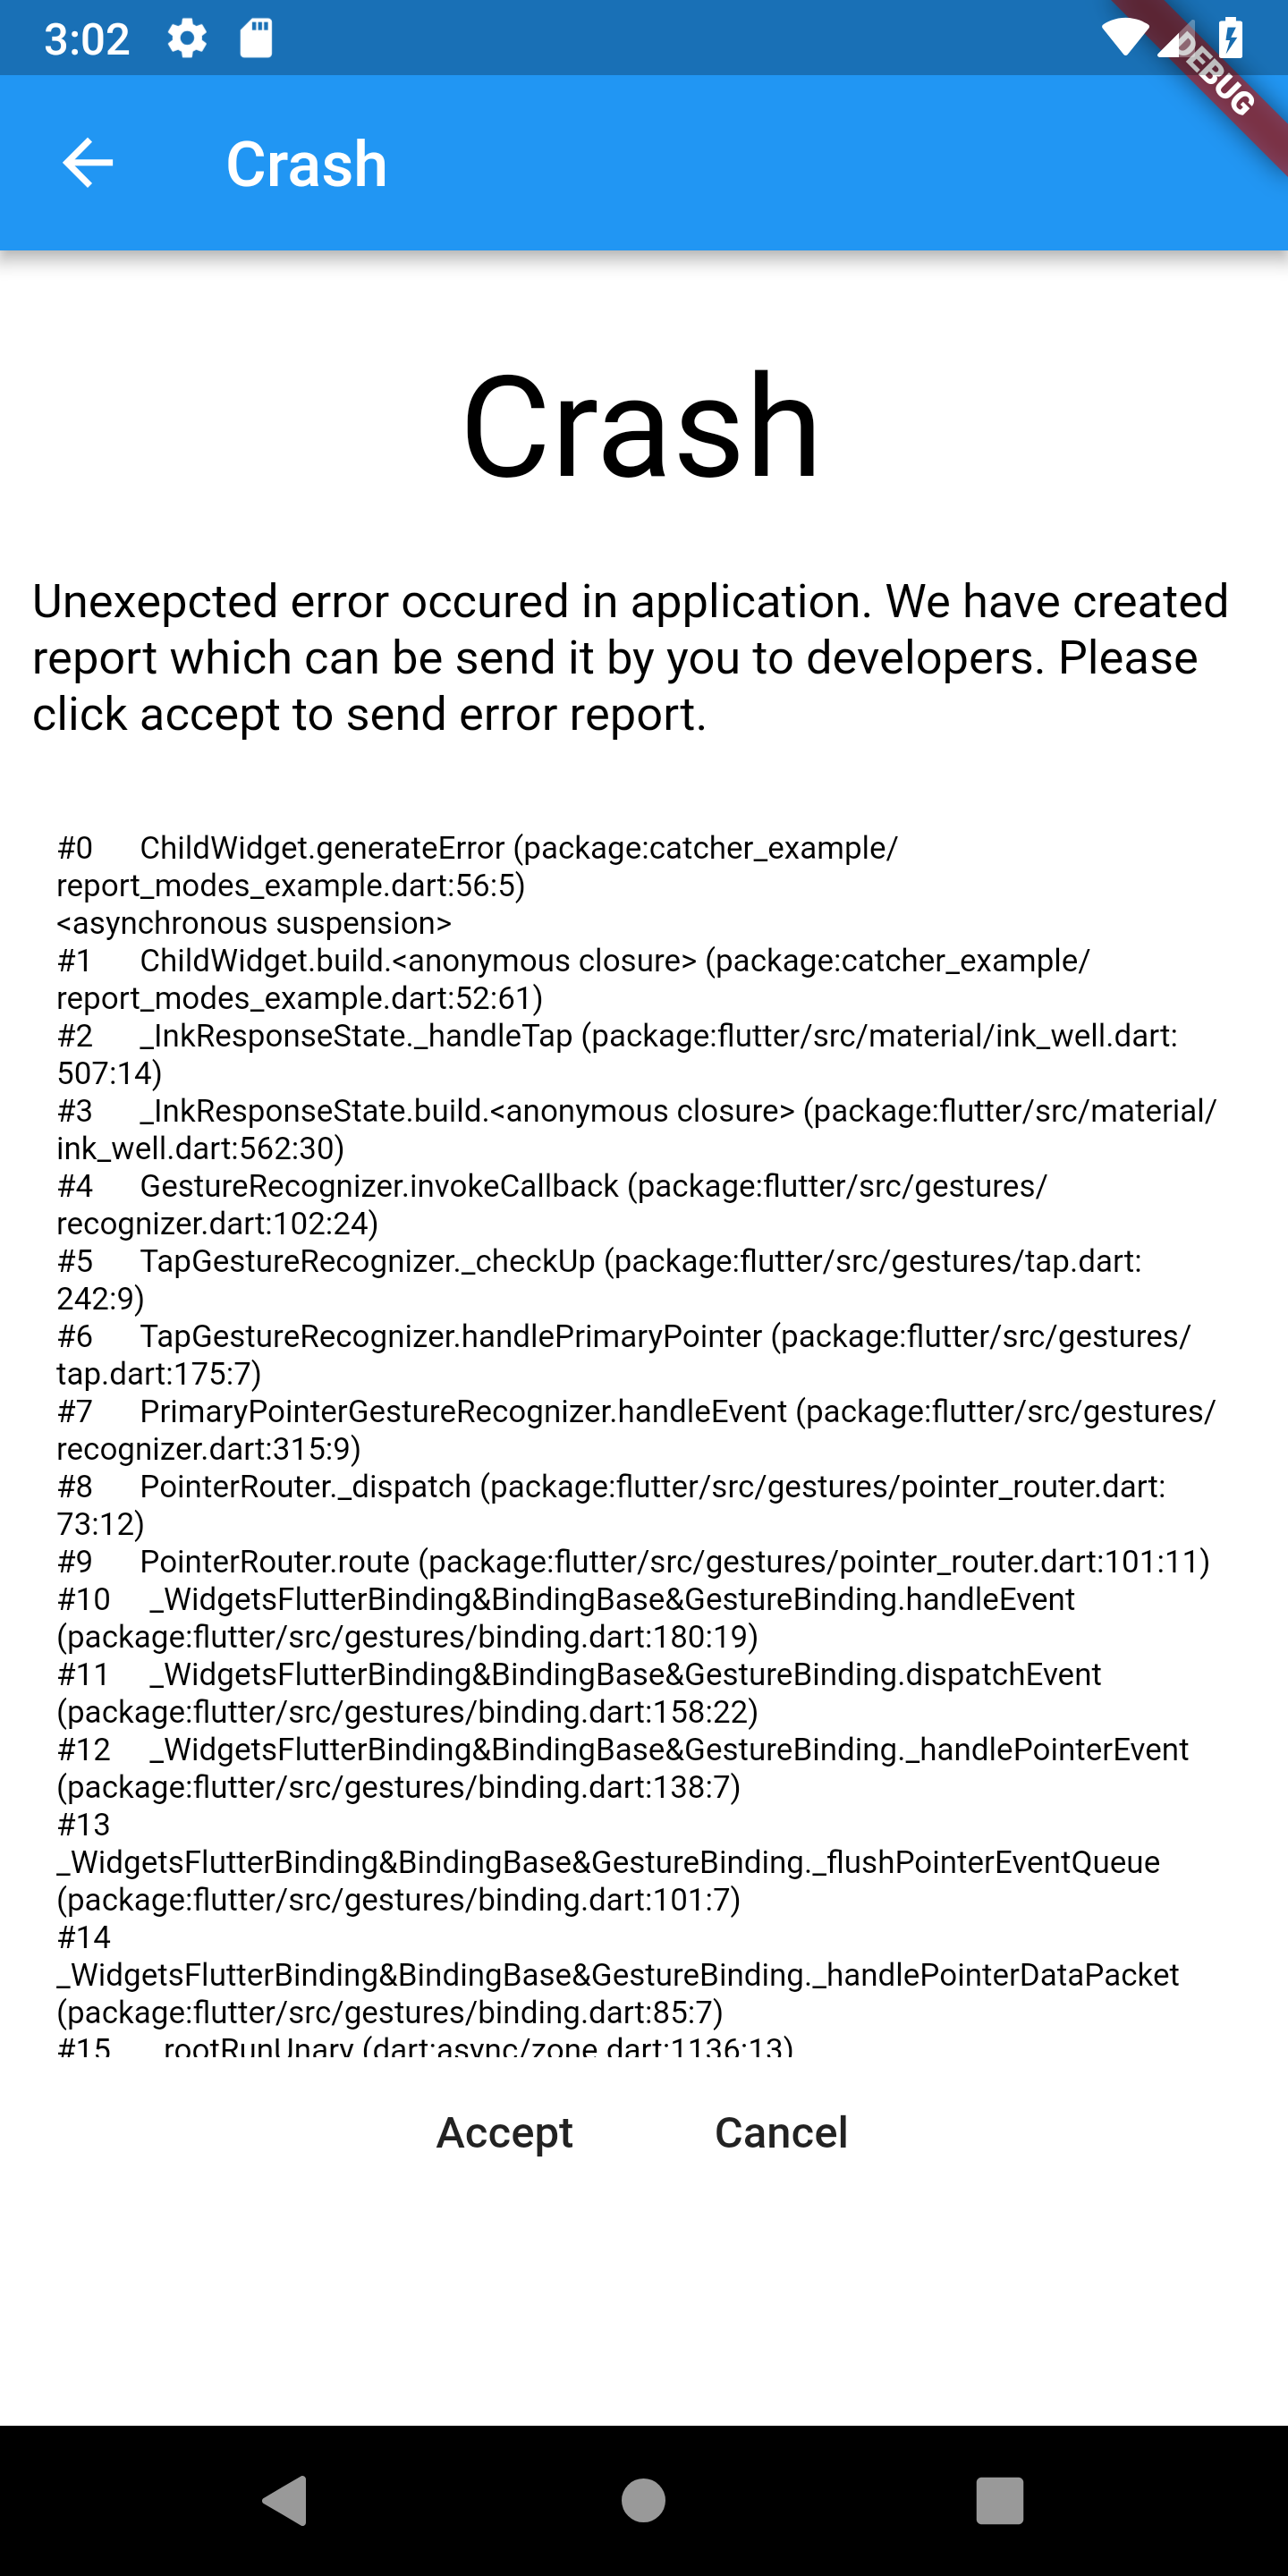
Page Report Mode shows new page with information about error. Page has title, description, stack trace view and 2 buttons: Accept and Cancel. Once user clicks on Accept button, report will be pushed to handlers.
recipients (required) - list of email addresses of recipients
enableDeviceParameters (optional) - see Console Handler description
enableStackTrace (optional) - see Console Handler description
enableCustomParameters (optional) - see Console Handler description
enableApplicationParameters (optional) - see Console Handler description
sendHtml (optional) - enable/disable html email formatting
emailTitle (optional) - set custom email title
emailHeader (optional) - set additional email text header
printLogs (optional) - enable/disable debug logs
Email Auto Handler
Email handler can be used to send automatically email with error reports. Email handler has multiple configuration parameters. Few of them are required, other are optional. These parameters are required:
We need to setup email smtp server, email account and recipient. Currently, only Gmail was tested and worked. You can try use other email providers, but there can be errors.
List of all parameters:
smtpHost (required) - host address of your email, for example host for gmail is smtp.gmail.com
smtpPort (required) - smtp port of your email, for example port for gmail is 587
senderEmail (required) - email from which Catcher 2 will send email (it will be sender of error emails)
senderName (required) - name of sender email
senderPassword (required) - password for sender email
recipients (required) - list which contains recipient emails
senderUsername (optional) - set an explicit username for the SMTP authentication
enableSSL (optional) - if your email provider supports SSL, you can enable this option
enableDeviceParameters (optional) - please look in console handler description
enableApplicationParameters (optional) - please look in console handler description
enableStackTrace (optional) - please look in console handler description
enableCustomParameters (optional) - please look in console handler description
emailTitle (optional) - custom title of report email, if not set then title will be: Handled Error: >> [Error name] <<
emailHeader (optional)- custom header message before report data
sendHtml (optional) - enable/disable html data in your email, if enabled then html will be sent and your report will look much better
printLog (optional) - enable/disable debug logs
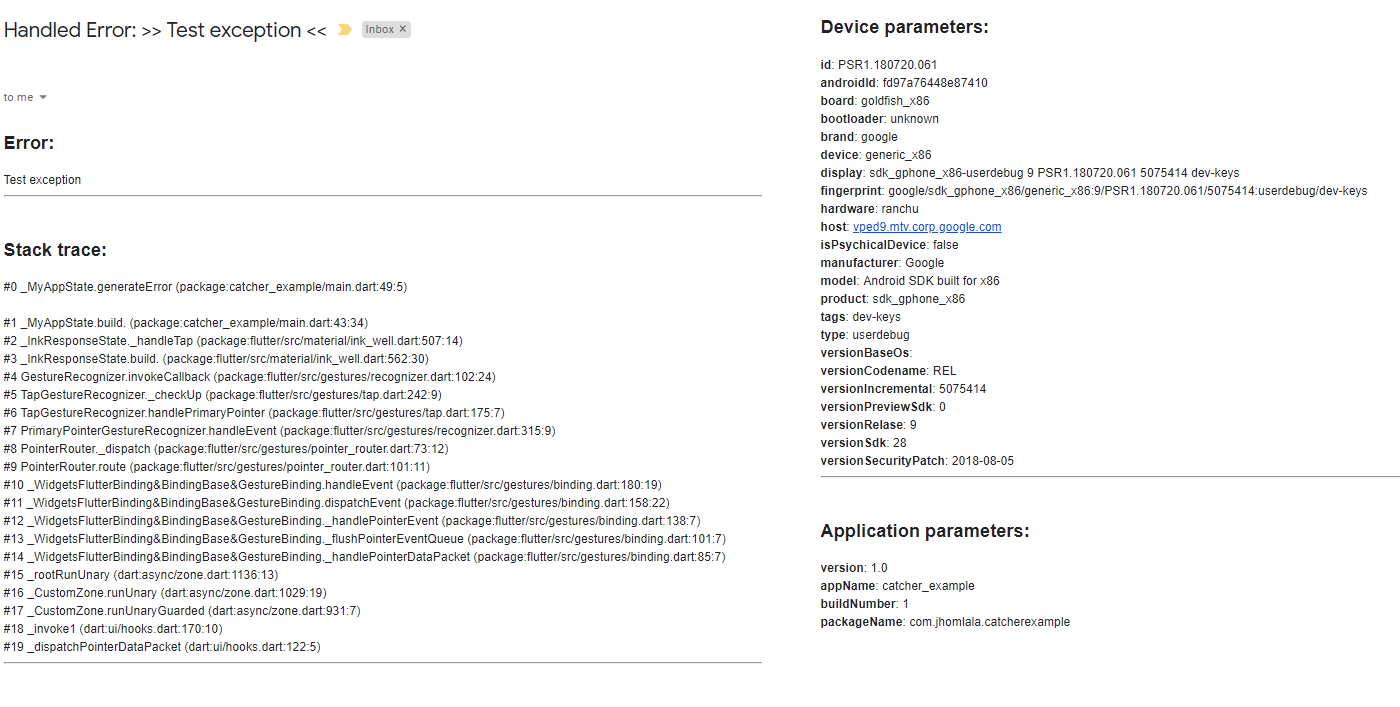
Example email:
Http Handler
Http Handler provides feature for sending report to external server. Data will be encoded in JSON and sent to specified server. Currently only POST request can be send. Minimal example:
requestType (required) - type of request, currently only POST is supported
endpointUri (required) - uri address of server
headers (optional) - map of additional headers that can be send in http request
requestTimeout (optional) - request time in milliseconds
printLogs (optional) - show debug logs
enableDeviceParameters (optional) - please look in console handler description
enableApplicationParameters (optional) - please look in console handler description
enableStackTrace (optional) - please look in console handler description
enableCustomParameters (optional) - please look in console handler description
You can try using example backend server which handles logs. It's written in Java 8 and Spring Framework and uses material design.
You can find code of backend server here: https://github.com/ThexXTURBOXx/catcher_2/tree/master/backend
Note: Remember to add Internet permission in Android Manifest:
file (required) - the file where you want to store your logs
enableDeviceParameters (optional) - please look in console handler description
enableApplicationParameters (optional) - please look in console handler description
enableStackTrace (optional) - please look in console handler description
enableCustomParameters (optional) - please look in console handler description
printLogs (optional) - enable/disable debug logs
handleWhenRejected - please look in console handler description
Example of logging to file in external directory: https://github.com/ThexXTURBOXx/catcher_2/blob/master/example/lib/file_example.dart
If you want to get file path with path_provider lib, you need to call Catcher 2 constructor with
ensureInitialized = true. Then you need to pass your catcher 2 config with updateConfig.
This is required because WidgetBindings ensureInitialized must be called first before accessing
path_provider methods.
See example here: https://github.com/ThexXTURBOXx/catcher_2/blob/master/example/lib/file_example.dart
Toast Handler
Toast handler allows to show short message in toast. Minimal example:
All parameters list:
gravity (optional) - location of the toast on screen top/middle/bottom
length (optional) - length of toast: long or short
backgroundColor (optional) - background color of toast
textColor (optional) - text color of toast
fontSize (optional) - text size
customMessage (optional) - custom message for toast, if not set then "Error occurred: error" will be displayed.
handleWhenRejected - please look in console handler description
Sentry Handler
Sentry handler allows to send handled errors to Sentry.io. Before using sentry handler, you need to create your project in
Sentry.io page and then copy DSN link. Example:
enableDeviceParameters (optional) - please look in console handler description
enableApplicationParameters (optional) - please look in console handler description
enableCustomParameters (optional) - please look in console handler description
customEnvironment (optional) - custom environment string, if null, Catcher 2 will generate it
customRelease (optional) - custom release string , if null, Catcher 2 will generate it
printLogs (optional) - enable/disable debug logs
Slack Handler
Slack Handler allows to send messages to your Slack workspace. You can specify destination
of your message and format. You need to register webhook in your workspace to make this handler
works: https://api.slack.com/incoming-webhooks.
channel (required) - your channel name (e.g. #catcher2)
apiToken (optional) - your API token, only needed for screenshots (e.g. xxxx-xxxxxxxxx-xxxx)
channelId (optional) - your screenshot channel ID, only needed for screenshots (e.g. C0NF841BK)
username (optional) - name of the integration bot
iconEmoji (optional) - avatar of the integration bot
enableDeviceParameters (optional) - please look in console handler description
enableApplicationParameters (optional) - please look in console handler description
enableCustomParameters (optional) - please look in console handler description
enableStackTrace (optional) - please look in console handler description
printLogs (optional) - enable/disable debug logs
customMessageBuilder - provide custom message
Discord Handler
Discord Handler allows to send messages to your Discord workspace. You need to register webhook in your server to make this handler
works: https://support.discordapp.com/hc/en-us/articles/228383668-Intro-to-Webhooks.
duration - See [SnackBar] in Flutter docs for details.
backgroundColor - See [SnackBar] in Flutter docs for details.
elevation - See [SnackBar] in Flutter docs for details.
margin - See [SnackBar] in Flutter docs for details.
padding - See [SnackBar] in Flutter docs for details.
width - See [SnackBar] in Flutter docs for details.
shape - See [SnackBar] in Flutter docs for details.
behavior - See [SnackBar] in Flutter docs for details.
action - See [SnackBar] in Flutter docs for details.
animation - See [SnackBar] in Flutter docs for details.
onVisible - See [SnackBar] in Flutter docs for details.
customMessage - Custom message which can be displayed instead default one.
textStyle - Custom text style for text displayed within snackbar.
printLogs - Enable additional logs printing
Crashlytics Handler
Crashlytics handler has been removed from core package. You can re-enable it in your project by using custom report mode presented in crashlytics_example in example project.
Explicit exception report handler map
Explicit exception report handler map allows you to setup report handler for specific exception. For example if you want to setup Console Handler for FormatException, you can write:
Now if FormatException will be caught, then Console Handler will be used. Warning: if you setup explicit exception map for specific exception, then only this handler will be used for this exception!
Explicit exception report mode map
Same as explicit report handler map, but it's for report mode. Let's say you want to use specific report mode for some exception:
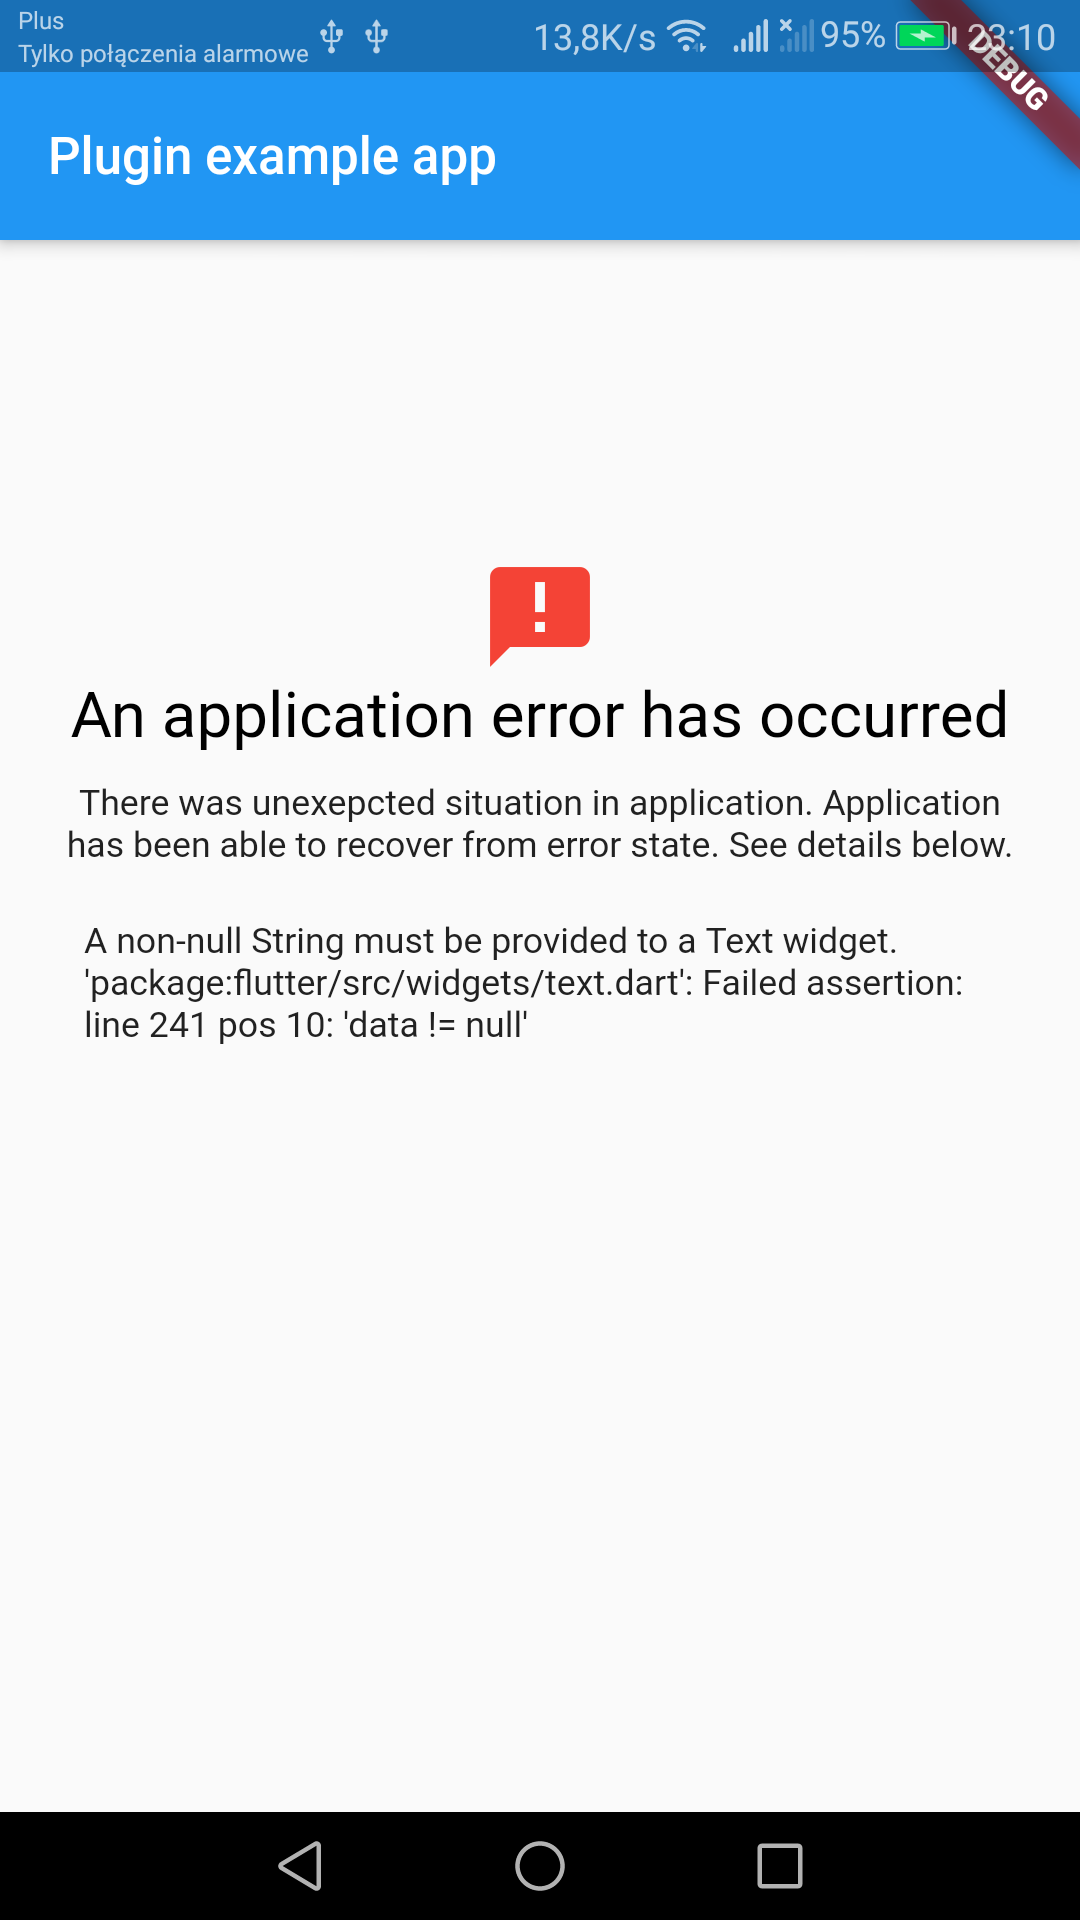
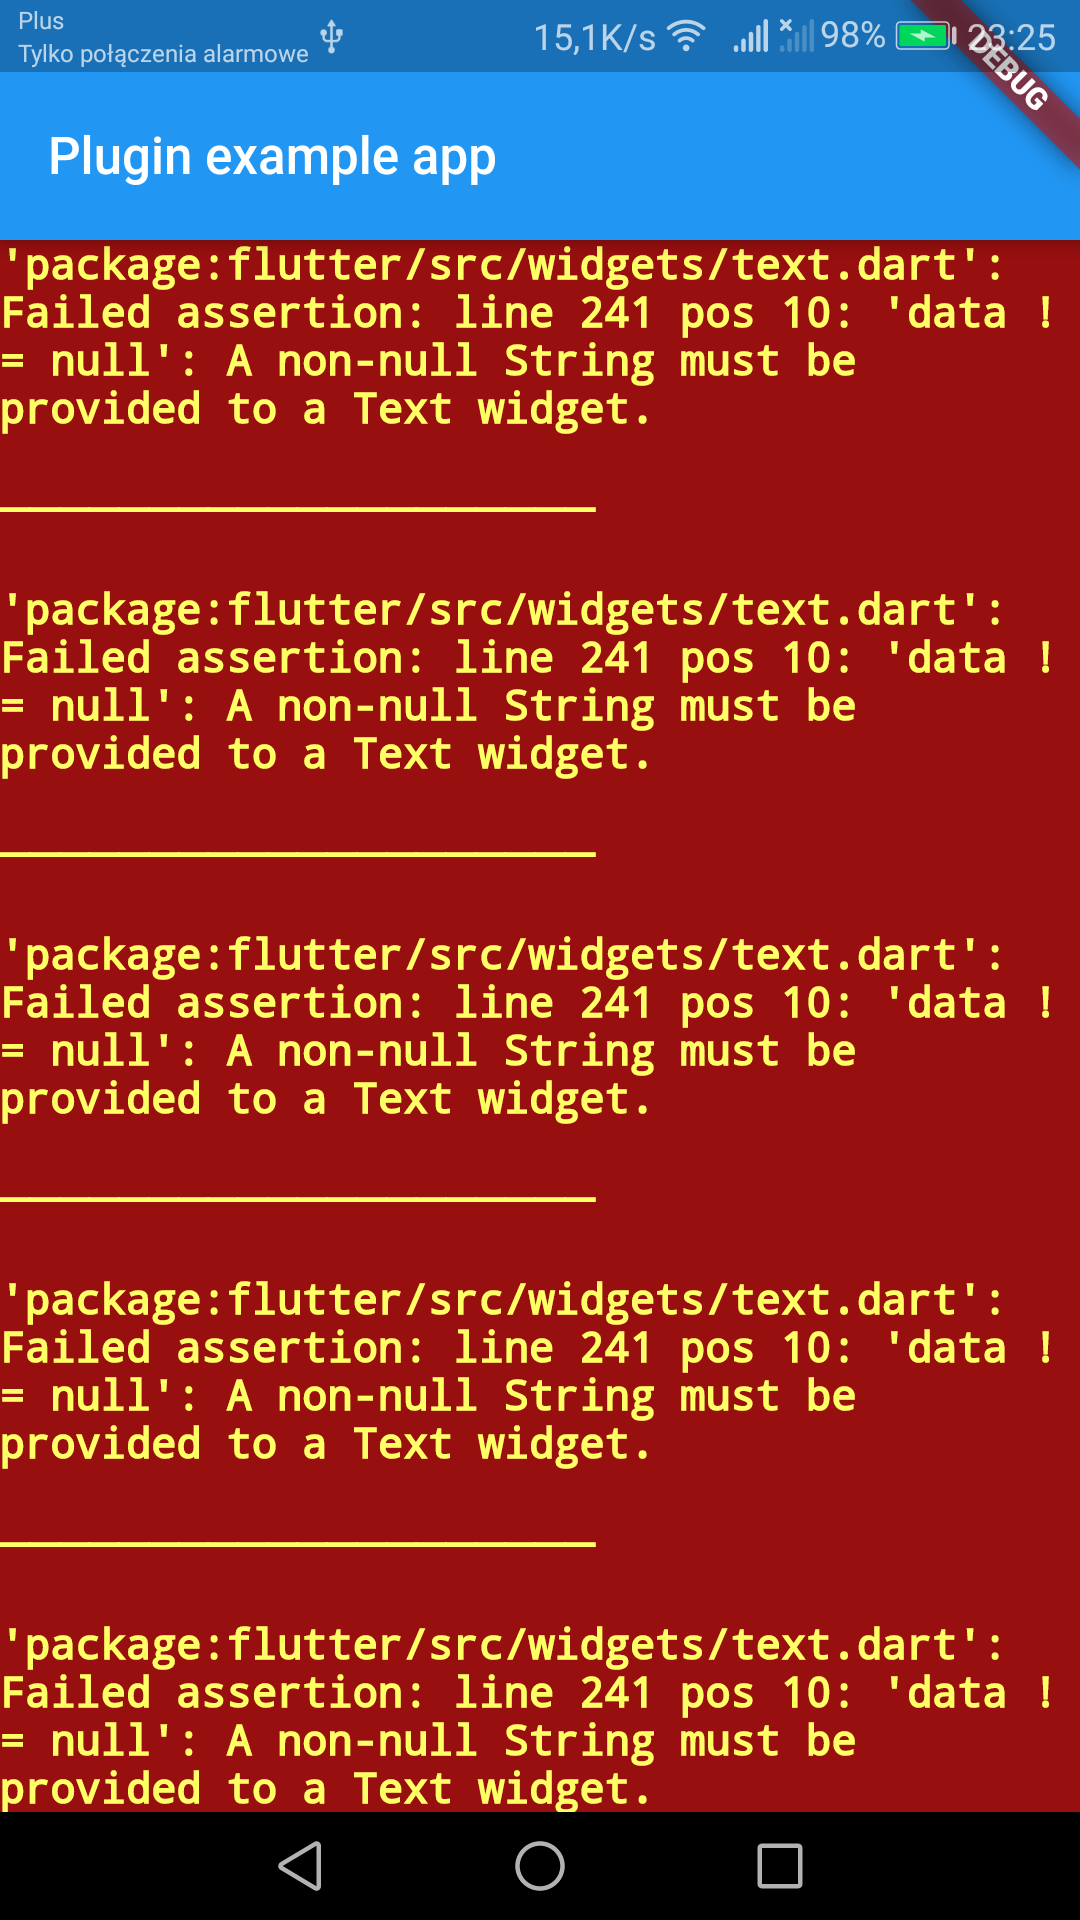
You need to add in your MaterialApp or CupertinoApp builder method with Catcher2.addDefaultErrorWidget(). This will add error handler for each widget in your app.
You can provide optional parameters:
showStacktrace - show/hide stacktrace
title - custom title for error widget
description - custom description for error widget
maxWidthForSmallMode - max width for "small" mode, default is 150
Error widget will replace your widget if he fails to render. If width of widget is less than maxWidthForSmallMode then "small" mode will be enabled, which will show only error icon
Catcher 2 can create screenshots automatically and include them in report handlers. To add screenshot
support in your app, simply wrap your root widget with Catcher2Screenshot widget: