搜索插件、代码仓与 APP 分类

flurry_navigation 封面
插件详情v0.2.0

flurry_navigation

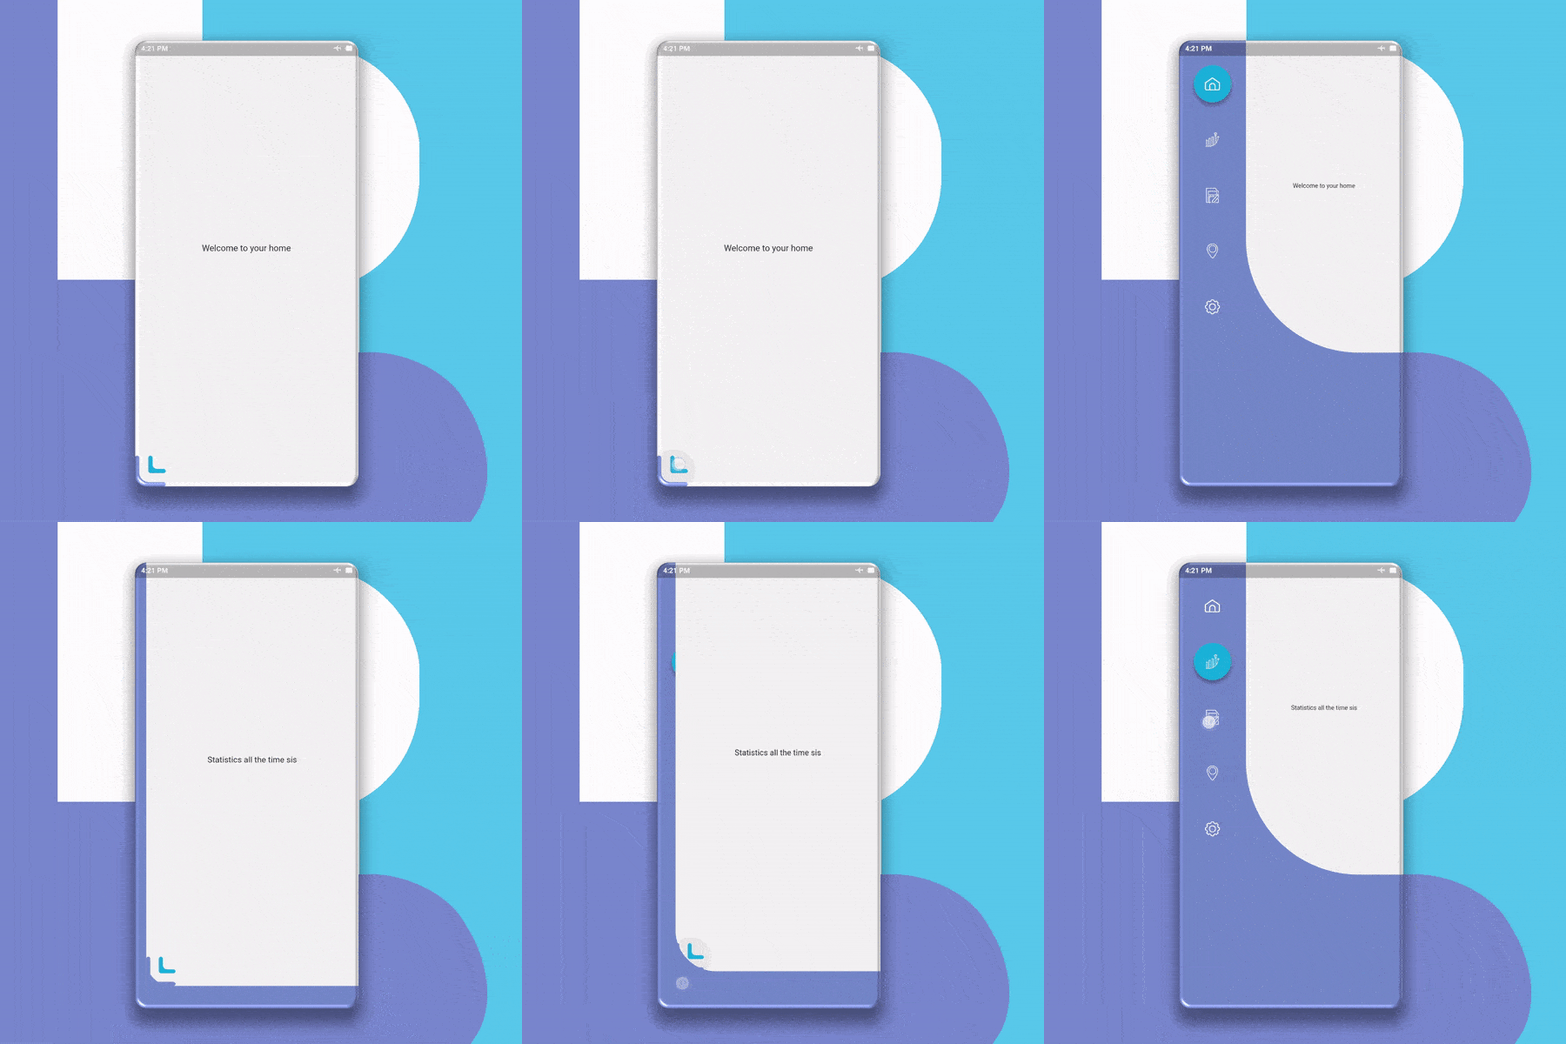
一个流畅且带有动画效果的 Flutter 导航包,不会干扰屏幕,支持可调节的颜色、形状和导航逻辑。

近 30 天下载
45
喜欢数
34
Pub 分数
60

安装插件

flutter pub add flurry_navigation

插件介绍

基于插件公开信息、社区数据与项目使用情况整理的选型参考。

Flurry Navigation 是一个 Flutter 包,提供平滑、动画化的导航功能,支持自定义颜色、形状和导航逻辑。旨在提升用户体验,同时不干扰主屏幕内容,为导航提供简洁现代的方法。适用于需要优雅过渡和灵活布局控制的应用程序,可无缝集成到现有的 Flutter 项目中。该包在保持性能和视觉吸引力的同时,支持高度定制化。

适合场景

  • 自定义动画侧边菜单
  • 流畅的屏幕切换
  • 品牌导航抽屉
  • 交互式UI组件
  • 移动应用导航栏
  • 基于动态形状的导航

主要特点

  • 动画导航过渡
  • 可调节的颜色和形状
  • 非侵入式屏幕集成
  • 可自定义的导航逻辑
  • 轻量且高效
  • 与 Flutter 的轻松集成

适合对象

  • 寻求动画导航的开发者
  • 注重设计的Flutter应用
  • 带有品牌化用户界面的应用程序需要
  • 需要流畅用户体验的项目
  • 希望拥有可重用导航组件的团队

使用建议

  • 有限的平台特定功能
  • 无内置暗色模式支持
  • 需要手动配置复杂流程
  • 最适合简单的到中等的导航结构
  • 未针对大规模导航层次结构进行优化

原始 README

以下为关联源码仓库的 README 原文快照,最新内容请访问源码仓库。

flurry_navigation

A Smooth and Animated navigation package for flutter that doesn’t interfere with the Screen with adjustable colors, shapes, and navigation logic.

this Image is not available

Getting Started

First of all, Depend on the package.

dependencies:
  ...
  flurry_navigation: ^0.2.0 #May not be the latest version
Changes to the Screens files

Add your code inside this variable below in every screen you want to navigate.

import 'package:flurry_navigation/flurry_navigation.dart';
//The variable name must be unique
final firstscreen = new Screen(

);

Changes in the main file

First You should declare a variable called activeScreen.

var activeScreen;

Now add a Widget builder class that returns new FlurryNavigation.

Widget build(BuildContext context) {
  return new FlurryNavigation(

  );
}

Add values to these attributes to FlurryNavigation.

Widget build(BuildContext context) {
  new FlurryNavigation(
    // The Icon data of the icon the BottomLeft
    expandIcon: Image.asset("Put your path here"),
    // The size of the icon on the BottomLeft
    iconSize: 50.0,
    // The content of the screen. leave it as it is
    contentScreen: activeScreen,
   )
}

Now add the menuScreen attribute FlurryNavigation and set it to the value below. [If you want to use your own menu, contact me and I will provide you with the instructions].

Widget build(BuildContext context) {
  new FlurryNavigation(
    ...
    menuScreen: new MenuScreen(

    )
  );
}

Add the bgColor attribute to MenuScreen and set it to the Background color you want.

Widget build(BuildContext context) {
  new FlurryNavigation(
    ...
    menuScreen: new MenuScreen(
      bgColor: Colors.white, //background color
    )
  )
}

Now add the menu attribute to MenuScreen and set it to the below value

Widget build(BuildContext context) {
  return new FlurryNavigation(
    ...
    menuScreen: new MenuScreen(
      ...
      menu: new Menu(

      )
    )
  )
}

Then add the "items" attribute to "Menu" and set it to the list of items you want in the menu "which usually matches the no. of screens", with "new MenuItem" like the example below.

Widget build(BuildContext context) {
  return new FlurryNavigation(
    ...
    menuScreen: new MenuScreen(
       menu: new Menu(
         items: [
            //You can add as many items as you want, it's scrollable!!
          new MenuItem(
            id: 'hom',//Set this to whatever you want but do not duplicate it. !Required!
            icon: 'assets/hom.png',//Set this to the path of the data for the icon of the button !Required!
            isSelected: true ,//make sure the default item "isSelected" attribute is set to "true" !Required!
            selectedBtnColor: Color.fromRGBO(38, 198, 218, 1
            //the color of the item if activated !Required!
            btnShape: BoxShape.rectangle
                    //the shape of the item !Required!
            #disabledBtnColor: Colors.transparent, //this have a default value of Colors.transparent
            #selectedShadowColor: Colors.blueGrey, //this have a default value of Colors.blueGrey
            #disabledShadowColor: Colors.transparent
          ), //this have a default value of Colors.transparent,
          new MenuItem(
             id: 'sta',
            icon: 'assets/sta.png',
            isSelected: false,
            selectedBtnColor: Color.fromRGBO(38, 198, 218, 1),
            btnShape: BoxShape.rectangle
          )
         ]
       )
    )
  )
}

Now add the onMenuItemSelected attribute to "MenuScreen" to specify the logic for the navigation.

Widget build(BuildContext context) {
  new FlurryNavigation(
    ...
    menuScreen: new MenuScreen(
      ...
      //this is the logic behind the navigation. tailor the code below to fit your needs. If you want any help message me.
      onMenuItemSelected: (String itemId) {
        if (itemId == 'hom') {
          setState(() => activeScreen = firstscreen);
        } else if (itemId == 'sta') {
          setState(() => activeScreen = secondscreen);
        }
      },
    ),
  );
}

Notice

  • This is my first markdown file so if you see any problems you're free to open an issue.
  • You can find a standalone full example in the example app or in the Github repo

Contributing

Pull requests are welcome. For major changes, please open an issue first to discuss what you would like to change.

License

MIT

By lasheen.dev

所属分类

源码仓库

使用此插件的项目

暂无相关数据。