搜索插件、代码仓与 APP 分类

floating_view 封面
插件详情v1.0.4

floating_view

一个实现 YouTube 折叠窗口行为的插件。

AndroidiOSWebmacOSWindowsLinux
近 30 天下载
63
喜欢数
18
Pub 分数
160

安装插件

flutter pub add floating_view

插件介绍

基于插件公开信息、社区数据与项目使用情况整理的选型参考。

Floating View 是一个 Flutter 插件,可实现画中画式功能,允许小部件浮在其他内容之上——类似于 YouTube 的折叠窗口行为。它支持 Android、iOS、Web、macOS、Windows 和 Linux 等多个平台。开发者可以创建可拖动、可调整大小且具有交互性的浮动窗口,为需要持久 UI 元素的应用提供更佳的用户体验。该插件可通过简单的命令行安装无缝集成到现有的 Flutter 项目中。

适合场景

  • 实现持久聊天组件
  • 创建用于媒体播放的浮动控件
  • 使用小叠加面板实现多任务处理
  • 始终可见的导航工具
  • 设计交互式浮动菜单

主要特点

  • 可拖动且可调整大小的浮动窗口
  • 跨平台支持(Android、iOS、Web、macOS、Windows、Linux)
  • 与 Flutter 小部件系统的简单集成
  • 可自定义的外观和行为
  • 支持触摸和指针交互

适合对象

  • 开发媒体应用的开发者
  • 需要持久化UI叠加层的应用
  • 多任务处理或注重生产力的应用程序
  • 寻求创新交互模式的UI设计师
  • 需要画中画功能的项目

使用建议

  • 在某些操作系统上可能需要特定于平台的权限
  • 复杂嵌套组件带来的性能影响
  • 某些平台上的原生动画支持有限
  • 全屏布局可能存在的UI冲突
  • 需要仔细处理生命周期事件

原始 README

以下为关联源码仓库的 README 原文快照,最新内容请访问源码仓库。

FloatingView Package

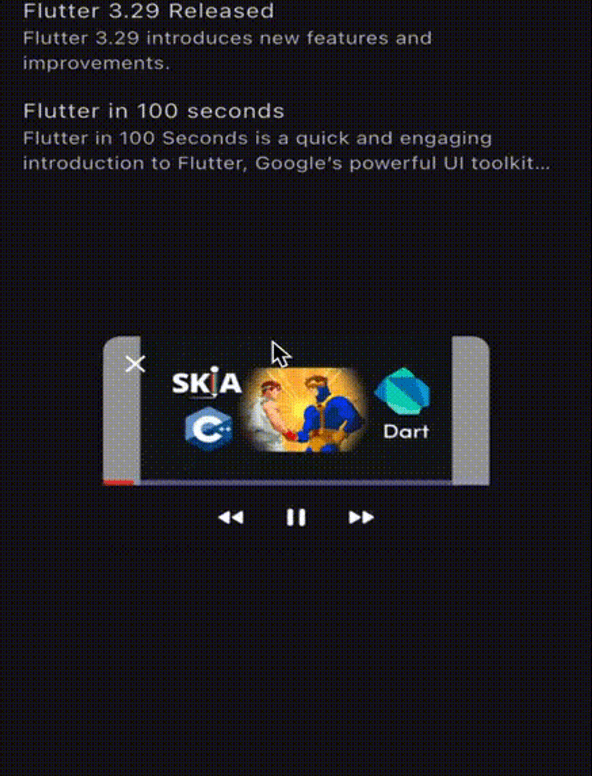
The FloatingView package enables you to create a floating window similar to YouTube's floating video feature. This allows the window to float on the screen and be draggable while scrolling.

The example app running in iOS

Table of Contents

Integration Steps

To integrate the package into your Flutter application, follow these steps:

  1. Wrap the Screen:

    Wrap the screen where you want to display the FloatingView:

    late final FloatingController _controller = FloatingController(
        context,
        initialPosition: FloatingPosition.bottomLeft,
    );
    
    @override
    void dispose() {
        super.dispose();
        _controller.dispose();
    }
    
    @override
    Widget build(BuildContext context) {
        return FloatingView(
            controller: _controller,
            childBuilder: () => Scaffold(
                body: ItemBuilder(list: dummyList, controller: _controller),
            ),
        );
    }
    

    Note: FloatingView will disappear when changing routes. To display it across routes, wrap your desired route screen with the FloatingView and use the same controller. The controller can be passed down in the widget tree or stored in state management solutions such as BLoC, Provider, etc. The FloatingView will be passed down across the screen using the Hero widget, which is currently the only option available.

    Navigator.push(
        context,
        MaterialPageRoute(
            builder: (context) => FloatingView(
                controller: _controller,
                childBuilder: () => NavigationTestScreen(),
            ),
        ),
    );
    
  2. Initialize the FloatingView:

    Initialize the controller and store the widget you want to display, such as a video, screen, or text. Here is an example of using FloatingView with a Video Player or a simple screen:

    void onTap(dynamic data) {
        switch (data) {
            case Video _:
                VideoPlayerController? videoController;
                videoController = VideoPlayerController.asset(data.url)
                    ..initialize().then((_) {
                        videoController?.play();
                    });
    
                widget.controller.initialize(
                    maxChild: MaximizedVideo(
                        videoController: videoController,
                        floatingController: widget.controller,
                        video: data,
                    ),
                    minChild: MinimizedVideo(
                        videoController: videoController,
                        floatingController: widget.controller,
                        video: data,
                    ),
                    onDispose: () {
                        videoController?.dispose();
                    },
                );
                break;
    
            case News _:
                widget.controller.initialize(
                    maxChild: MaximizedNewsScreen(
                        news: data,
                        controller: widget.controller,
                    ),
                    minChild: MinimizedNewsScreen(
                        news: data,
                        controller: widget.controller,
                    ),
                    onDispose: () {},
                );
                break;
    
            default:
                break;
        }
    }
    

    Note: controller.initialize() will run the previous onDispose() method to clear the previous controller data if you initialize another FloatingView while having an active one.

  3. Using the APIs:

    You can use the passed-down controller to control the FloatingView state like this:

    Padding(
        padding: const EdgeInsets.fromLTRB(15, 15, 15, 0),
        child: Row(
            children: [
                GestureDetector(
                    onTap: () {
                        widget.controller.close();
                    },
                    child: Icon(Icons.close, size: 24),
                ),
                const SizedBox(width: 20),
                GestureDetector(
                    onTap: () {
                        widget.controller.toggleSize();
                    },
                    child: Icon(Icons.aspect_ratio, size: 24),
                ),
            ],
        ),
    );
    
Available API Methods in FloatingController
  1. Initialize the Floating View:

    controller.initialize({
        required Widget maxChild,
        required Widget minChild,
        required VoidCallback onDispose,
    })
    
  2. Close an Active Floating View:

    controller.close()
    
  3. Toggle the Floating View Size:

    controller.toggleSize()
    
  4. #Dispose the controller:

    controller.dispose()
    

Contributing

Contributions are welcome! Please open an issue or submit a pull request if you have any improvements or bug fixes.

License

This project is licensed under the MIT License. See the LICENSE file for details.

Support Me

If you find this package helpful and want to support its development, consider making a donation. Thank you for your support!

Support via PayPal

所属分类

源码仓库

使用此插件的项目

暂无相关数据。