搜索插件、代码仓与 APP 分类

flutter_mapbox_navigation 封面
插件详情v0.2.2

flutter_mapbox_navigation

使用 MapBox 向您的 Flutter 应用添加逐向导航。当您需要将用户引导至某个位置时,无需离开应用。

AndroidiOS
近 30 天下载
622
喜欢数
305
Pub 分数
120

安装插件

flutter pub add flutter_mapbox_navigation

插件介绍

基于插件公开信息、社区数据与项目使用情况整理的选型参考。

flutter_mapbox_navigation 包通过使用 Mapbox 的路线规划和地图服务,使 Flutter 应用具备逐向导航功能。它允许开发者在应用内无缝集成实时导航,无需切换到外部地图应用。支持 Android 和 iOS,提供类似原生的导航体验,包括路线可视化、语音提示和实时跟踪。该包设计用于轻松集成和自定义,非常适合需要基于位置导航功能的应用。

适合场景

  • 应用内导航
  • 网约车应用
  • 配送跟踪
  • 旅游指南应用程序
  • 现场服务管理

主要特点

  • 逐个步骤的导航指引
  • 实时位置追踪
  • 语音引导
  • Mapbox 集成
  • 可自定义的用户界面

适合对象

  • 导航密集型应用
  • 基于位置的服务
  • 移动车队管理
  • 旅行与物流应用

使用建议

  • 需要 Mapbox API 密钥
  • 有限离线支持
  • 依赖 Mapbox SDK
  • 导航期间电池消耗更高
  • 需要位置访问权限

原始 README

以下为关联源码仓库的 README 原文快照,最新内容请访问源码仓库。

Pub BuyMeACoffee

flutter_mapbox_navigation

Add Turn By Turn Navigation to Your Flutter Application Using MapBox. Never leave your app when you need to navigate your users to a location.

Features

IOS Configuration

  1. Go to your Mapbox account dashboard and create an access token that has the DOWNLOADS:READ scope. PLEASE NOTE: This is not the same as your production Mapbox API token. Make sure to keep it private and do not insert it into any Info.plist file. Create a file named .netrc in your home directory if it doesn’t already exist, then add the following lines to the end of the file:

    machine api.mapbox.com
      login mapbox
      password PRIVATE_MAPBOX_API_TOKEN
    

    where PRIVATE_MAPBOX_API_TOKEN is your Mapbox API token with the DOWNLOADS:READ scope.

  2. Mapbox APIs and vector tiles require a Mapbox account and API access token. In the project editor, select the application target, then go to the Info tab. Under the “Custom iOS Target Properties” section, set MBXAccessToken to your access token. You can obtain an access token from the Mapbox account page.

  3. In order for the SDK to track the user’s location as they move along the route, set NSLocationWhenInUseUsageDescription to:

    Shows your location on the map and helps improve OpenStreetMap.

  4. Users expect the SDK to continue to track the user’s location and deliver audible instructions even while a different application is visible or the device is locked. Go to the Capabilities tab. Under the Background Modes section, enable “Audio, AirPlay, and Picture in Picture” and “Location updates”. (Alternatively, add the audio and location values to the UIBackgroundModes array in the Info tab.)

Android Configuration

  1. Mapbox APIs and vector tiles require a Mapbox account and API access token. Add a new resource file called mapbox_access_token.xml with it's full path being <YOUR_FLUTTER_APP_ROOT>/android/app/src/main/res/values/mapbox_access_token.xml. Then add a string resource with name "mapbox_access_token" and your token as it's value as shown below. You can obtain an access token from the Mapbox account page.
<?xml version="1.0" encoding="utf-8"?>
<resources xmlns:tools="http://schemas.android.com/tools">
    <string name="mapbox_access_token" translatable="false" tools:ignore="UnusedResources">ADD_MAPBOX_ACCESS_TOKEN_HERE</string>
</resources>
  1. Add the following permissions to the app level Android Manifest
<manifest>
    ...
    <uses-permission android:name="android.permission.ACCESS_COARSE_LOCATION" />
    <uses-permission android:name="android.permission.ACCESS_FINE_LOCATION" />
    <uses-permission android:name="android.permission.ACCESS_NETWORK_STATE" />
    ...
</manifest>
  1. Add the MapBox Downloads token with the downloads:read scope to your gradle.properties file in Android folder to enable downloading the MapBox binaries from the repository. To secure this token from getting checked into source control, you can add it to the gradle.properties of your GRADLE_HOME which is usually at $USER_HOME/.gradle for Mac. This token can be retrieved from your MapBox Dashboard. You can review the Token Guide to learn more about download tokens
MAPBOX_DOWNLOADS_TOKEN=sk.XXXXXXXXXXXXXXX

After adding the above, your gradle.properties file may look something like this:

org.gradle.jvmargs=-Xmx1536M
android.useAndroidX=true
android.enableJetifier=true
MAPBOX_DOWNLOADS_TOKEN=sk.epe9nE9peAcmwNzKVNqSbFfp2794YtnNepe9nE9peAcmwNzKVNqSbFfp2794YtnN.-HrbMMQmLdHwYb8r
  1. Update MainActivity.kt to extends FlutterFragmentActivity vs FlutterActivity. Otherwise you'll get Caused by: java.lang.IllegalStateException: Please ensure that the hosting Context is a valid ViewModelStoreOwner.
//import io.flutter.embedding.android.FlutterActivity
import io.flutter.embedding.android.FlutterFragmentActivity

class MainActivity: FlutterFragmentActivity() {
}
  1. Add implementation platform("org.jetbrains.kotlin:kotlin-bom:1.8.0") to android/app/build.gradle

Usage

Set Default Route Options (Optional)
    MapBoxNavigation.instance.setDefaultOptions(MapBoxOptions(
                     initialLatitude: 36.1175275,
                     initialLongitude: -115.1839524,
                     zoom: 13.0,
                     tilt: 0.0,
                     bearing: 0.0,
                     enableRefresh: false,
                     alternatives: true,
                     voiceInstructionsEnabled: true,
                     bannerInstructionsEnabled: true,
                     allowsUTurnAtWayPoints: true,
                     mode: MapBoxNavigationMode.drivingWithTraffic,
                     mapStyleUrlDay: "https://url_to_day_style",
                     mapStyleUrlNight: "https://url_to_night_style",
                     units: VoiceUnits.imperial,
                     simulateRoute: true,
                     language: "en"))
Listen for Events
  MapBoxNavigation.instance.registerRouteEventListener(_onRouteEvent);
  Future<void> _onRouteEvent(e) async {

        _distanceRemaining = await _directions.distanceRemaining;
        _durationRemaining = await _directions.durationRemaining;
    
        switch (e.eventType) {
          case MapBoxEvent.progress_change:
            var progressEvent = e.data as RouteProgressEvent;
            _arrived = progressEvent.arrived;
            if (progressEvent.currentStepInstruction != null)
              _instruction = progressEvent.currentStepInstruction;
            break;
          case MapBoxEvent.route_building:
          case MapBoxEvent.route_built:
            _routeBuilt = true;
            break;
          case MapBoxEvent.route_build_failed:
            _routeBuilt = false;
            break;
          case MapBoxEvent.navigation_running:
            _isNavigating = true;
            break;
          case MapBoxEvent.on_arrival:
            _arrived = true;
            if (!_isMultipleStop) {
              await Future.delayed(Duration(seconds: 3));
              await _controller.finishNavigation();
            } else {}
            break;
          case MapBoxEvent.navigation_finished:
          case MapBoxEvent.navigation_cancelled:
            _routeBuilt = false;
            _isNavigating = false;
            break;
          default:
            break;
        }
        //refresh UI
        setState(() {});
      }
Begin Navigating

    final cityhall = WayPoint(name: "City Hall", latitude: 42.886448, longitude: -78.878372);
    final downtown = WayPoint(name: "Downtown Buffalo", latitude: 42.8866177, longitude: -78.8814924);

    var wayPoints = List<WayPoint>();
    wayPoints.add(cityHall);
    wayPoints.add(downtown);
    
    await MapBoxNavigation.instance.startNavigation(wayPoints: wayPoints);
Screenshots
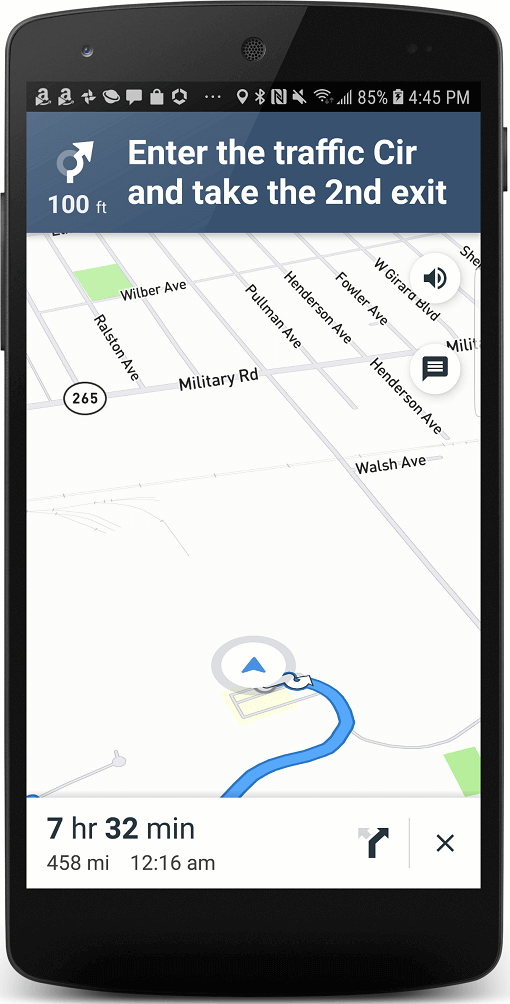
Navigation View Android View
iOS View Android View

Embedding Navigation View

Declare Controller
      MapBoxNavigationViewController _controller;
Add Navigation View to Widget Tree
            Container(
                color: Colors.grey,
                child: MapBoxNavigationView(
                    options: _options,
                    onRouteEvent: _onRouteEvent,
                    onCreated:
                        (MapBoxNavigationViewController controller) async {
                      _controller = controller;
                    }),
              ),
Build Route
        var wayPoints = List<WayPoint>();
                            wayPoints.add(_origin);
                            wayPoints.add(_stop1);
                            wayPoints.add(_stop2);
                            wayPoints.add(_stop3);
                            wayPoints.add(_stop4);
                            wayPoints.add(_origin);
                            _controller.buildRoute(wayPoints: wayPoints);
Start Navigation
    _controller.startNavigation();
Additional IOS Configuration

Add the following to your info.plist file

    <dict>
        ...
        <key>io.flutter.embedded_views_preview</key>
        <true/>
        ...
    </dict>
Embedding Navigation Screenshots
Navigation View Navigation View
Embedded iOS View Embedded Android View

To Do

  • [DONE] Android Implementation
  • [DONE] Add more settings like Navigation Mode (driving, walking, etc)
  • [DONE] Stream Events like relevant navigation notifications, metrics, current location, etc.
  • [DONE] Embeddable Navigation View
  • Offline Routing

所属分类

依赖

依赖清单 2 项

源码仓库

使用此插件的项目

暂无相关数据。