搜索插件、代码仓与 APP 分类

simple_3d_renderer 封面
插件详情v24.0.0

simple_3d_renderer

Sp3dObj 渲染器。包含简单的相机、灯光、世界等。还支持用户点击。

AndroidiOSWebmacOSWindowsLinux
近 30 天下载
271
喜欢数
62
Pub 分数
160

安装插件

flutter pub add simple_3d_renderer

插件介绍

基于插件公开信息、社区数据与项目使用情况整理的选型参考。

一个轻量级的Flutter 3D渲染包,支持相机、照明和世界环境,可实现基本的3D场景创建。它通过点击实现用户交互,专为跨多平台的简单3D可视化设计。非常适合需要最少设置和直接3D渲染功能的原型或教育类应用。

适合场景

  • 交互式3D原型
  • 教育类3D可视化
  • 简单的游戏环境
  • 基本3D模型查看器
  • 跨平台 3D 演示

主要特点

  • 内置摄像头和照明
  • 基于点击的用户交互
  • 多平台支持
  • 简单的场景管理
  • 轻量级3D渲染引擎

适合对象

  • 3D图形初学者
  • 寻求快速3D集成的Flutter开发者
  • 教育项目
  • 原型,3D复杂度最低

使用建议

  • 有限的高级3D功能
  • 不适合复杂的动画或高性能游戏
  • 依赖外部源代码进行更新
  • 无内置模型加载支持

原始 README

以下为关联源码仓库的 README 原文快照,最新内容请访问源码仓库。

simple_3d_renderer

(en)Japanese ver is here.
(ja)この解説の日本語版はここにあります。

Overview

This package is for rendering Sp3dObj.
Sp3dObj is an implementation of the Simple 3D Format created for science. It is created mainly for use by scientists.
Please refer to the following for the packages to be used together.

simple_3d
util_simple_3d

If you want to implement Undo/Redo functionality in an app that directly edits Sp3dObj,
you can use the following package.
file_state_manager

For examples of using this package, see the following package:
sakura_blizzard

Although this is a very experimental project, there are also packages for converting from other 3D formats.
However, Sp3dObj is intended for scientific use and has significant differences in functionality, so only minimal compatibility is supported.
convert_simple_3d

Usage

import 'package:flutter/material.dart';
import 'package:simple_3d/simple_3d.dart';
import 'package:util_simple_3d/util_simple_3d.dart';
import 'package:simple_3d_renderer/simple_3d_renderer.dart';

void main() async {
  runApp(const MyApp());
}

class MyApp extends StatefulWidget {
  const MyApp({Key? key}) : super(key: key);

  @override
  State<StatefulWidget> createState() => _MyAppState();
}

class _MyAppState extends State<MyApp> {
  late List<Sp3dObj> objs = [];
  late Sp3dWorld world;
  bool isLoaded = false;

  @override
  void initState() {
    super.initState();
    // Create Sp3dObj.
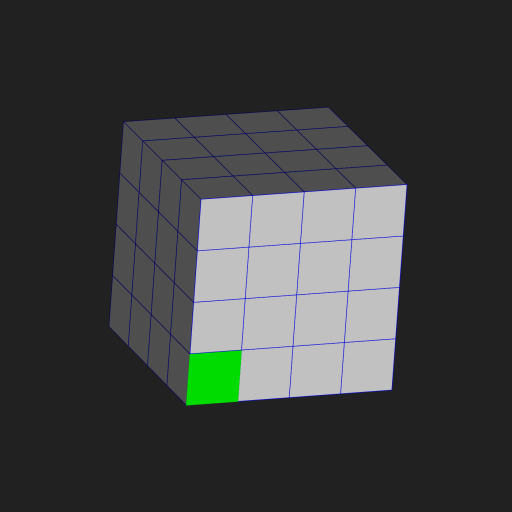
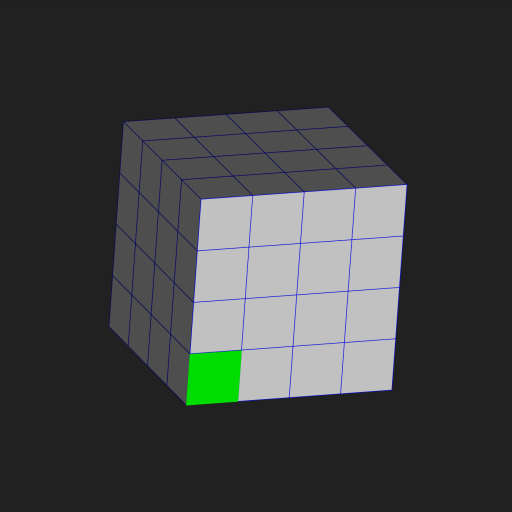
    Sp3dObj obj = UtilSp3dGeometry.cube(200, 200, 200, 4, 4, 4);
    obj.materials.add(FSp3dMaterial.green.deepCopy());
    obj.fragments[0].faces[0].materialIndex = 1;
    obj.materials[0] = FSp3dMaterial.grey.deepCopy()
      ..strokeColor = const Color.fromARGB(255, 0, 0, 255);
    obj.rotate(Sp3dV3D(1, 1, 0).nor(), 30 * 3.14 / 180);
    objs.add(obj);
    loadImage();
  }

  void loadImage() async {
    world = Sp3dWorld(objs);
    world.initImages().then((List<Sp3dObj> errorObjs) {
      setState(() {
        isLoaded = true;
      });
    });
  }

  @override
  Widget build(BuildContext context) {
    if (!isLoaded) {
      return MaterialApp(
              title: 'Sp3dRenderer',
              home: Scaffold(
                      appBar: AppBar(
                        backgroundColor: const Color.fromARGB(255, 0, 255, 0),
                      ),
                      backgroundColor: const Color.fromARGB(255, 33, 33, 33),
                      body: Container()));
    } else {
      return MaterialApp(
        title: 'Sp3dRenderer',
        home: Scaffold(
          appBar: AppBar(
            backgroundColor: const Color.fromARGB(255, 0, 255, 0),
          ),
          backgroundColor: const Color.fromARGB(255, 33, 33, 33),
          body: Column(
            children: [
              Sp3dRenderer(
                const Size(800, 800),
                const Sp3dV2D(400, 400),
                world,
                // If you want to reduce distortion, shoot from a distance at high magnification.
                Sp3dCamera(Sp3dV3D(0, 0, 3000), 6000),
                Sp3dLight(Sp3dV3D(0, 0, -1), syncCam: true),
              ),
            ],
          ),
        ),
      );
    }
  }
}

Cube Sample

Use Image File

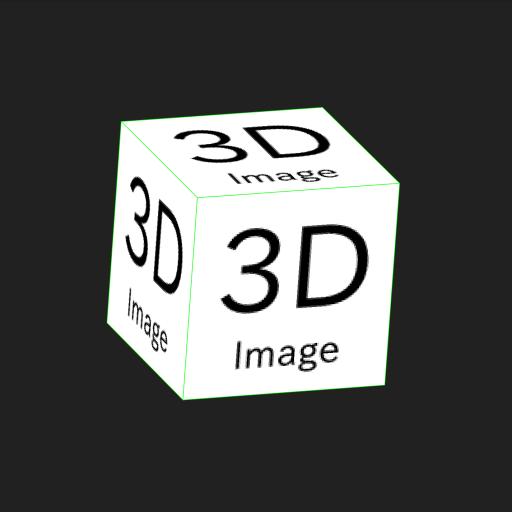
For example, rewrite sample code as follows.(*Note that some unnecessary parameters remain for simplicity)

sample_image.png

sample_image.png

  // Change Cube of initState().
  Sp3dObj obj = UtilSp3dGeometry.cube(200,200,200,1,1,1);
  --------------------------------------------------------------------
  // Change function
  void loadImage() async {
    this.objs[0].fragments[0].faces[0].materialIndex=1;
    this.objs[0].fragments[0].faces[1].materialIndex=1;
    this.objs[0].fragments[0].faces[2].materialIndex=1;
    this.objs[0].fragments[0].faces[3].materialIndex=1;
    this.objs[0].materials[1].imageIndex = 0;
    // You can use images by creating an assets/images folder under your project, adding images, and adding the asset path to pubspec.yaml.
    // For Flutter Web, you also need to copy it to your web folder.
    this.objs[0].images.add(await _readFileBytes("./assets/images/sample_image.png"));
    this.world = Sp3dWorld(objs);
    this.world.initImages().then(
            (List<Sp3dObj> errorObjs){
          setState(() {
            this.isLoaded = true;
          });
        }
    );
  }

  // Add function
  Future<Uint8List> _readFileBytes(String filePath) async {
    ByteData bd = await rootBundle.load(filePath);
    return bd.buffer.asUint8List(bd.offsetInBytes,bd.lengthInBytes);
  }

Texture Sample

Triangle mesh

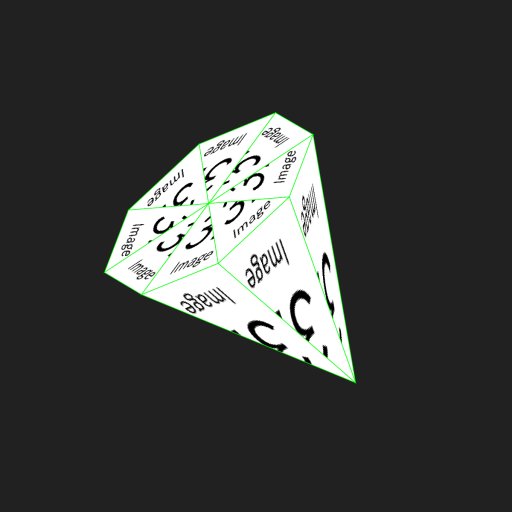
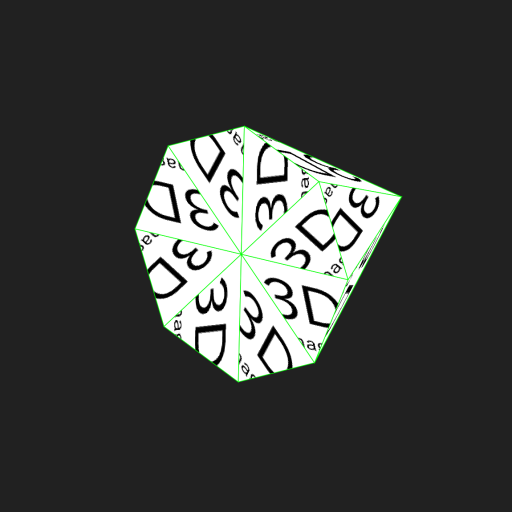
If the drawing destination of the image is a triangular mesh, the image is automatically divided into triangles with the vertices at the upper left, lower left, and lower right, and displayed.
Texture Sample

You can also use the Sp3dMaterial parameters to control the cutout position with respect to the triangular mesh.
*Note that the size of the image of paste to cone is (width, height) = (128, 128). Since textureCoordinates specifies the position where you want to cut out the image, it indicate the points on the image. And this image is (0,0) in the upper left and (128,128) in the lower right. For example, the following sample is cut out at the upper left, the middle of the lower side, and the upper right.
In the case of a square mesh, it is necessary to specify two triangles, so six vertices are required.

Sp3dObj obj = UtilSp3dGeometry.cone(100,200);
obj.materials[0].strokeColor = Color.fromARGB(255, 0, 255, 0);
obj.materials[0].textureCoordinates = [Offset(0,0),Offset(64,128),Offset(128,0)];

Texture Sample

How to follow a user's touch event

For example, rewrite sample code as follows.
The return value Sp3dFaceObj in onPanDown is a class that contains information about the touched surface.
The sample uses this information to move the object touched by the user.

  // Add variable to _MyAppState.
  ValueNotifier<int> vn = ValueNotifier<int>(0);
  --------------------------------------------------------------------
  // Rewrite Sp3dRenderer.
  Sp3dRenderer(
    const Size(800, 800),
    const Sp3dV2D(400, 400),
    world,
    // If you want to reduce distortion, shoot from a distance at high magnification.
    Sp3dCamera(Sp3dV3D(0, 0, 30000), 60000),
    Sp3dLight(Sp3dV3D(0, 0, -1), syncCam: true),
    allowUserWorldRotation: true,
    checkTouchObj: true,
    vn: vn,
    onPanDown: (Sp3dGestureDetails d, Sp3dFaceObj? info){
      print("onPanDown");
      if(info!=null) {
        info.obj.move(Sp3dV3D(50, 0, 0));
        vn.value++;
      }
    },
    onPanCancel: (){
      print("onPanCancel");
    },
    onPanStart: (Sp3dGestureDetails d){
      print("onPanStart");
      print(d.toOffset());
    },
    onPanUpdate: (Sp3dGestureDetails d){
      print("onPanUpdate");
      print(d.toOffset());
    },
    onPanEnd: (Sp3dGestureDetails d){
      print("onPanEnd");
    },
    onPinchStart: (Sp3dGestureDetails d){
      print("onPinchStart");
      print(d.diffV);
    },
    onPinchUpdate: (Sp3dGestureDetails d){
      print("onPinchUpdate");
      print(d.diffV);
    },
    onPinchEnd: (Sp3dGestureDetails d){
      print("onPinchEnd");
      print(d.diffV);
    },
    onMouseScroll: (Sp3dGestureDetails d){
      print("onMouseScroll");
      print(d.diffV);
    },
  )

Save or Restore the Sp3dWorld

If you want to save / restore multiple Sp3dObj along with their location, Sp3dWorld also has toDict and fromDict methods.
The extension when saving is recommended to be .s3dw to avoid confusion.

Support

If you need paid support for any reason, please contact my company.
This package is developed by me personally, but may be supported via the company.
SimpleAppli Inc.

Rendering Speed (300 paint average)

When using CPU Ryzen5 5600, it is a consideration of the time it takes to draw in debug mode and on a web browser. There are some speed issues, such as running on a CPU and being single-threaded. In the case of real-time rendering, the limit is about 1000 cubes (8000 vertices), and anything higher than that is heavy.
Note: Not all objects will perform equally well due to acceleration logic. For models such as spheres with many vertices, the amount you can comfortably manipulate is much smaller.

/// use cube obj(8 vertices / 1 obj)
Sp3dObj obj = UtilSp3dGeometry.cube(2, 2, 2, 1, 1, 1);
  • 100 cube : 338.6 fps (800 vertices)
  • 1000 cube : 34.1 fps
  • 2500 cube : 13.6 fps

About version control

The C part will be changed at the time of version upgrade.

  • Changes such as adding variables, structure change that cause problems when reading previous files.
    • C.X.X
  • Adding methods, etc.
    • X.C.X
  • Minor changes and bug fixes.
    • X.X.C

License

This software is released under the MIT License, see LICENSE file.

Copyright notice

The “Dart” name and “Flutter” name are trademarks of Google LLC.
*The developer of this package is not Google LLC.

所属分类

依赖

依赖清单 2 项

源码仓库

使用此插件的项目

暂无相关数据。