Search packages, repositories and app categories

upi_india cover
Package detailsv3.0.1

upi_india

A flutter plugin to do UPI transaction through different apps in Android.

Android
30-day downloads
248
Likes
141
Pub points
150

Install package

flutter pub add upi_india

Package Overview

Package selection guidance compiled from public package information, community data, and project usage.

The upi_india package is a Flutter plugin designed for Android that enables seamless UPI (Unified Payments Interface) transactions by integrating with various UPI-enabled apps installed on the device. It allows users to initiate payments directly through popular UPI apps like Google Pay, PhonePe, or Paytm without requiring manual entry of bank details. The plugin simplifies payment processing in Indian e-commerce and service apps by leveraging native UPI functionality. It supports dynamic transaction parameters such as amount, recipient, and transaction reference, ensuring secure and efficient payments. This package is ideal for developers building financial or retail applications targeting the Indian market.

Use cases

  • Mobile e-commerce checkout
  • Digital wallet integration
  • Service payment collection
  • Bill splitting apps
  • Donation platforms

Key features

  • Supports multiple UPI apps
  • Secure transaction initiation
  • Dynamic payment parameters
  • Simple API for Android
  • Built-in error handling

Suitable for

  • Indian-focused mobile apps
  • Payment gateways
  • Retail and service platforms
  • Flutter developers on Android
  • Apps needing UPI payments

Considerations

  • Android-only support
  • Requires UPI app installation
  • Limited to Indian banking system
  • No iOS compatibility
  • Depends on user's UPI app availability

Original README

Original README snapshot from the linked source repository. Visit the repository for the latest content.

This repository is now Archived.

UPI India (for Android only)

This plugin is used to integrate UPI Options in your Android app. You can use this plugin to initiate transaction to any UPI ID or to any Account number.
Check the Supported apps here.

For a complete example of how to use this plugin, look at the Example tab or in the Github repository.

IMPORTANT!

Some apps like Google Pay, PhonePe, Paytm are currently unable to process the transaction and showing "Maximum limit exceeded" or "Risk threshold exceeded" errors. Reason for this is not clear yet.

Help required

If you can help to extend this for iOS, feel free to check this issue.
If you can help to verify the compatibility of different UPI apps, feel free to check this issue.

Thanks in advance :)


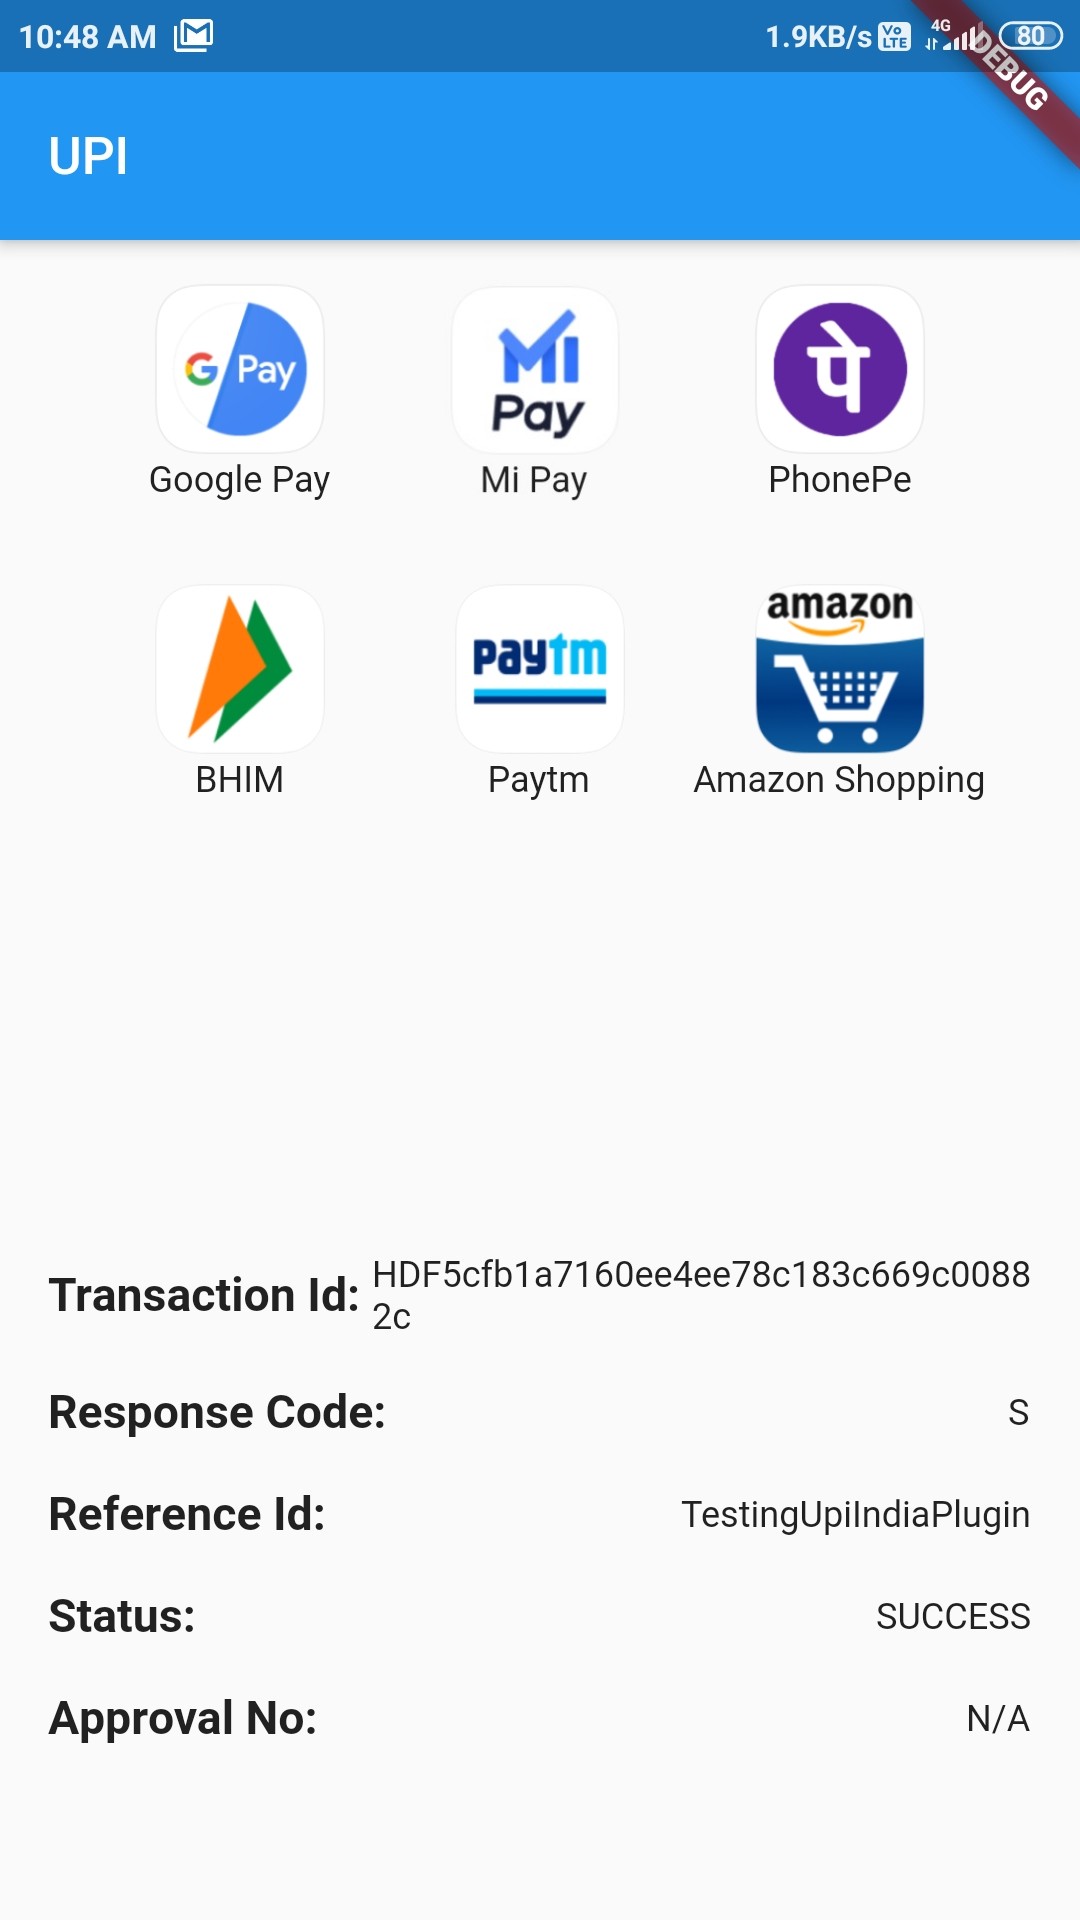
How example looks Success Status

Classes to know

  1. UpiIndia - It is the main class containing two methods:
  • getAllUpiApps() - It takes:

    • bool allowNonVerifiedApps: Should include apps whose working has not been verified yet or not
    • List[UpiApp] includeOnly: List of UpiApps which should be shown and hide the others.
    • bool mandatoryTransactionId: Should include those apps which doesn't return Transaction ID or not
  • startTransaction() - It takes:

    • double amount: Amount to transfer (in ₹)
    • UpiApp app: Which app to use to do the transaction
    • String currency: Currently only supports INR
    • bool flexibleAmount: Set true to allow user to fill the amount
    • String merchantId: Merchant code if present
    • String receiverId: ID of the receiver
    • String receiverName: Name of receiver
    • String transactionNote: A note about the transaction
    • String transactionRefId: Reference Id of transaction
    • String url: For some extra information
  1. UpiApp - It contains supported apps. It is also the model class for the apps returned by getAllUpiApps().

  2. UpiResponse - You will use this to get response from the requested app.

  3. UpiPaymentStatus - Use this to see if transaction was a success or not.


Custom Exception thrown by this Plugin (with self explanatory names)

  1. UpiIndiaAppNotInstalledException

  2. UpiIndiaUserCancelledException

  3. UpiIndiaNullResponseException

  4. UpiIndiaInvalidParametersException

  5. UpiIndiaActivityMissingException

  6. UpiIndiaAppsGetException

How to start transaction?

Step 1:

Import the Package:

import 'package:upi_india/upi_india.dart';
Step 2:

Create UpiIndia object.

UpiIndia _upiIndia = UpiIndia();
Step 3:

Get list of all apps in the device which can handle UPI Intent, as shown.

  List<UpiApp>? apps;

  @override
  void initState() {
    _upiIndia.getAllUpiApps(mandatoryTransactionId: false).then((value) {
      setState(() {
        apps = value;
      });
    }).catchError((e) {
      apps = [];
    });
    super.initState();
  }

OR

You can directly use the predefined apps, like:

UpiApp app = UpiApp.googlePay;

and assign it to the app parameter in Step 4

Step 4:

Create a method which will start the transaction on being called, as shown.
To initiate transaction to any UPI ID, directly pass the ID to receiverId

  Future<UpiResponse> initiateTransaction(UpiApp app) async {
    return _upiIndia.startTransaction(
      app: app,
      receiverUpiId: "9078600498@ybl",
      receiverName: 'Md Azharuddin',
      transactionRefId: 'TestingUpiIndiaPlugin',
      transactionNote: 'Not actual. Just an example.',
      amount: 1.00,
    );
  }
Step 5:

Call this method on any button click or through FutureBuilder and then you will get the Response!


How to handle Response?

Step 1:

After getting the snapshot from the Future, check if there is any error or not:

if (snapshot.hasError) {
  switch (snapshot.error.runtimeType) {
    case UpiIndiaAppNotInstalledException:
      print("Requested app not installed on device");
      break;
    case UpiIndiaUserCancelledException:
      print("You cancelled the transaction");
      break;
    case UpiIndiaNullResponseException:
      print("Requested app didn't return any response");
      break;
    case UpiIndiaInvalidParametersException:
      print("Requested app cannot handle the transaction");
      break;
    default:
      print("An Unknown error has occurred");
      break;
  }
}
Step 2:

If snapshot.hasError is false, you can then get the response UpiResponse from snapshot.data and extract these parameters:

  • Transaction ID
  • Response Code
  • Approval Reference Number
  • Transaction Reference ID
  • Status
Step 3:

Check the Status property. It has following values:

  • UpiPaymentStatus.SUCCESS
  • UpiPaymentStatus.SUBMITTED
  • UpiPaymentStatus.FAILURE

If Status is SUCCESS, Congratulations! You have successfully used this plugin.


For a complete example of how to use this plugin, look at the Example tab or in the Github repository.

Supported Apps

Verified Apps - These Apps have been tested to work fine with this plugin (included by default):
  • All Bank
  • Amazon Pay
  • Axis Pay
  • Baroda Pay
  • BHIM
  • Cent UPI
  • Cointab
  • Corp UPI
  • DCB UPI
  • Fino BPay
  • Freecharge
  • Google Pay
  • iMobile ICICI
  • Indus Pay
  • Khaali Jeb
  • Maha UPI
  • Mobikwik
  • Oriental Pay
  • Paytm
  • Paywiz
  • PhonePe
  • PSB
  • SBI Pay
  • Yes Pay
Apps that don't return Transaction ID in response (pass mandatoryTransactionId: false to getAllUpiApps to use them):
  • MiPay (Both Play Store and GetApps version)
  • HSBC Simply Pay
Non-Verified Apps - These apps haven't been tested yet (pass allowNonVerifiedApps: true to getAllUpiApps to use them):
  • True Caller
  • BOI UPI
  • CSB UPI
  • CUB UPI
  • digibank
  • Equitas UPI
  • Kotak
  • PayZapp
  • PNB
  • RBL Pay
  • realme PaySa
  • United UPI Pay
  • Vijaya UPI

Unsupported Apps

(These apps are not working as expected currently)
  • Airtel Thanks
  • AUPay
  • Bandhan Bank UPI
  • CANDI
  • Indian Bank UPI
  • Jet Pay
  • KBL UPI
  • KVB UPI
  • LVB UPAAY
  • Synd UPI
  • UCO UPI
  • Ultra Cash

Special Thanks to:

Don't forget to give Like and Stars!

Categories

Source repository

Projects using this package