Package selection guidance compiled from public package information, community data, and project usage.
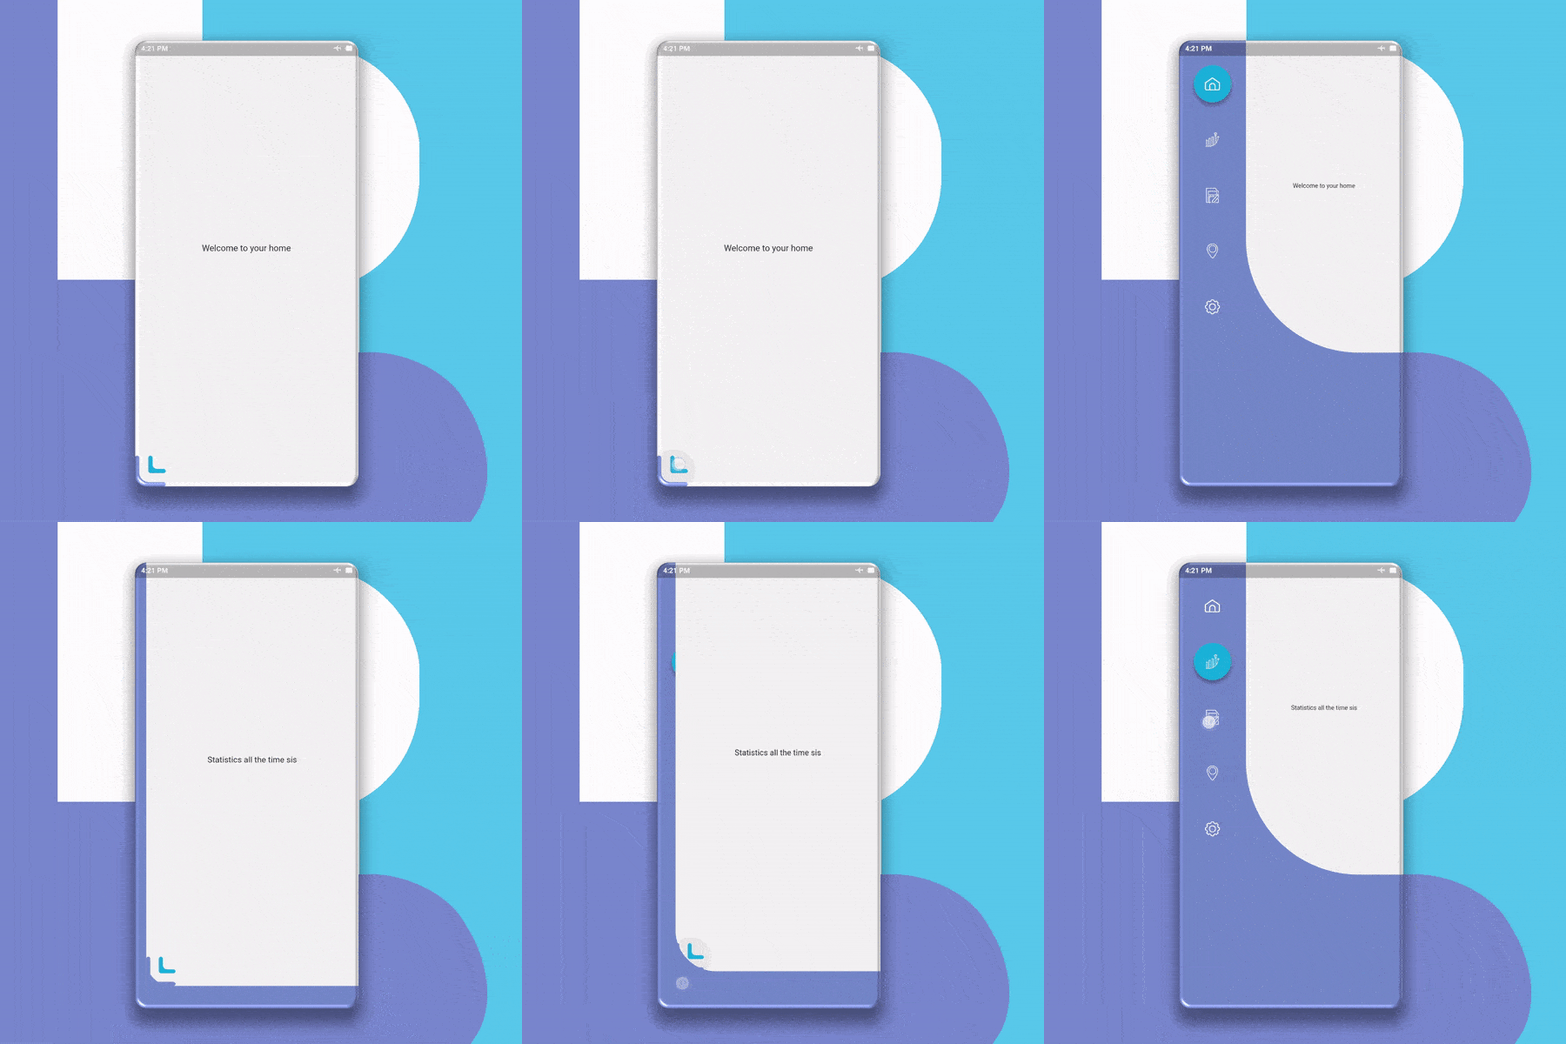
Flurry Navigation is a Flutter package that provides smooth, animated navigation with customizable colors, shapes, and navigation logic. Designed to enhance user experience without interfering with the main screen content, it offers a clean and modern approach to navigation. Ideal for apps requiring elegant transitions and flexible layout control, it integrates seamlessly into existing Flutter projects. The package supports customization while maintaining performance and visual appeal.
Use cases
Custom animated side menus
Smooth screen transitions
Branded navigation drawers
Interactive UI components
Mobile app navigation bars
Dynamic shape-based navigation
Key features
Animated navigation transitions
Adjustable colors and shapes
Non-intrusive screen integration
Customizable navigation logic
Lightweight and performant
Easy integration with Flutter
Suitable for
Developers seeking animated navigation
Design-focused Flutter apps
Apps with branded UI needs
Projects requiring smooth UX
Teams wanting reusable navigation components
Considerations
Limited platform-specific features
No built-in dark mode support
Requires manual configuration for complex flows
Best suited for simple to moderate navigation structures
Not optimized for large-scale navigation hierarchies
Original README
Original README snapshot from the linked source repository. Visit the repository for the latest content.
flurry_navigation
A Smooth and Animated navigation package for flutter that doesn’t interfere with the Screen with adjustable colors, shapes, and navigation logic.
Getting Started
First of all, Depend on the package.
dependencies:...flurry_navigation:^0.2.0#May not be the latest version
Changes to the Screens files
Add your code inside this variable below in every screen you want to navigate.
import'package:flurry_navigation/flurry_navigation.dart';
//The variable name must be uniquefinal firstscreen = newScreen(
);
Changes in the main file
First You should declare a variable called activeScreen.
var activeScreen;
Now add a Widget builder class that returns new FlurryNavigation.
Add values to these attributes to FlurryNavigation.
Widgetbuild(BuildContext context) {
newFlurryNavigation(
// The Icon data of the icon the BottomLeft
expandIcon: Image.asset("Put your path here"),
// The size of the icon on the BottomLeft
iconSize: 50.0,
// The content of the screen. leave it as it is
contentScreen: activeScreen,
)
}
Now add the menuScreen attribute FlurryNavigation and set it to the value below.
[If you want to use your own menu, contact me and I will provide you with the instructions].
Then add the "items" attribute to "Menu" and set it to the list of items you want in the menu "which usually matches the no. of screens", with "new MenuItem" like the example below.
Widgetbuild(BuildContext context) {
returnnewFlurryNavigation(
...
menuScreen: newMenuScreen(
menu: newMenu(
items: [
//You can add as many items as you want, it's scrollable!!newMenuItem(
id: 'hom',//Set this to whatever you want but do not duplicate it. !Required!
icon: 'assets/hom.png',//Set this to the path of the data for the icon of the button !Required!
isSelected: true ,//make sure the default item "isSelected" attribute is set to "true" !Required!
selectedBtnColor: Color.fromRGBO(38, 198, 218, 1//the color of the item if activated !Required!
btnShape: BoxShape.rectangle
//the shape of the item !Required!
#disabledBtnColor: Colors.transparent, //this have a default value of Colors.transparent
#selectedShadowColor: Colors.blueGrey, //this have a default value of Colors.blueGrey
#disabledShadowColor: Colors.transparent
), //this have a default value of Colors.transparent,newMenuItem(
id: 'sta',
icon: 'assets/sta.png',
isSelected: false,
selectedBtnColor: Color.fromRGBO(38, 198, 218, 1),
btnShape: BoxShape.rectangle
)
]
)
)
)
}
Now add the onMenuItemSelected attribute to "MenuScreen" to specify the logic for the navigation.
Widgetbuild(BuildContext context) {
newFlurryNavigation(
...
menuScreen: newMenuScreen(
...
//this is the logic behind the navigation. tailor the code below to fit your needs. If you want any help message me.
onMenuItemSelected: (String itemId) {
if (itemId == 'hom') {
setState(() => activeScreen = firstscreen);
} elseif (itemId == 'sta') {
setState(() => activeScreen = secondscreen);
}
},
),
);
}
Notice
This is my first markdown file so if you see any problems you're free to open an issue.
You can find a standalone full example in the example app or in the Github repo
Contributing
Pull requests are welcome. For major changes, please open an issue first to discuss what you would like to change.